Pomoc
LEGAL CONTROL app manual
- Introduction
- IMI Declarations
- UK Vehicle Checklist
- Legal DOC’s
- Truck Check
- Legal Pay (under construction)
- UK VISA
 Introduction
Welcome!
This manual is here to help you with easy instructions and useful tips for the Legal Control App. If you have any feature questions or cannot solve certain situations, please contact us.
 IMI Declarations
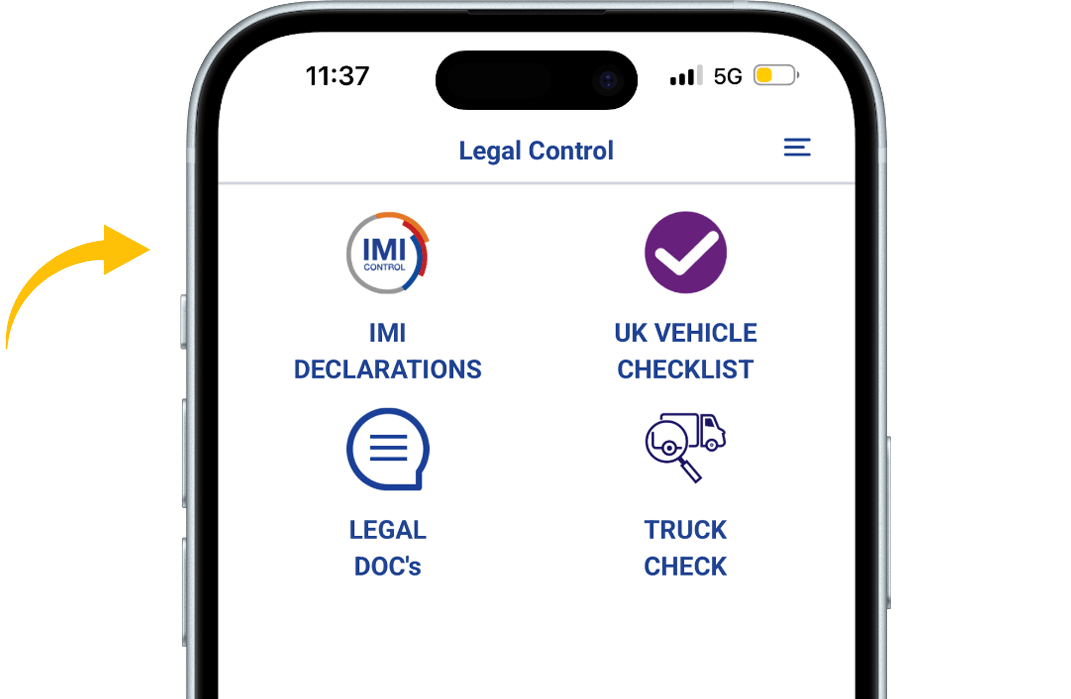
When in the app, press the IMI DECLARATIONS button.
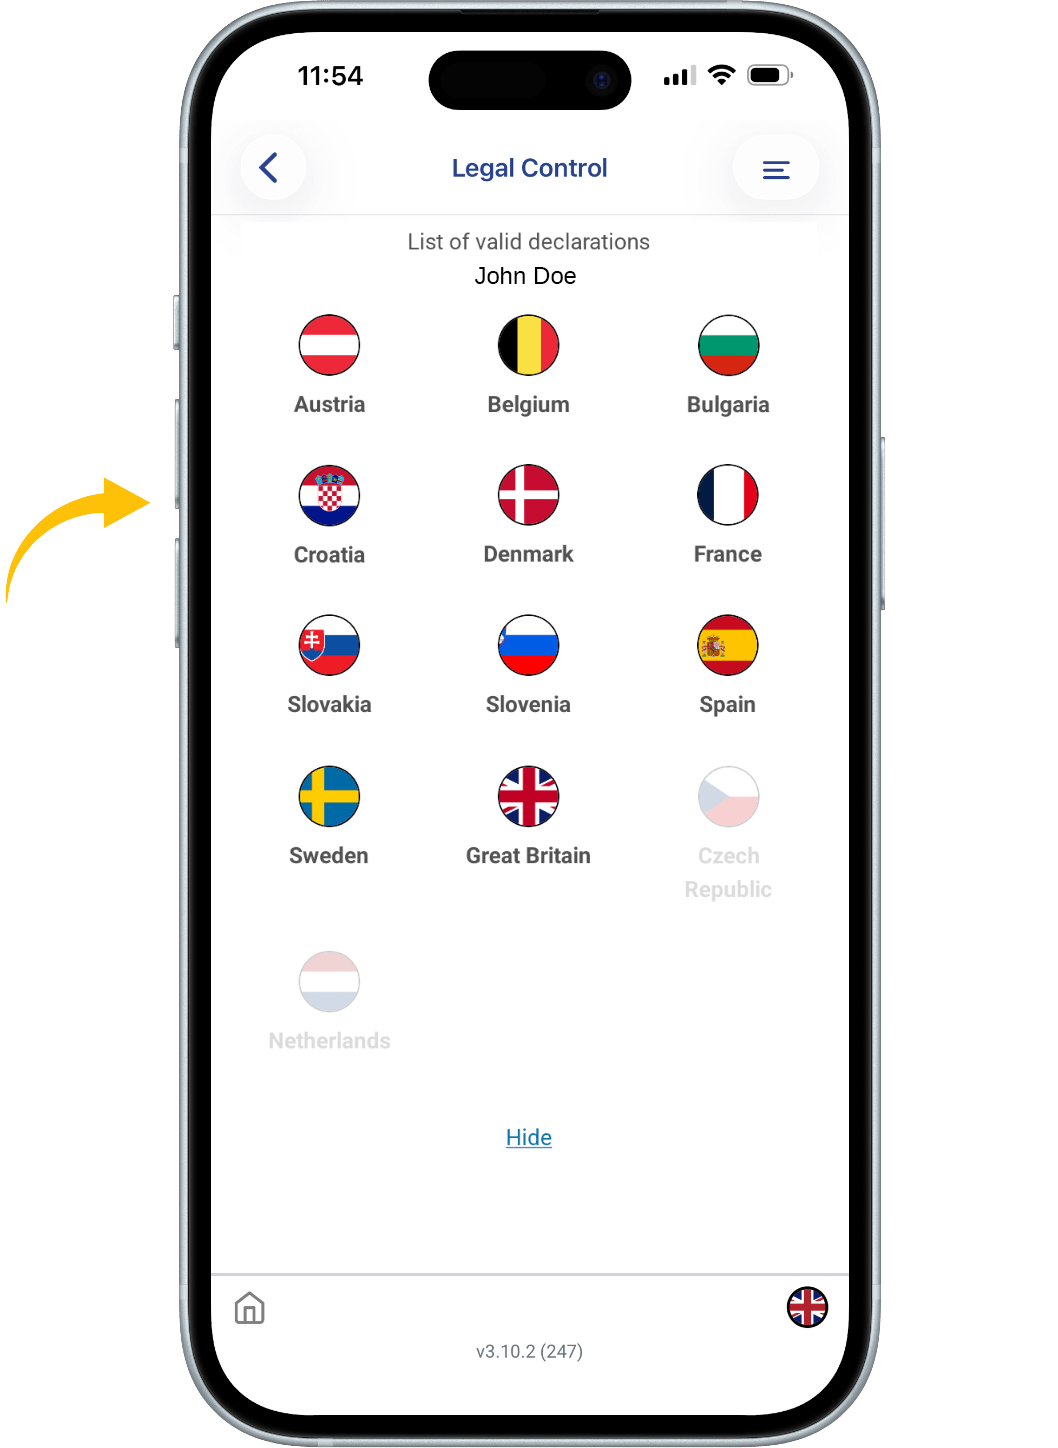
You see flags of several countries. The flags that are seen in color are the flags that represent the countries you have valid the IMI declarations for.
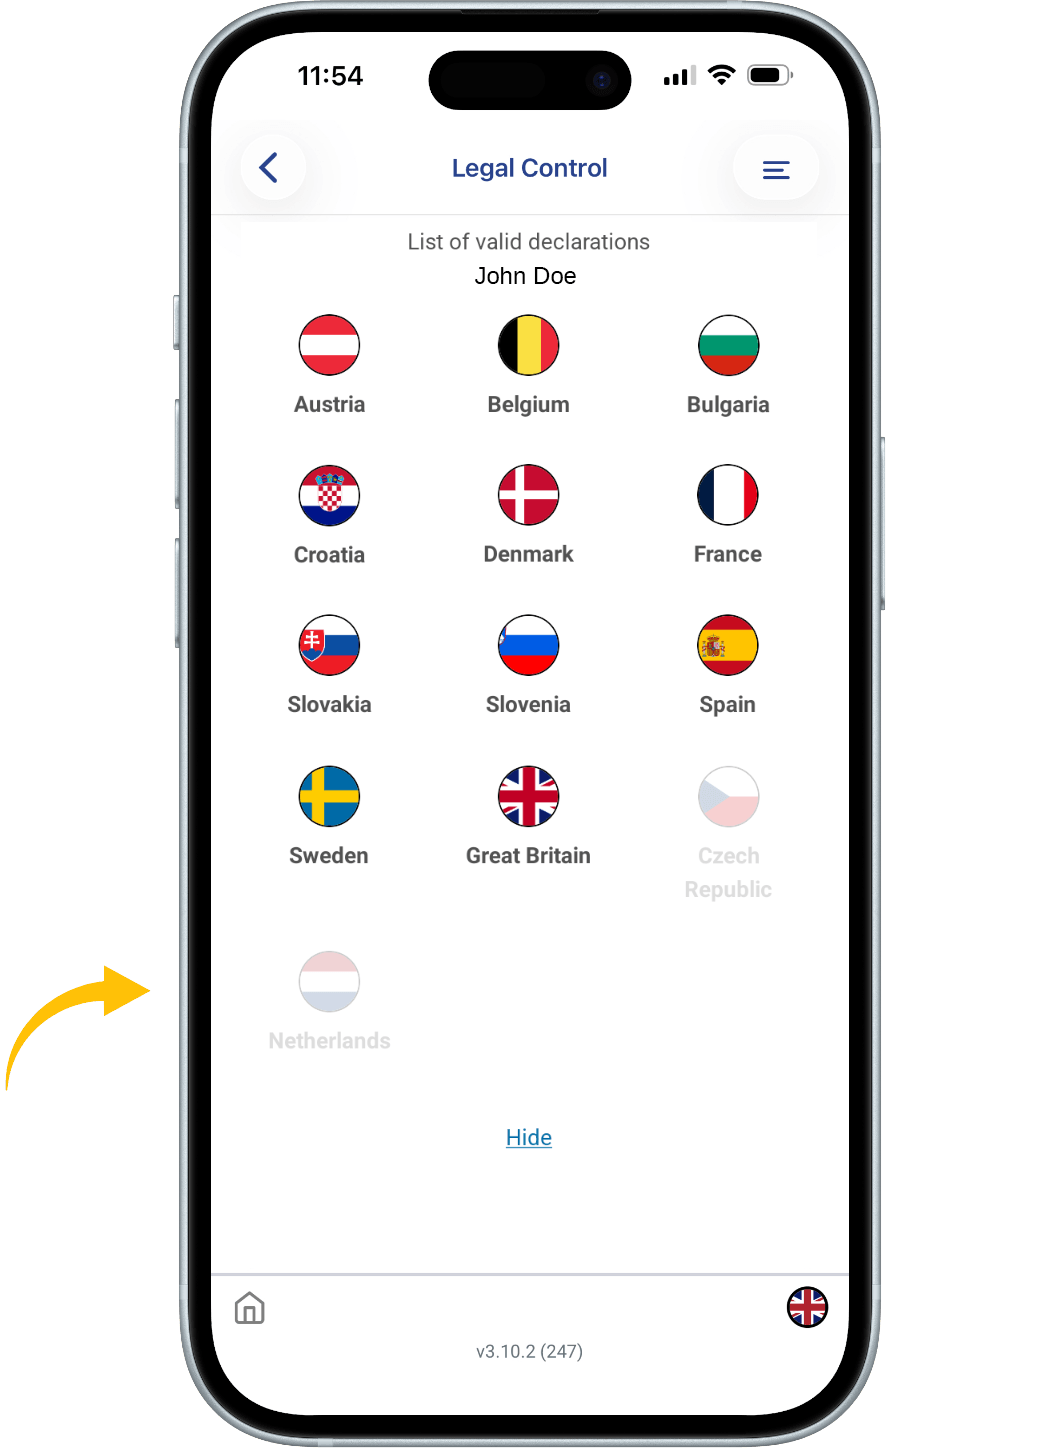
All flags that have a faded color, are not active.
When you click on a country, you will see a QR code first.
That is your IMI declaration for that specific country.

Below there are two blue buttons.
1. SEE FULL DECLARATION: This button shows all the details of your IMI declaration.
2. SEE ORIGINAL AS IN IMI: this button shows your IMI declaration as how it will be seen in the IMI portal.
All QR codes can be scanned by the authorities.
![]()
This document is the property of Transport in Nood.
All rights reserved.
 UK Vehicle Checklist
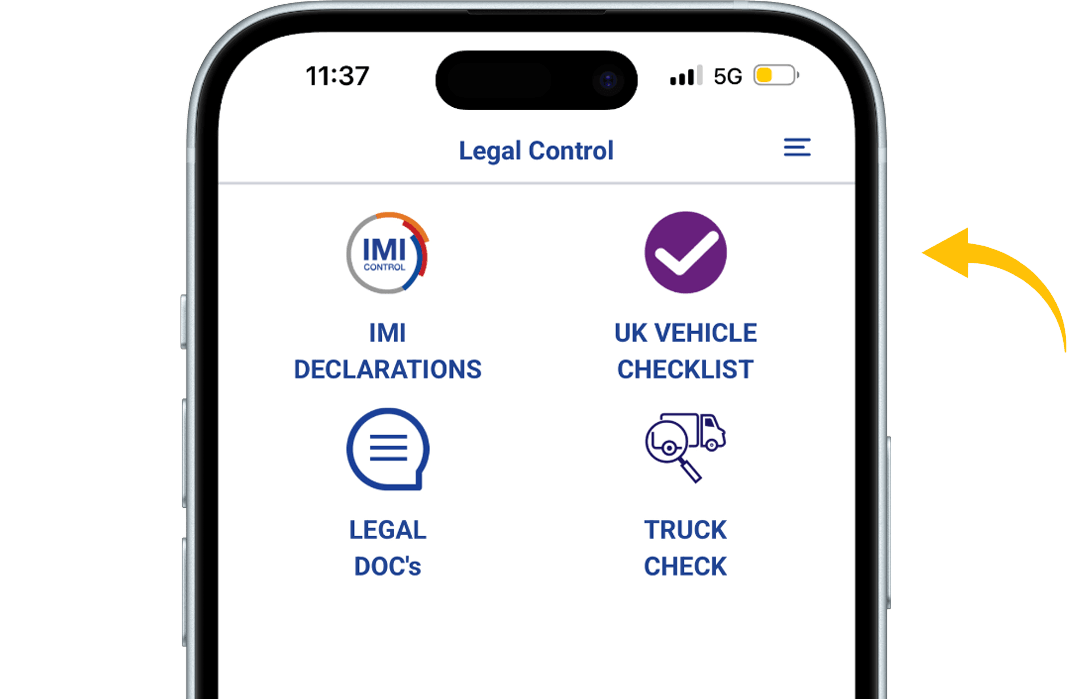
When in the app, press the VEHICLE CHECKLIST button.
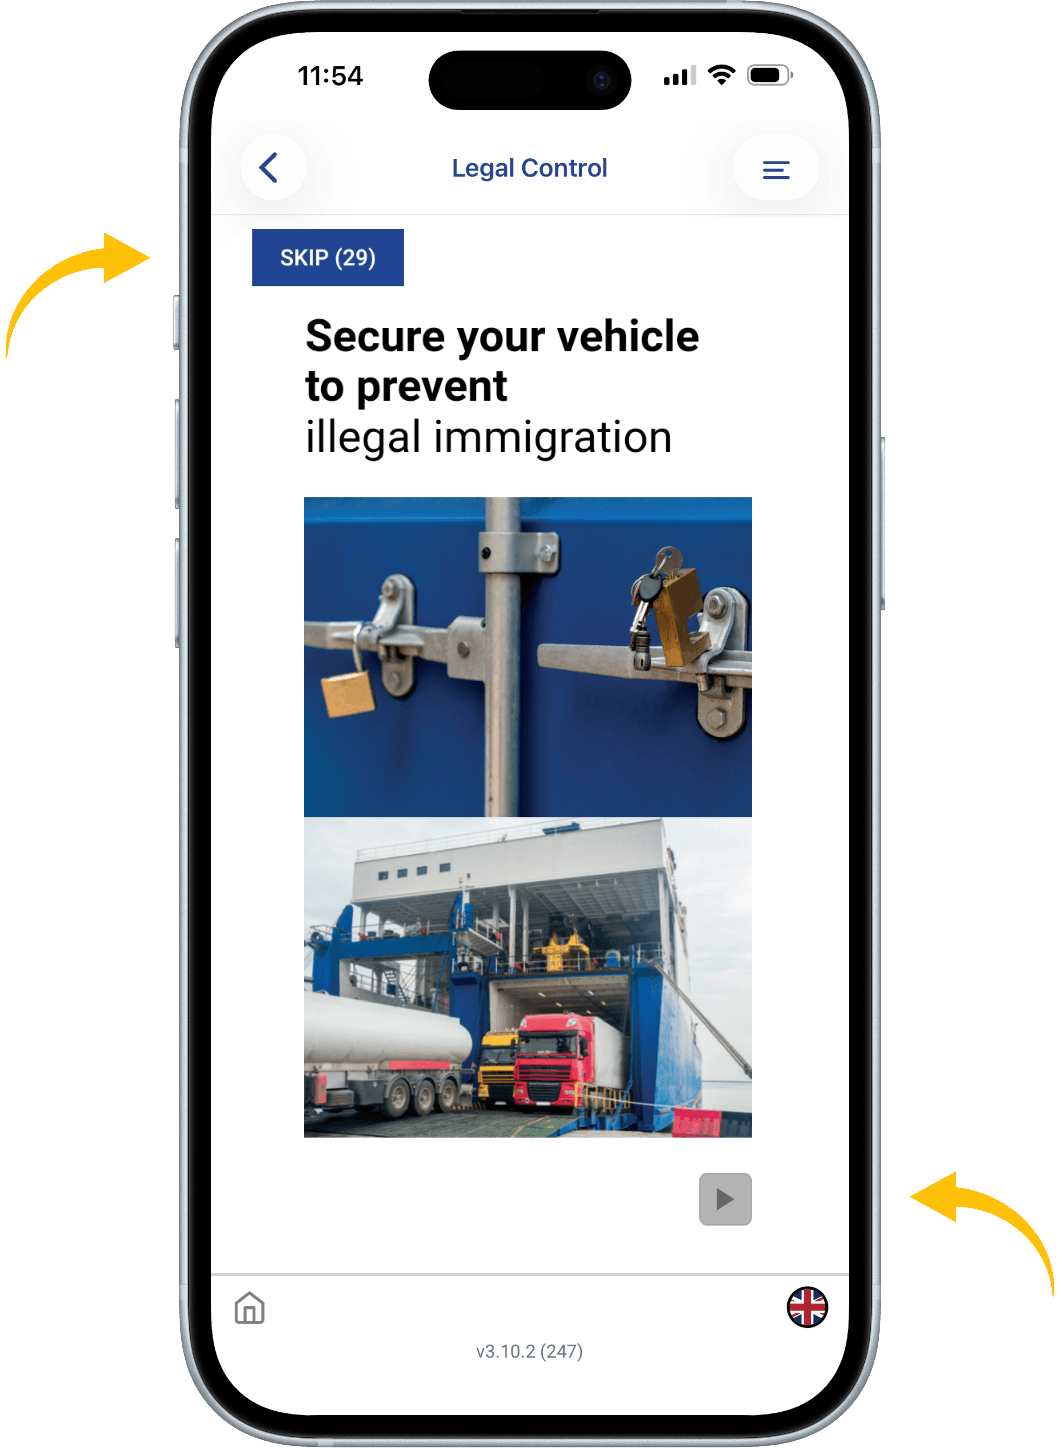
You will now see the training, to start the training press the arrow in the lower right corner.
Follow the training by answering the questions.
You can skip training by pressing button SKIP. You can do this for 30 days. You are obliged to do the training every 6 months.
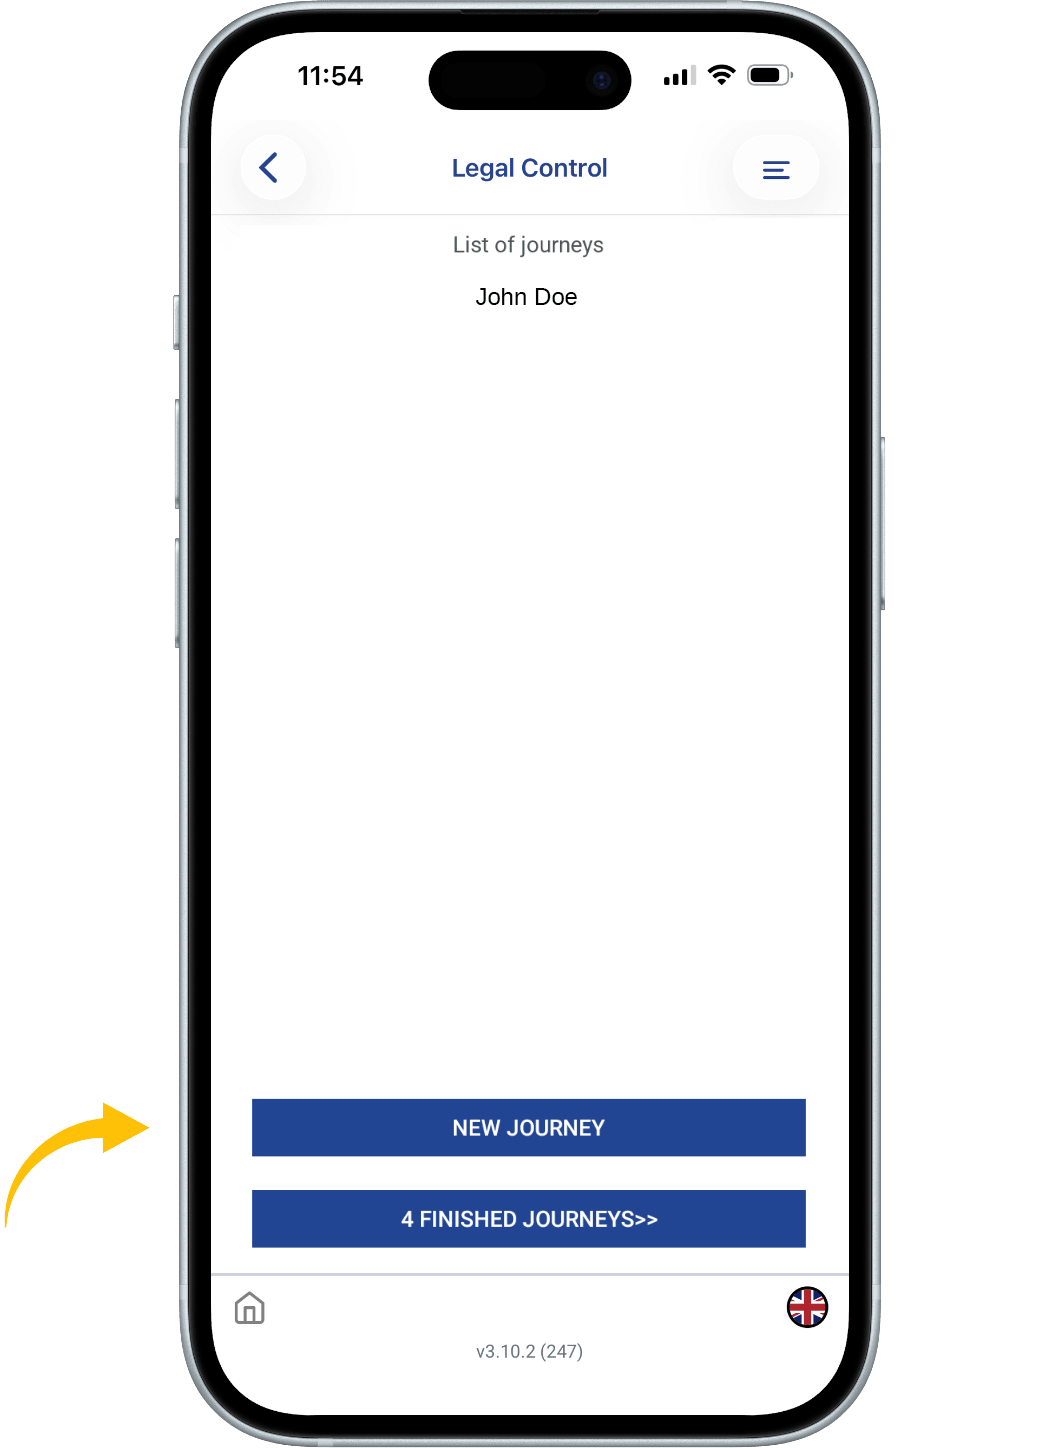
When you have completed the training questions, you will see this screen.
Press the button: NEW JOURNEY to start the checklist.
Fill in the empty fields.
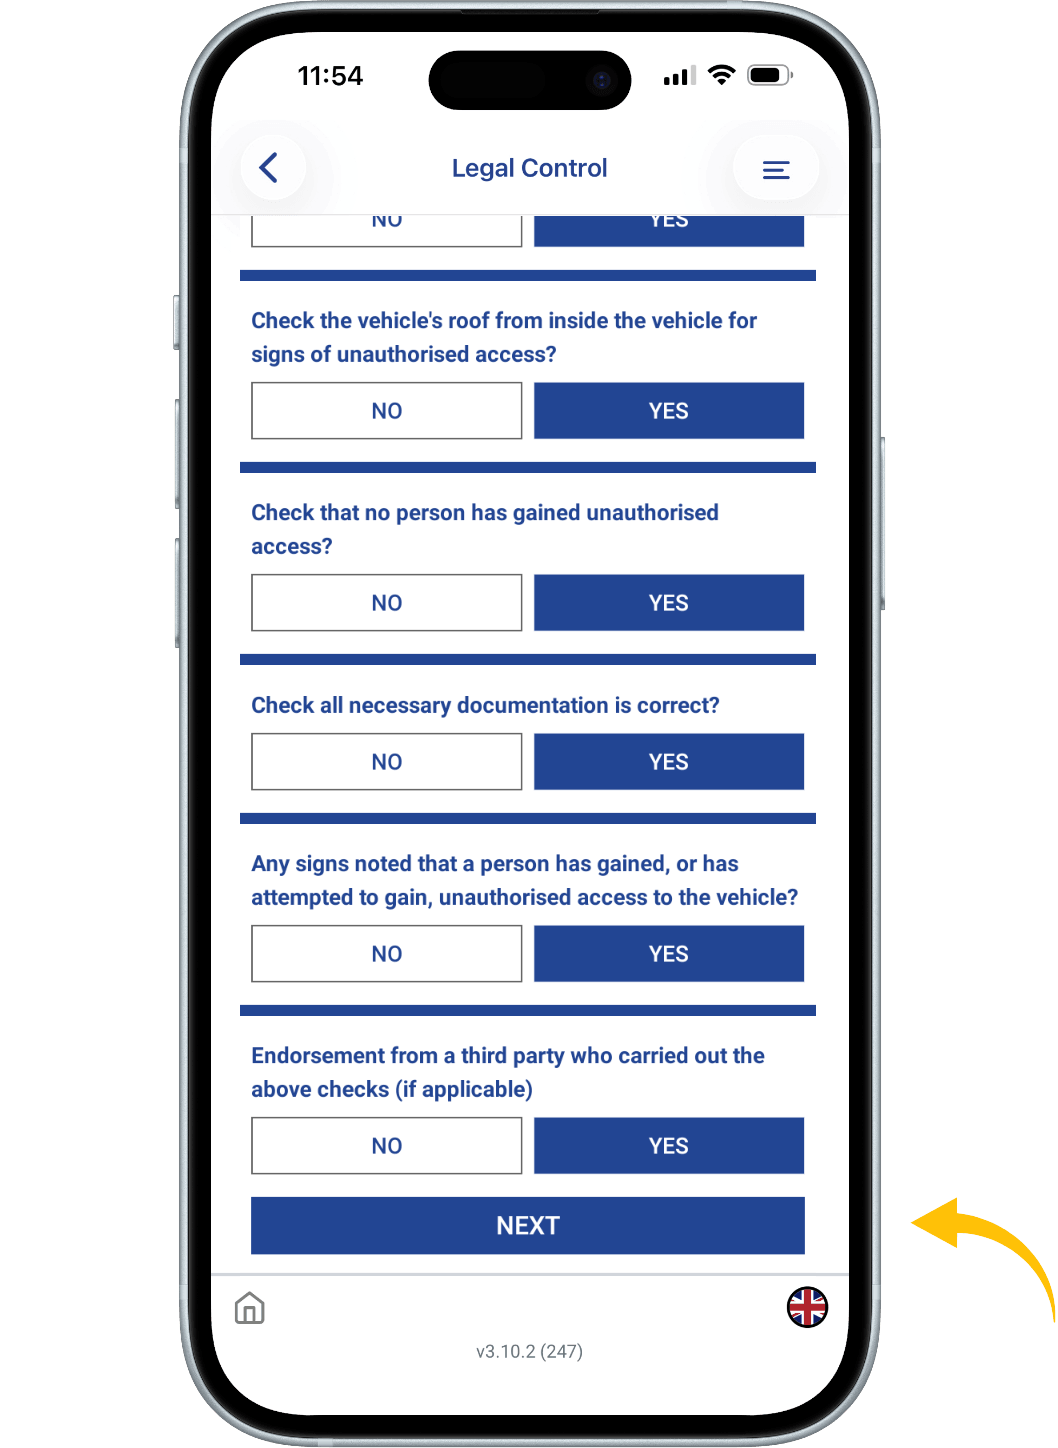
When everything is filled in press the button: START JOURNEY. Now you get the checklist which consists of 14 short questions.
At the end of the checklist press: NEXT.

TAKE A PICTURE OF THE SEAL OR PADLOCK NUMBER
To add a signature, press the SIGN button.
If you are going to have any more stops along the way. Press: FINISH STOP.
If this is your last stop you are going to have press: FINISH JOURNEY.
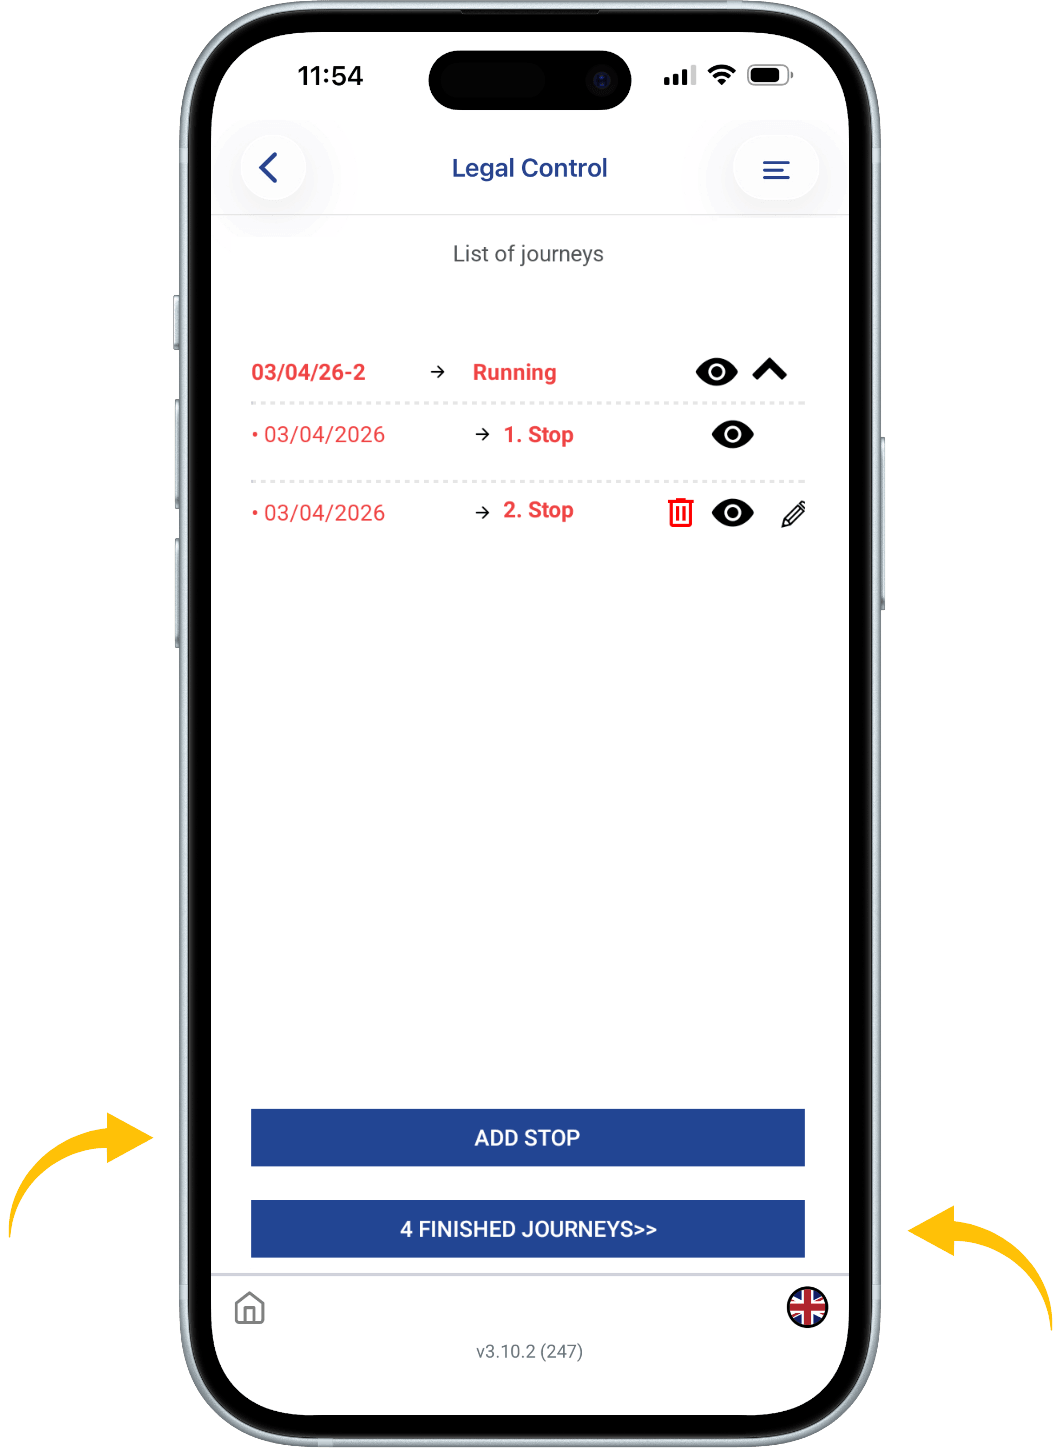
You will see at the top of the screen that the text is in red. This means your checklist is running and therefore not closed yet.
At the bottom, you will find the blue FINISHED JOURNEYS button.
If you click on this, you will see all your Finished Journeys.
Want to add a stop press the button: ADD STOP.
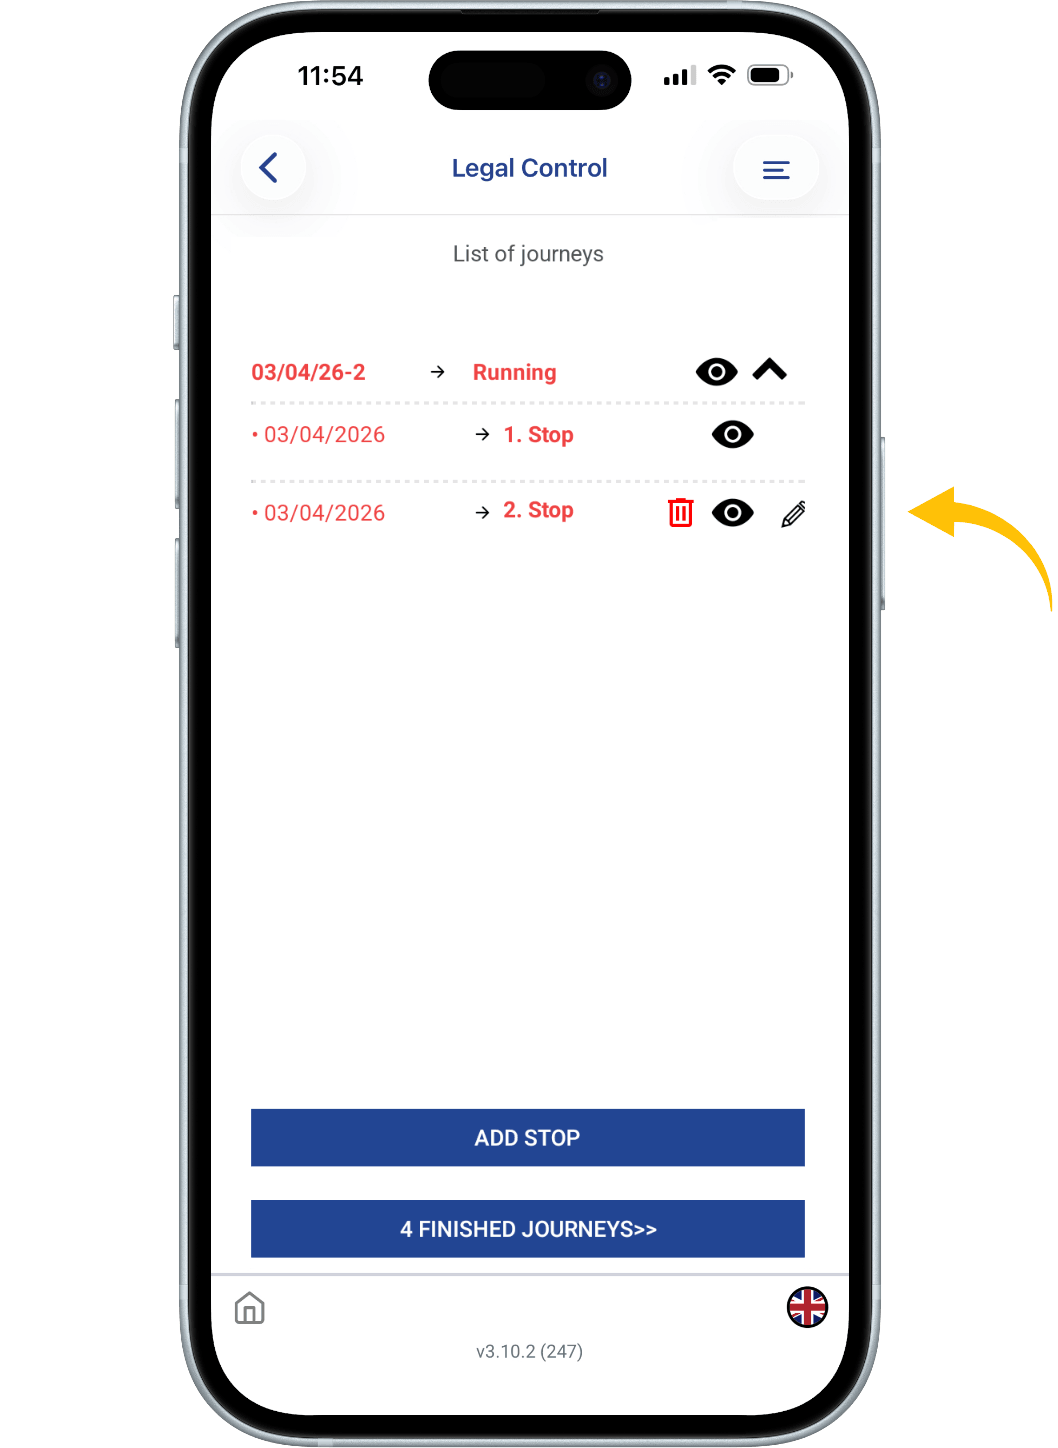
An eye icon can be seen on the right side. If you click on this, you can send the checklist and the training to the authorities via e-mail if needed.
On the right side of the screen, you will see a pencil.
If you click on it you can edit your last stop if necessary.
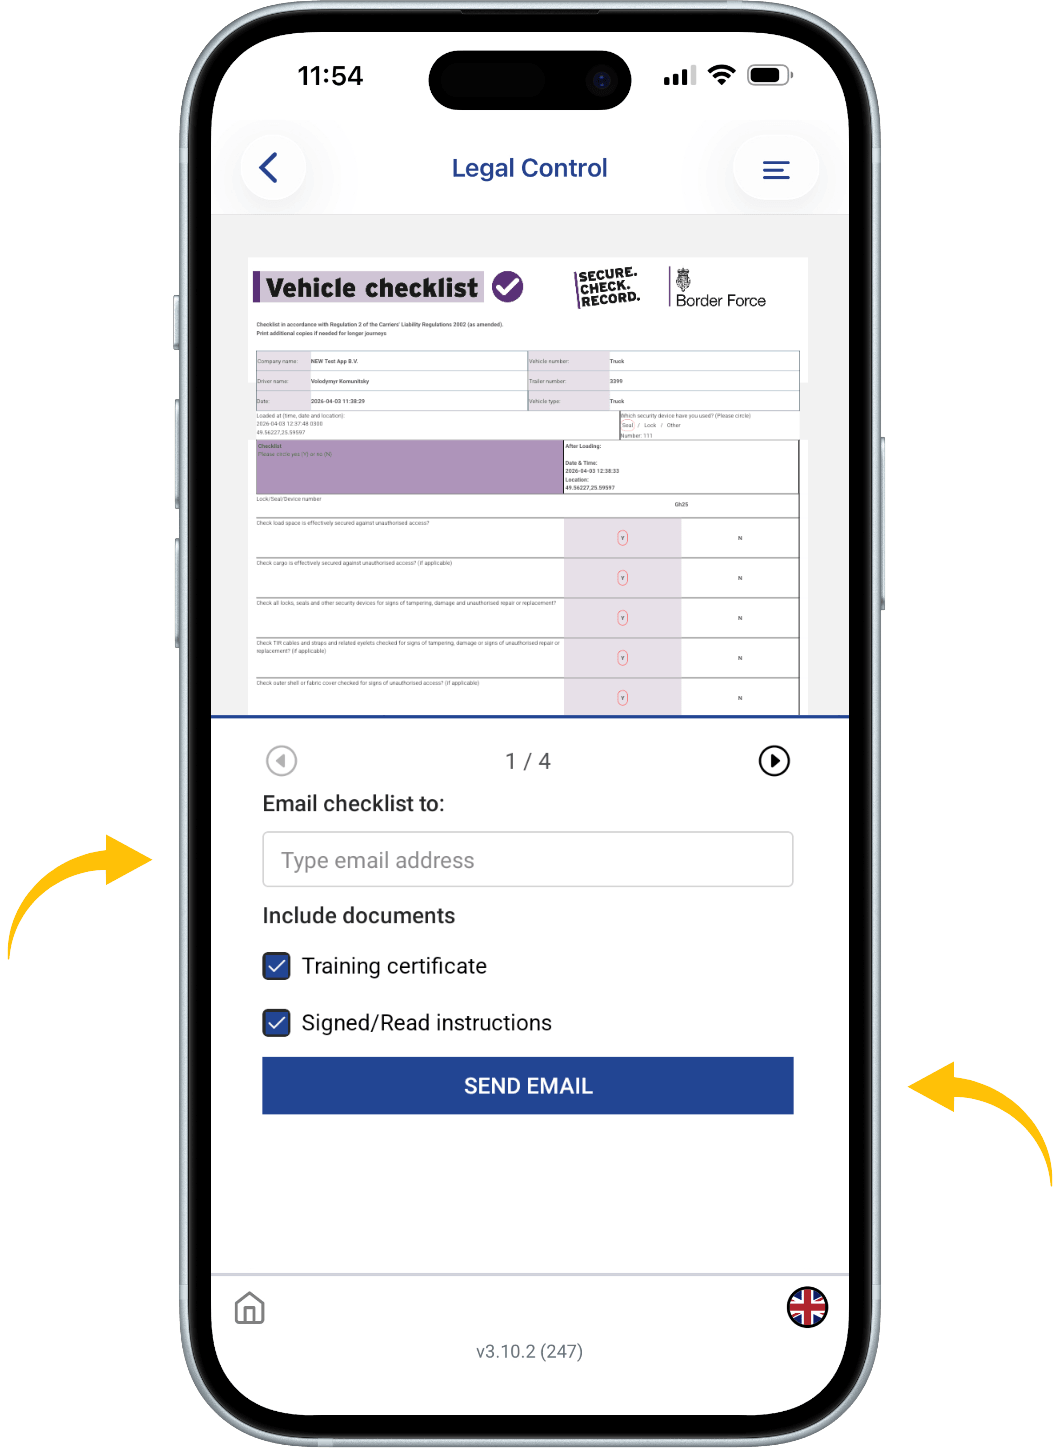
If you have pressed the eye icon, you will see this screen.
Enter an e-mail address here.
You can select whether you want to send the Checklist, Training or Instruction.
Press here to proceed to send the checklist.
![]()
This document is the property of Transport in Nood.
All rights reserved.
 Legal DOC’s
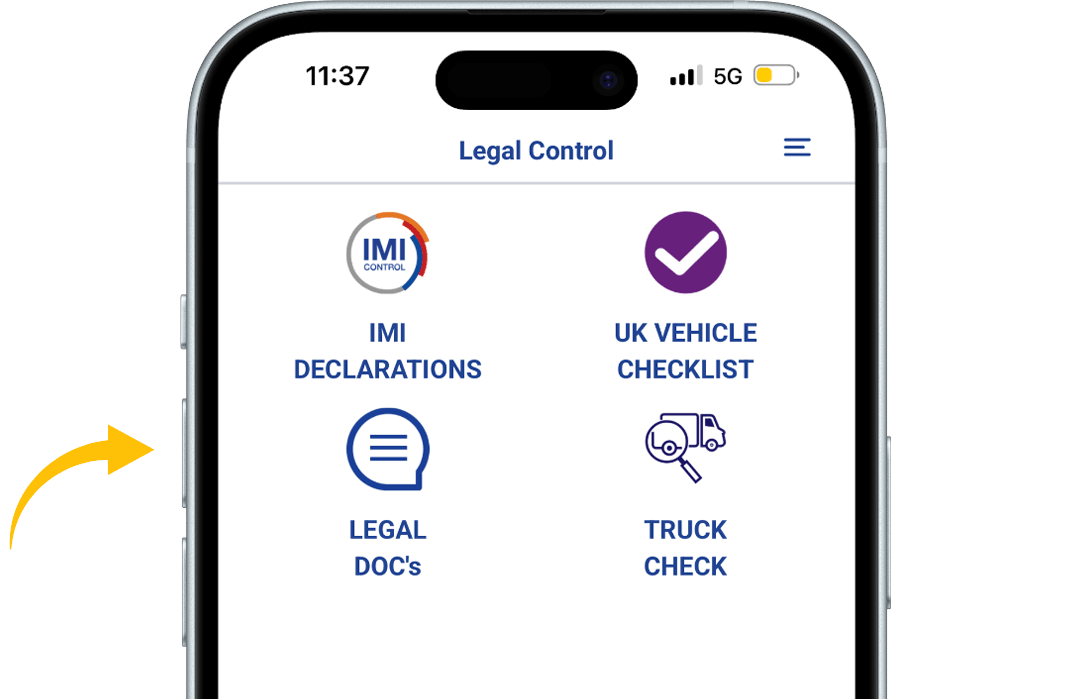
When you’re in the app, press the LEGAL DOC’S button.
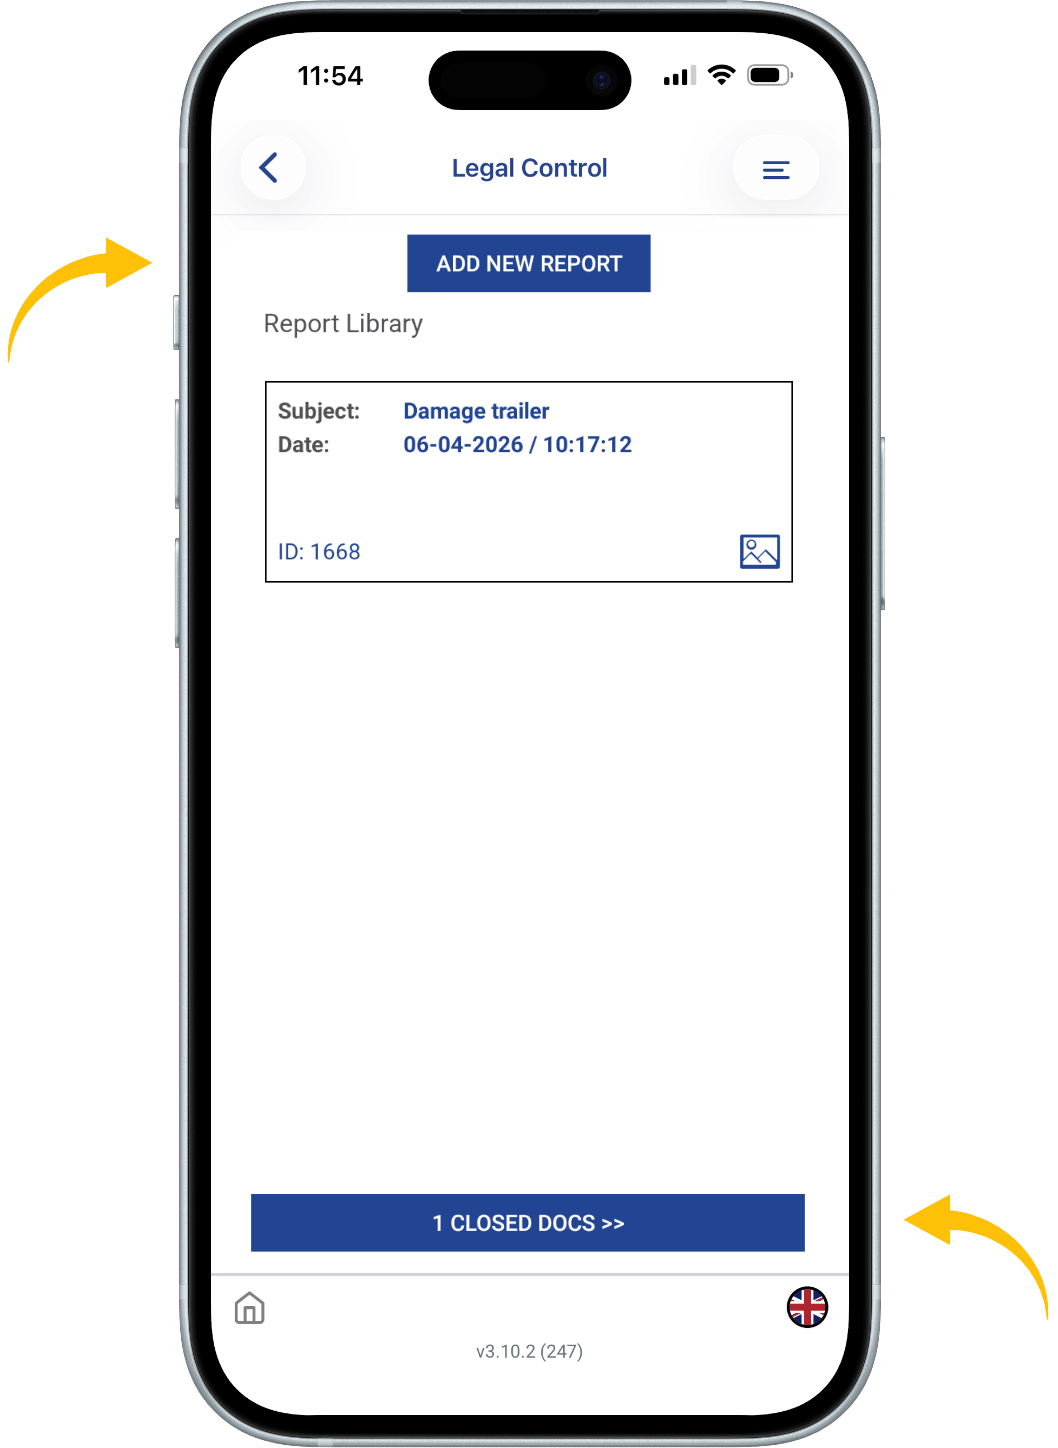
Here there is an overview of all open reports. If you press the bottom button CLOSED DOCS you are able to see all your finished reports.
To create a report, click on the blue ADD NEW REPORT button.
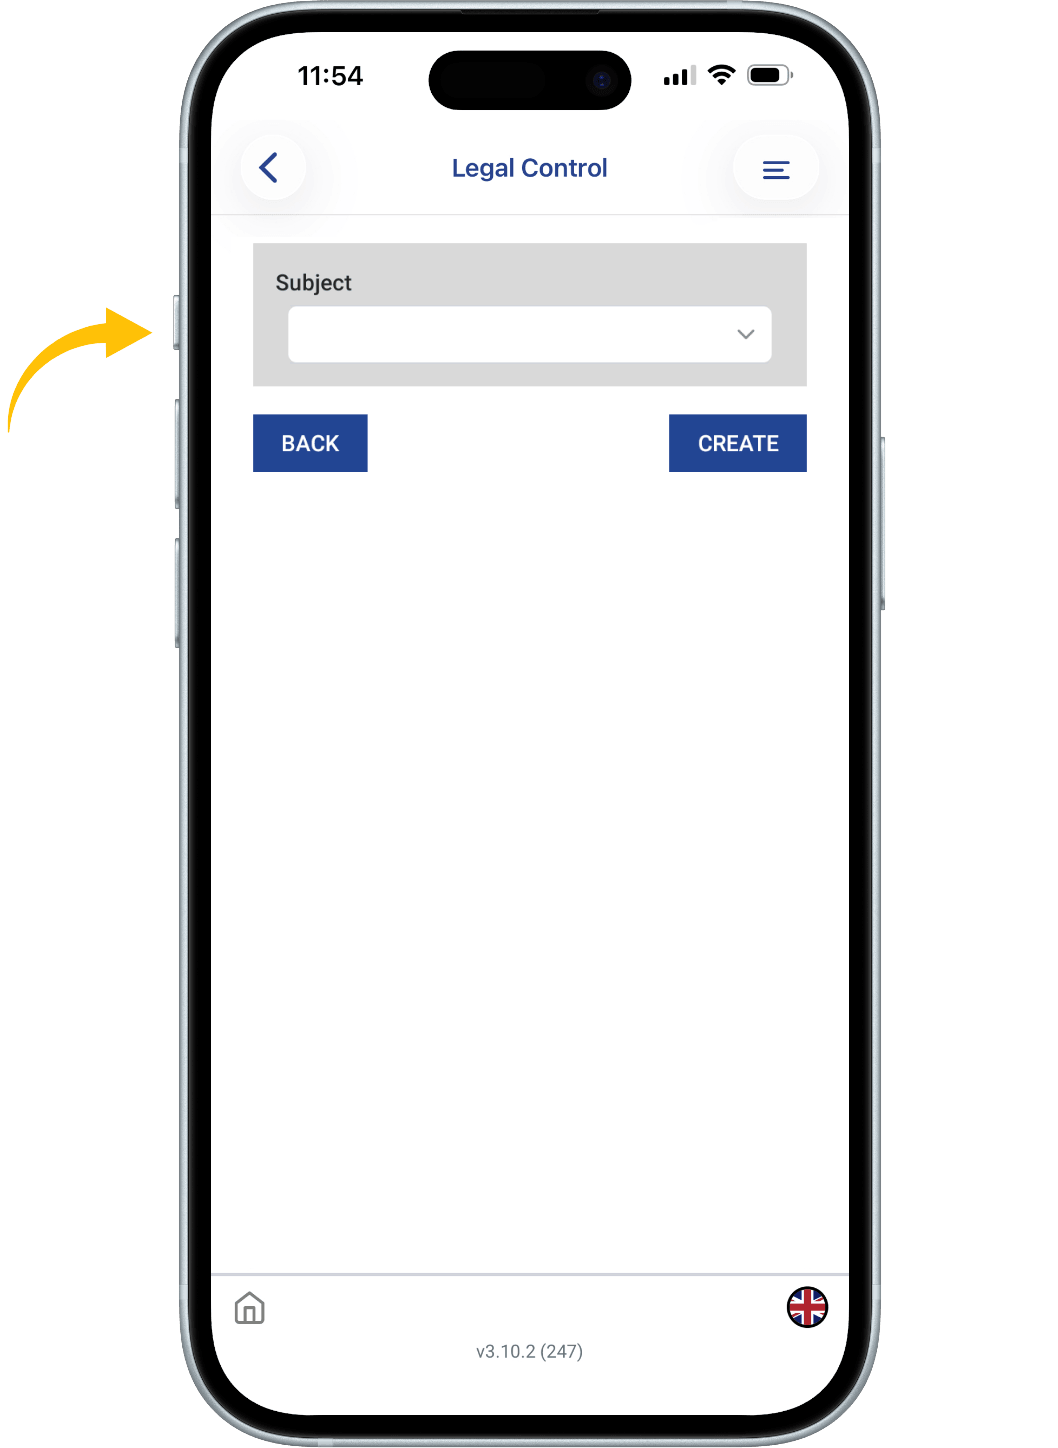
Then click a on THE BLANK WHITE FIELD and a dropdown menu will appear.

Choose a topic on what the report should be about, or choose Other and then enter a topic yourself.
Below you will see a section where you can type messages to the CRM system. If you have typed something, press the SEND button.
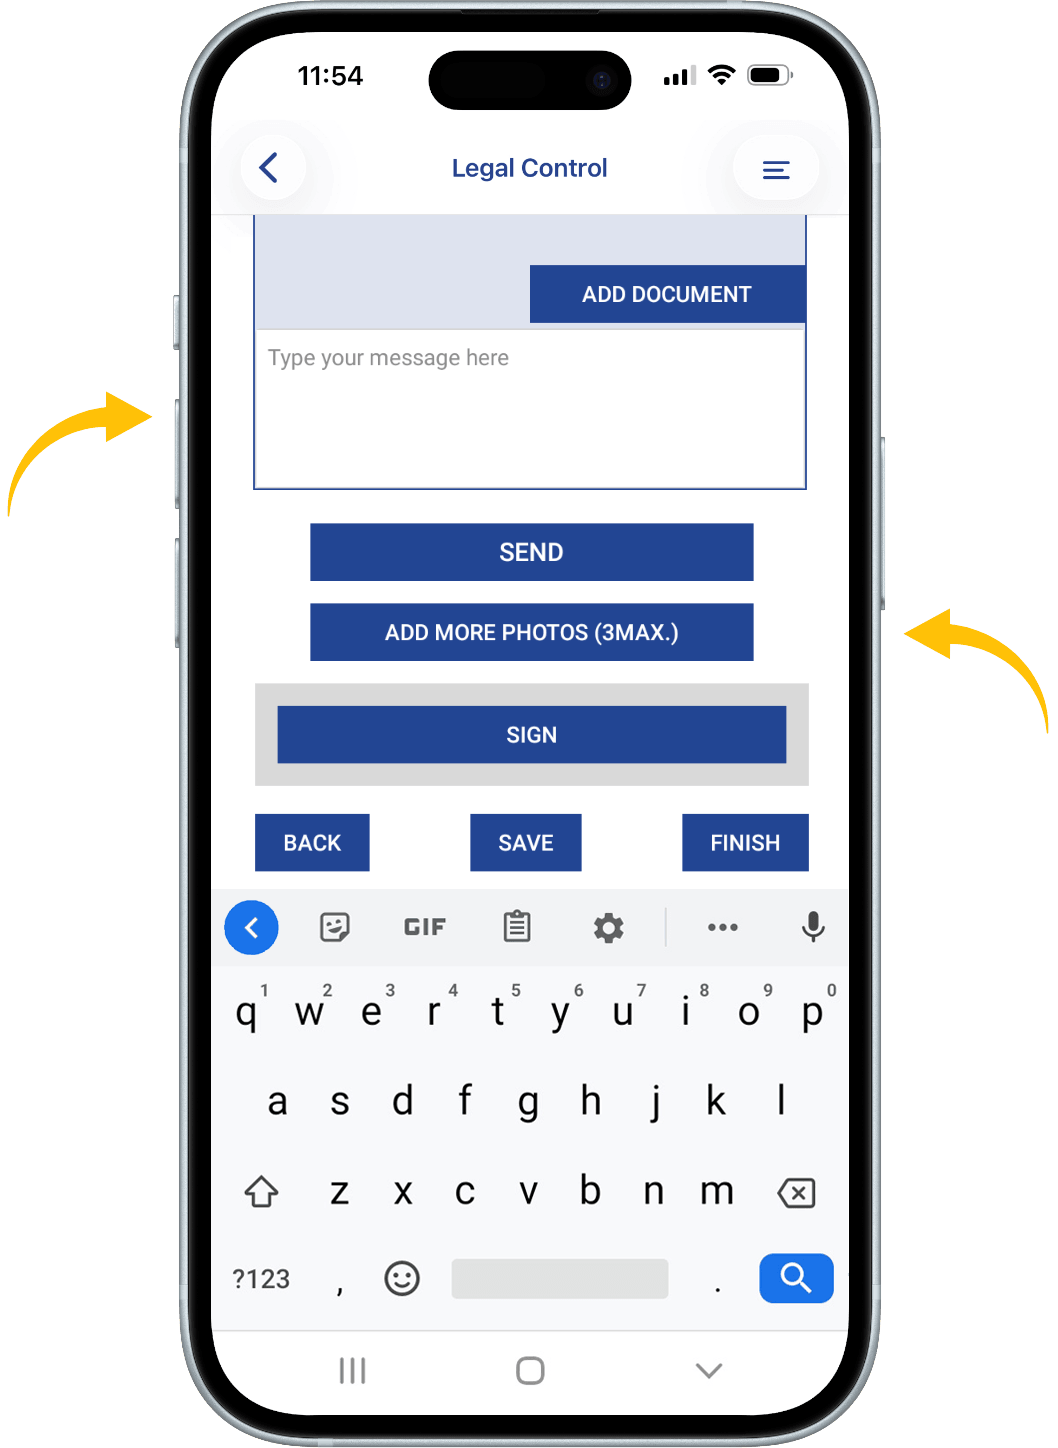
To upload photos, press the ADD MORE PHOTOS button.
Over the photos is an area where you can type comments.
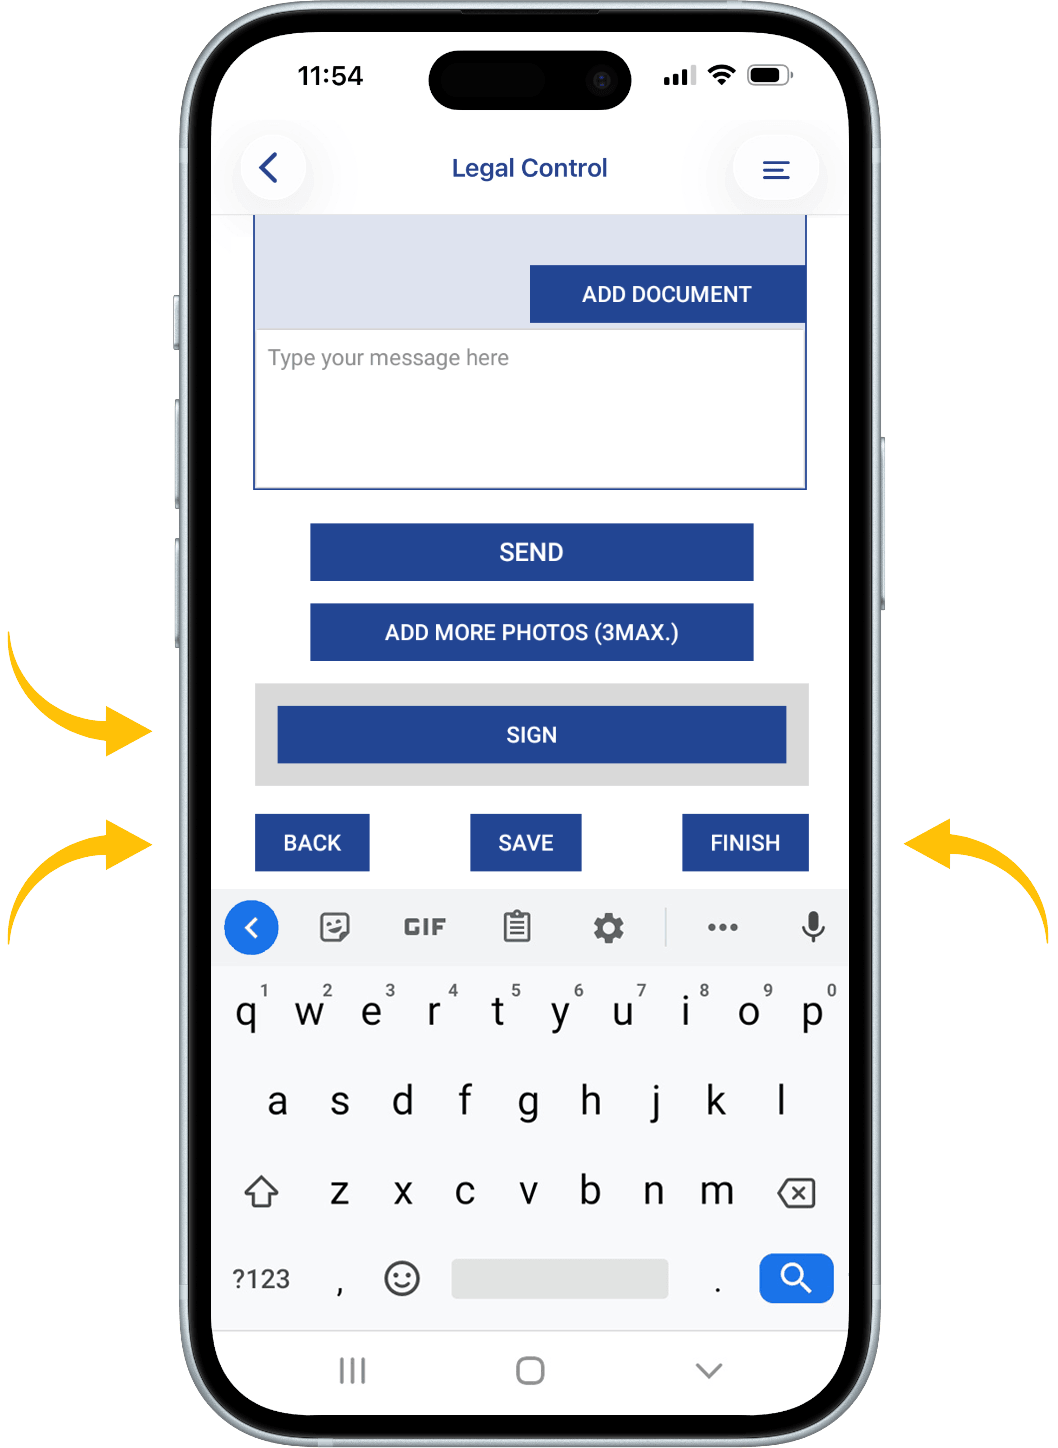
To add a signature, press the SIGN button.
Press the SAVE button if you don’t want to close the document yet.
Press the FINISH button when you want to finish the document and when everything is resolved. Remember that when FINISH is pressed, no more changes can be made.
![]()
This document is the property of Transport in Nood.
All rights reserved.
 Truck Check
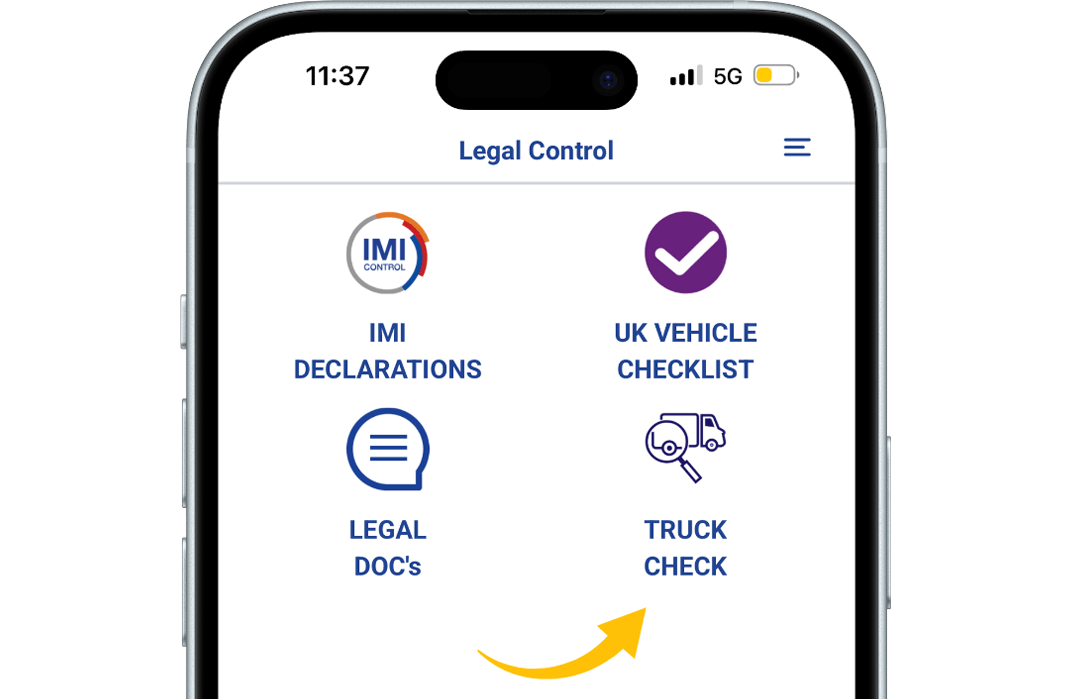
Step 1
Open the Truck check.
Then tap on „Truck Check” to proceed.
Step 2
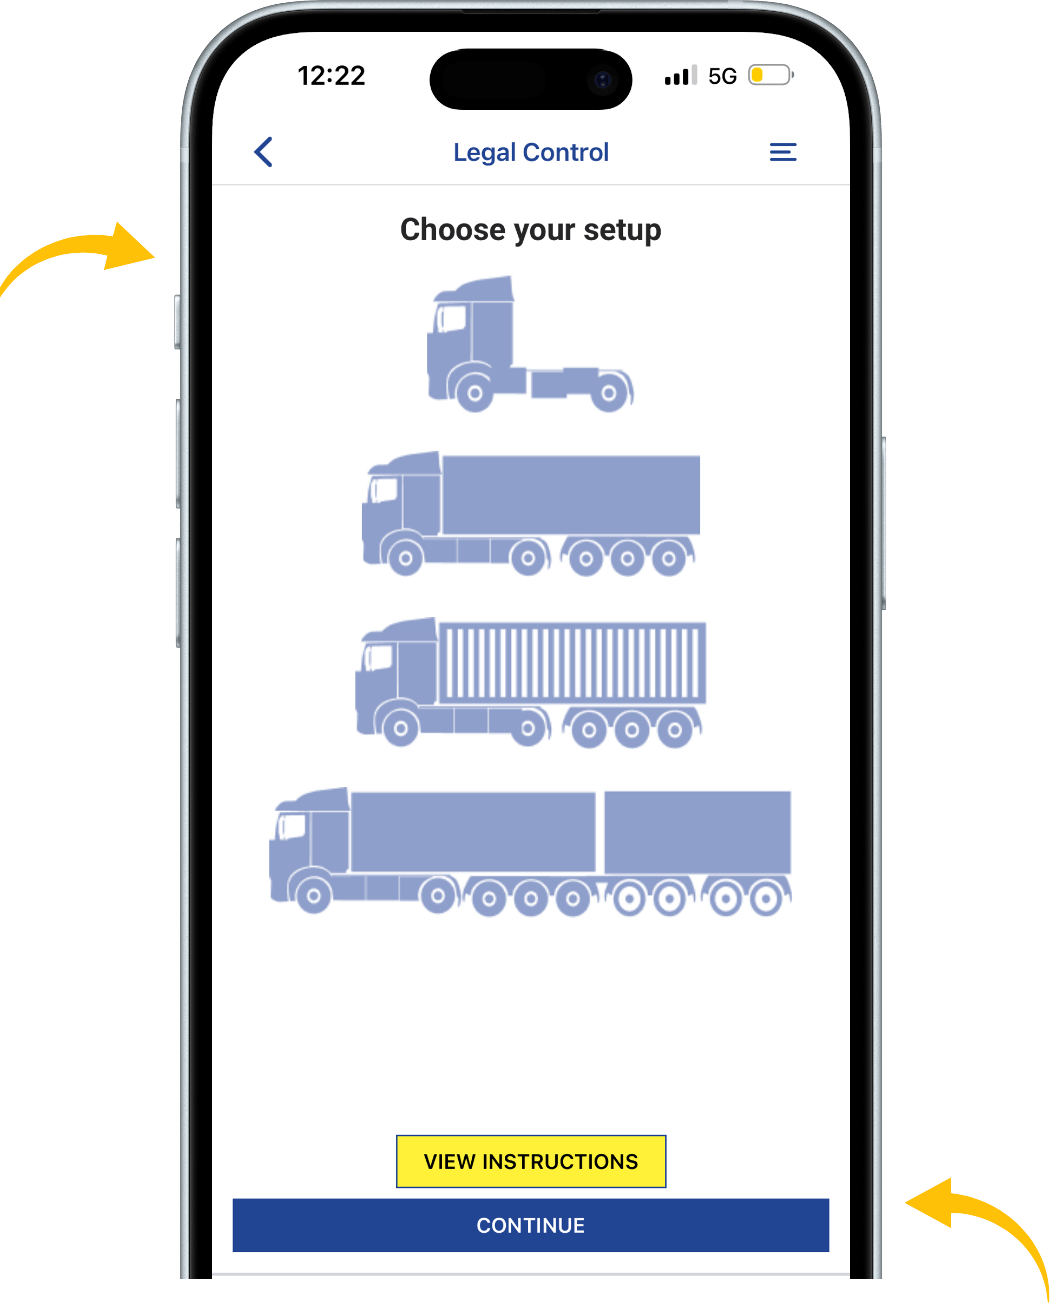
Choose your setup.
Once selected, tap „Continue” to move forward.
If you need help,
Tap „View Instructions” for help with the truck check.
Step 3
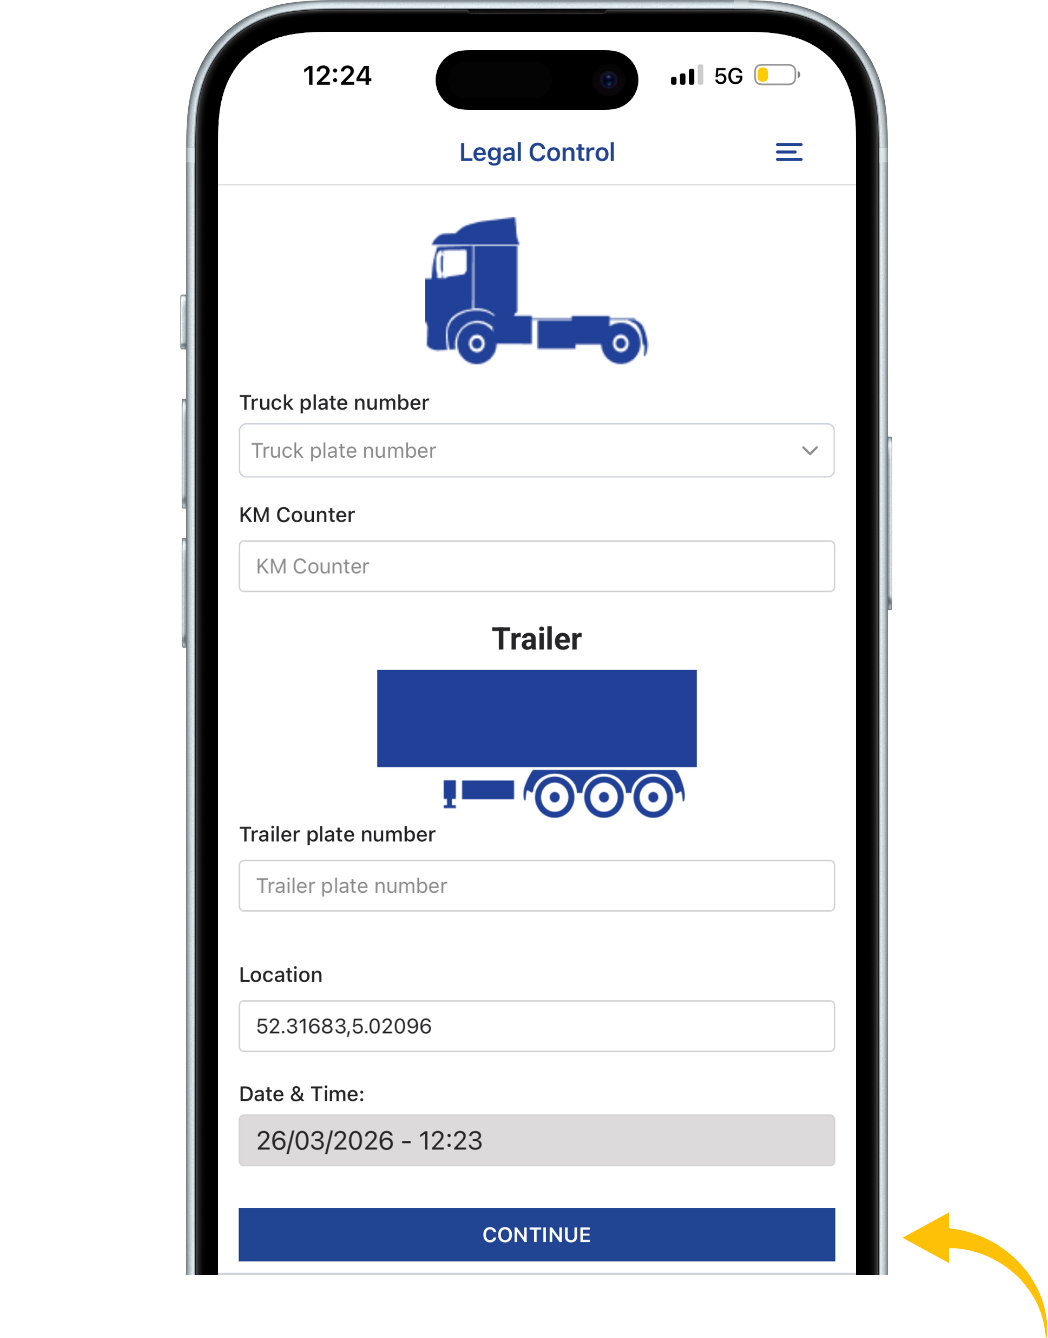
In this example, a truck with trailer is selected.
Fill in the required fields:
truck plate number, KM counter, and trailer plate number.
Once all fields are completed, tap „Continue”.

Step 4
Tap „Check In” at the top of the screen to
begin the check-in for your selected setup.
At the bottom of the screen, under „Old Checks”,
you can find the previous check-outs for this setup.
A red number indicates how many damages
were reported for that license plate.
Tap the eye icon to view the details of a previous check-out.
Step 5
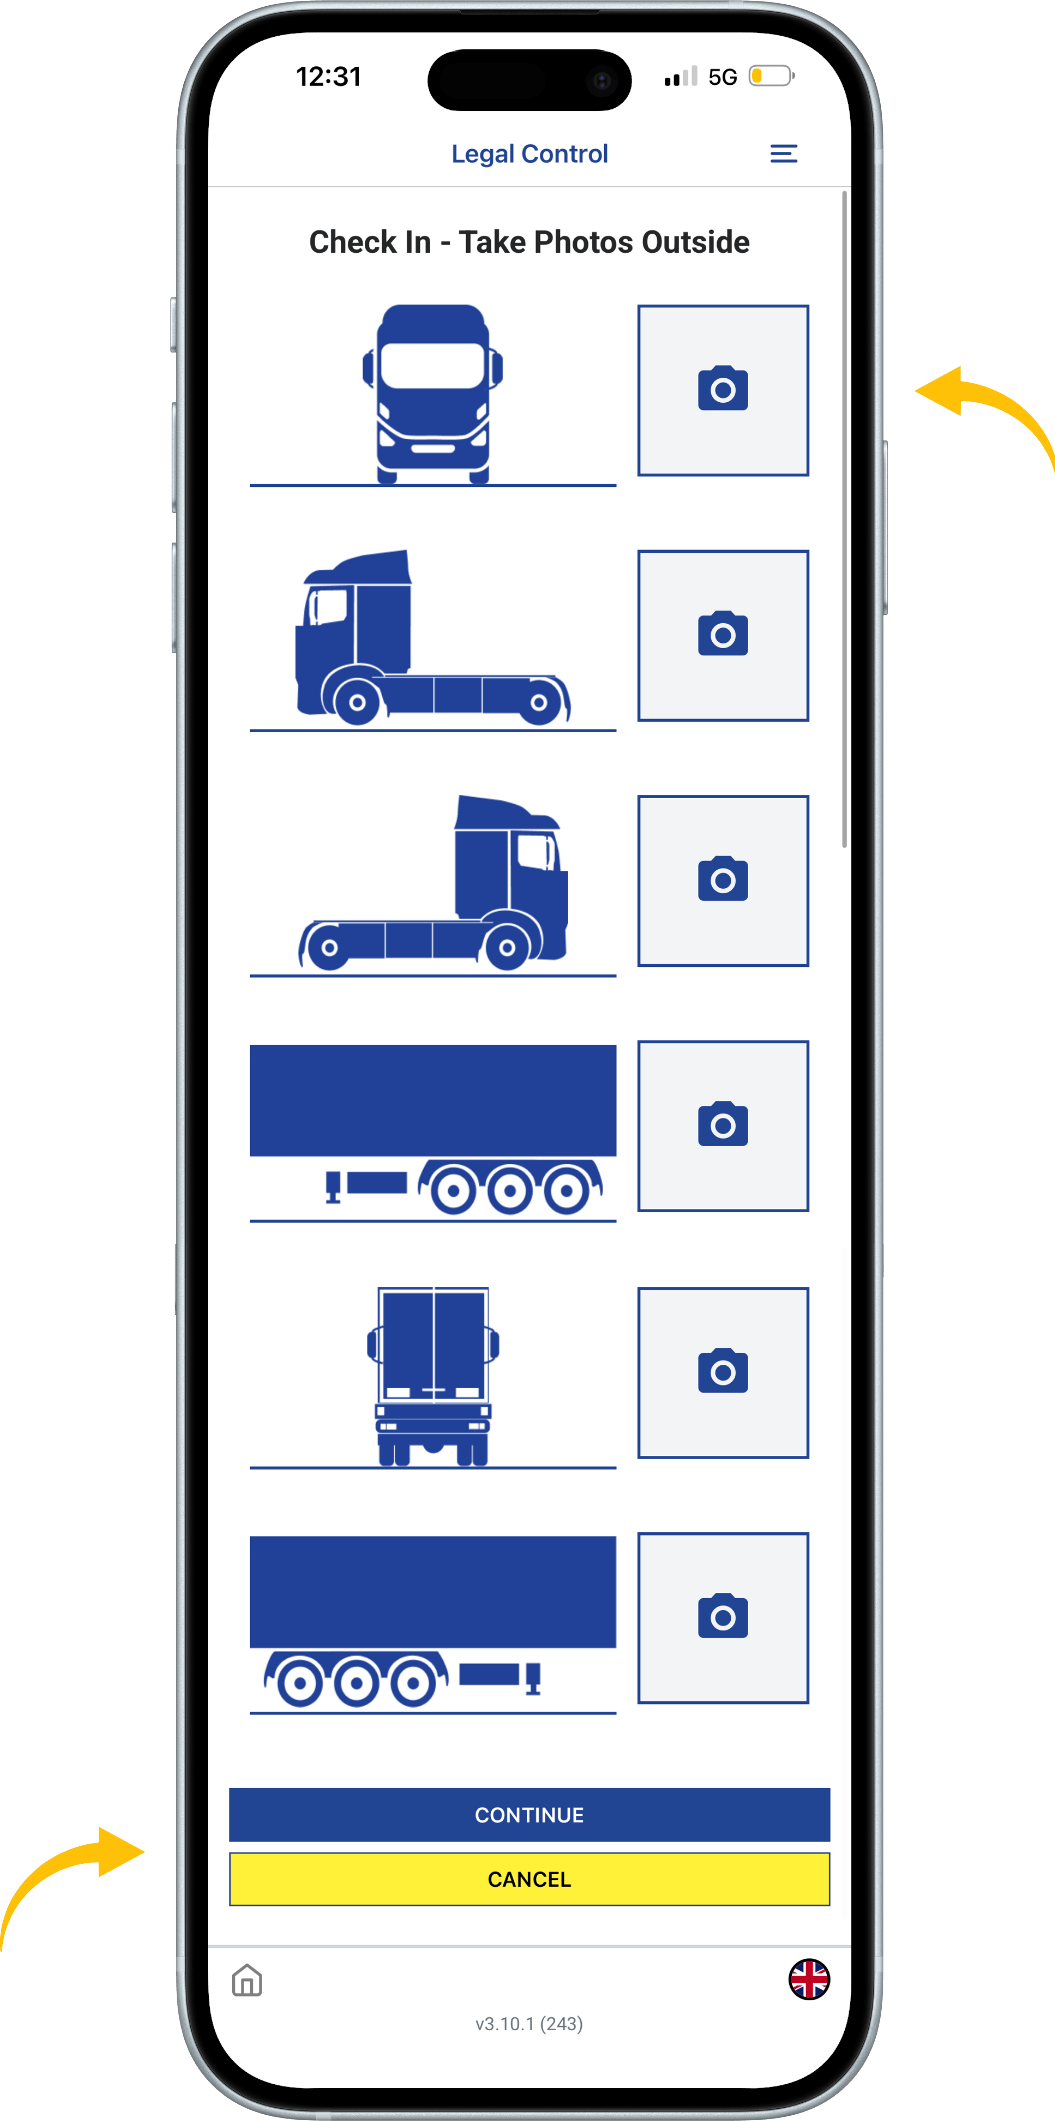
Take photos of your selected setup from all required angles.
Tap the camera icons to capture each photo.
Once all photos are taken, tap „Continue” to proceed.
You can stop the process at any time by tapping „Cancel”.
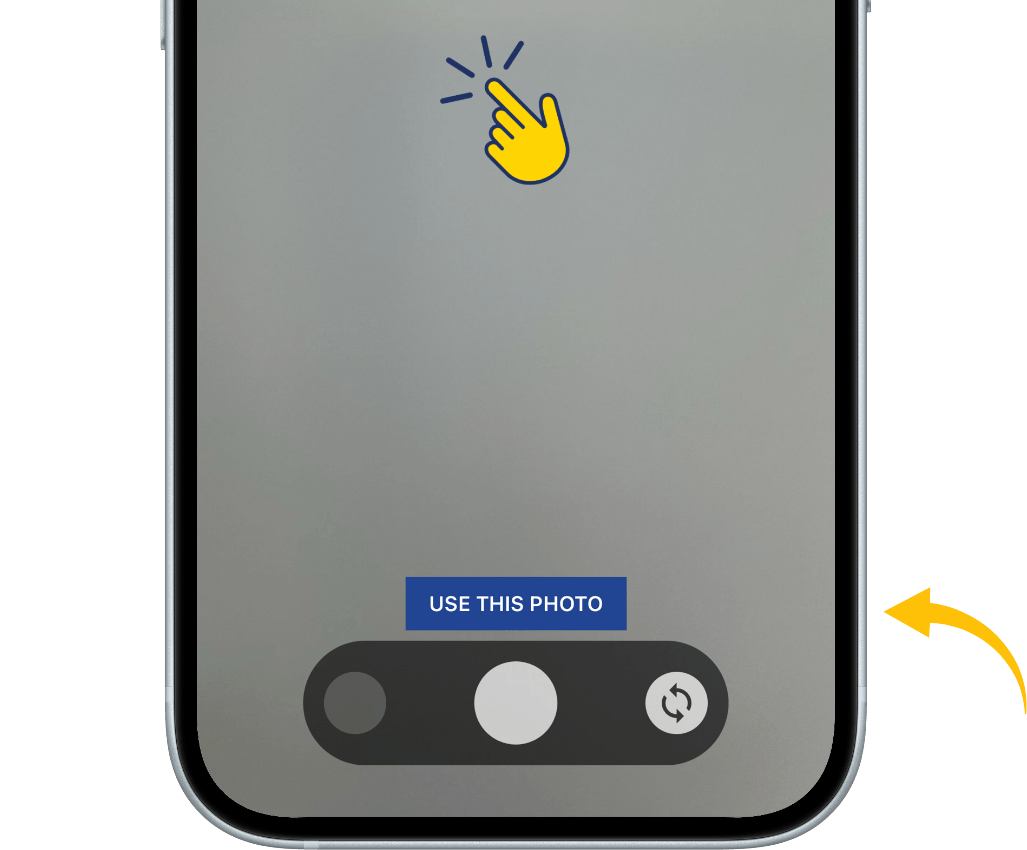
Step 6
After taking a photo,
tap and hold the screen to mark any damage.
A red circle will appear, which you can resize using
the „+” and „–” controls in the top right corner of the screen.
To confirm the photo, tap „Use This Photo”.
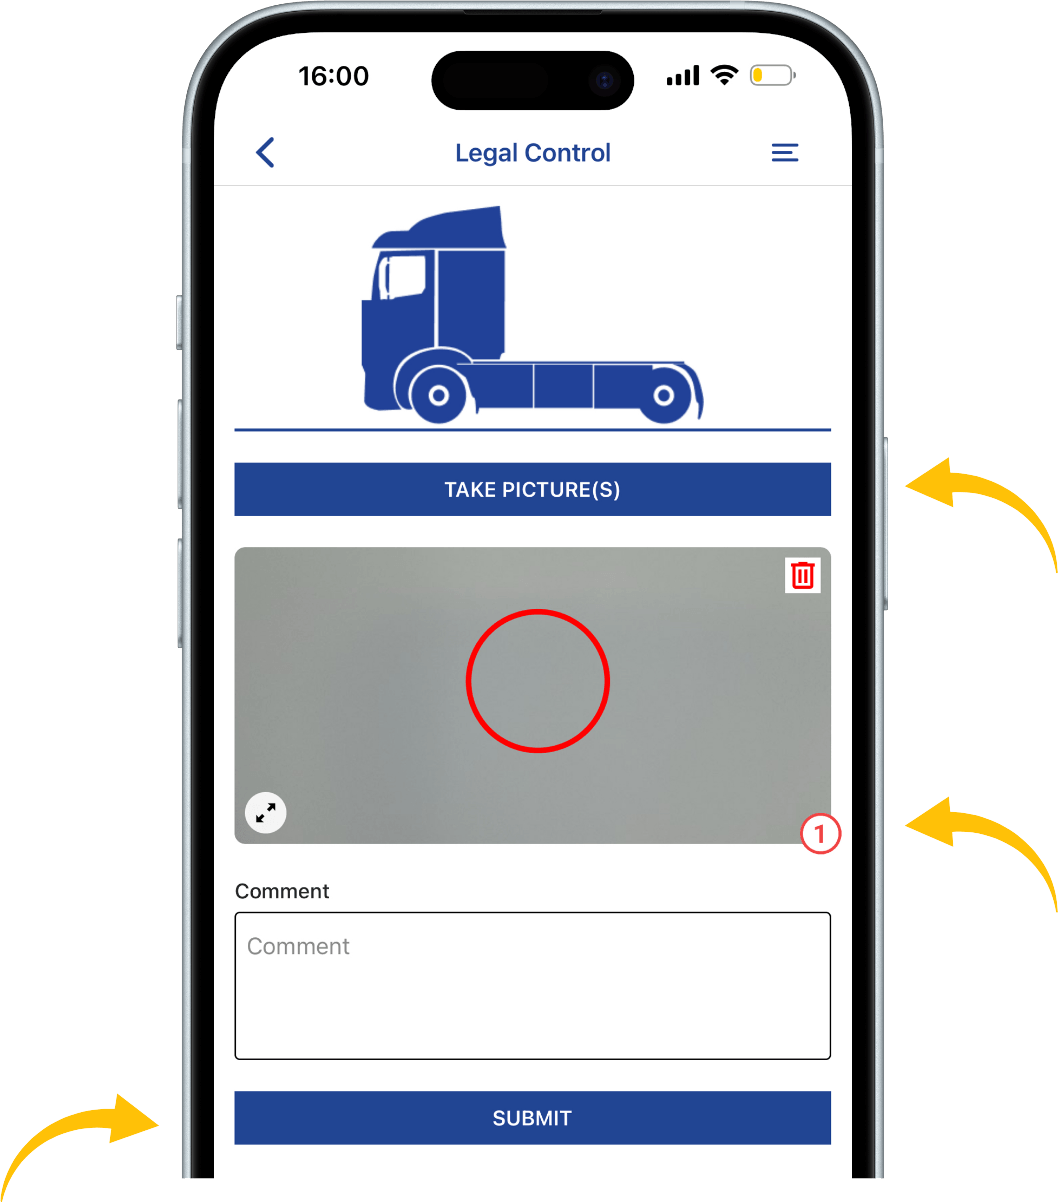
Step 7
This screen shows an overview of one side of the setup.
Tap „Take Picture(s)” to retake or add photos.
To delete a photo, tap the trash icon in the
top right corner of the image.
If damage is marked,
a number will appear in the bottom right corner of the photo.
You can add a comment in the field below the photo.
Once everything is completed,
tap „Submit” to finish this side of the setup.
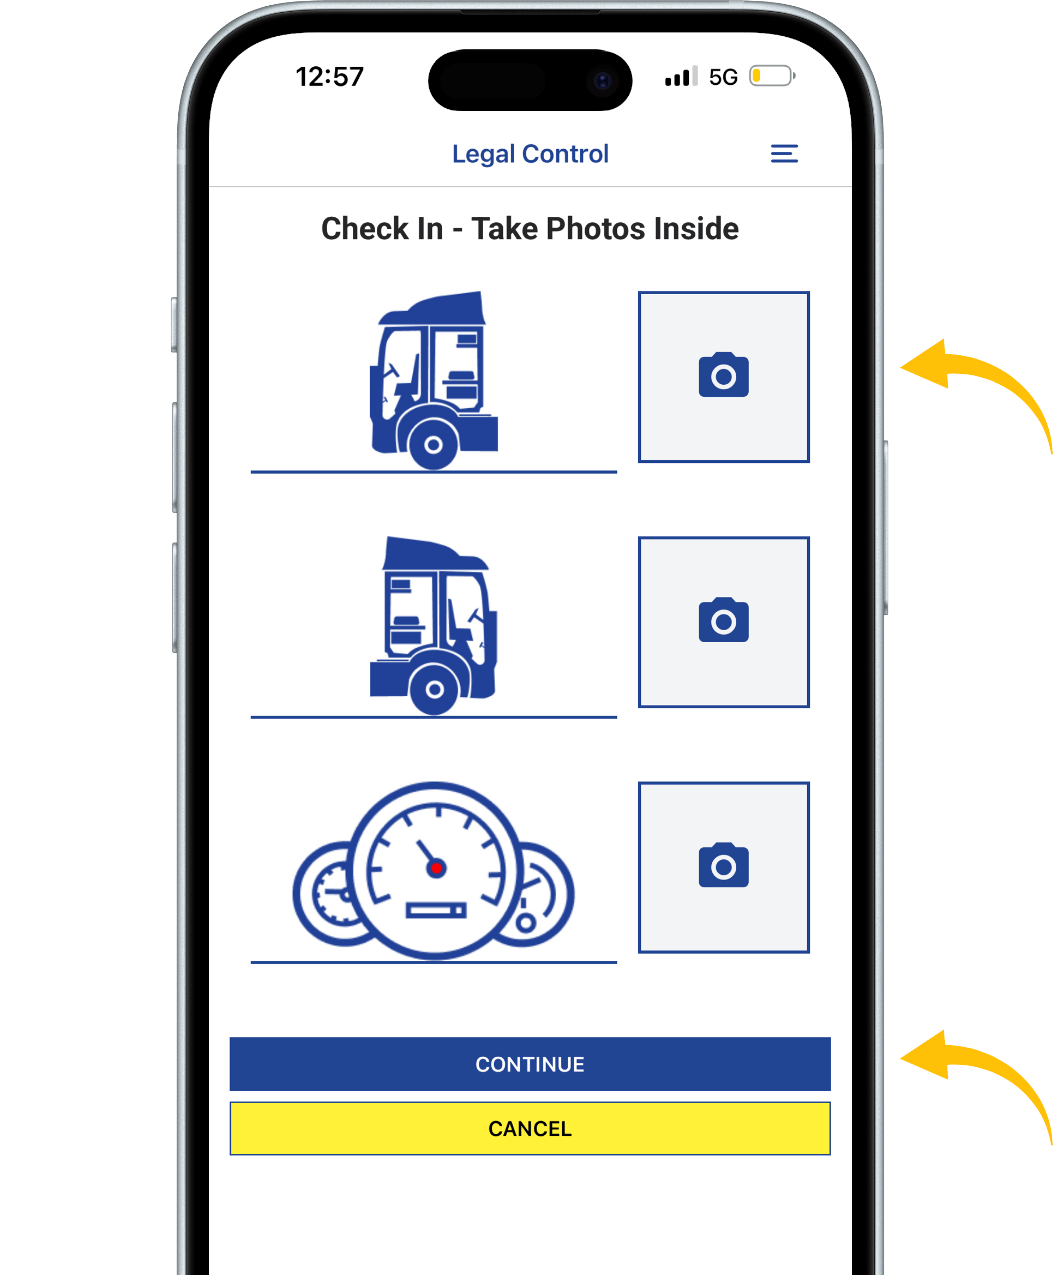
Step 8
After completing the exterior photos,
you will be asked to take photos of the interior.
Capture photos of both sides of the interior and
the dashboard while it is turned on.
Once all photos are taken, tap „Continue” to proceed.

Step 9
This is a checklist of items you may have with you.
Tap the circle next to each item to select what you have with you.
Once you are done, tap „Continue” to proceed.
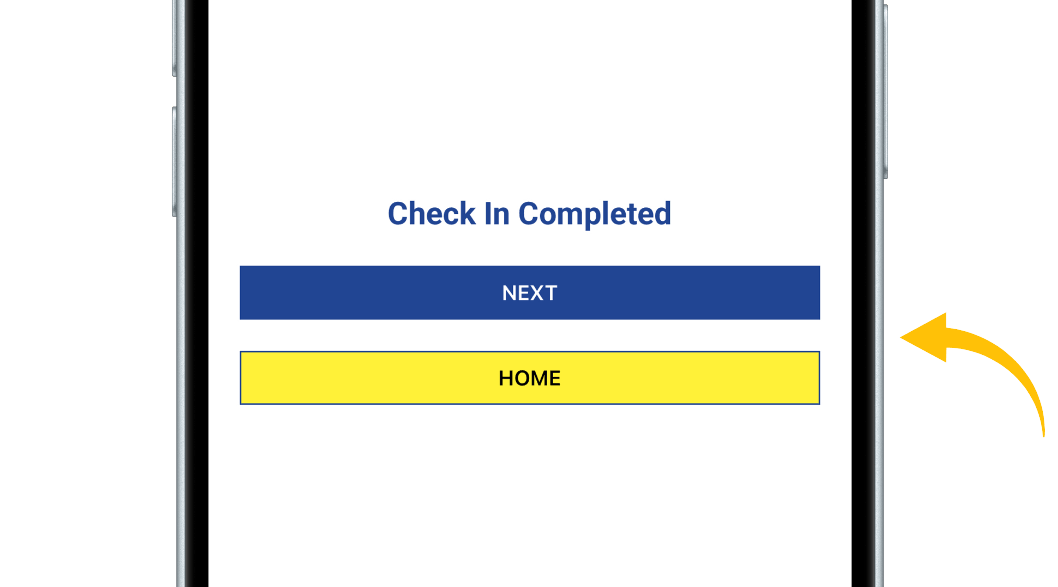
Step 10
This screen confirms that your check-in is completed.
Tap „Next” to go to the truck check overview.
Tap „Home” to return to the main screen of the app.
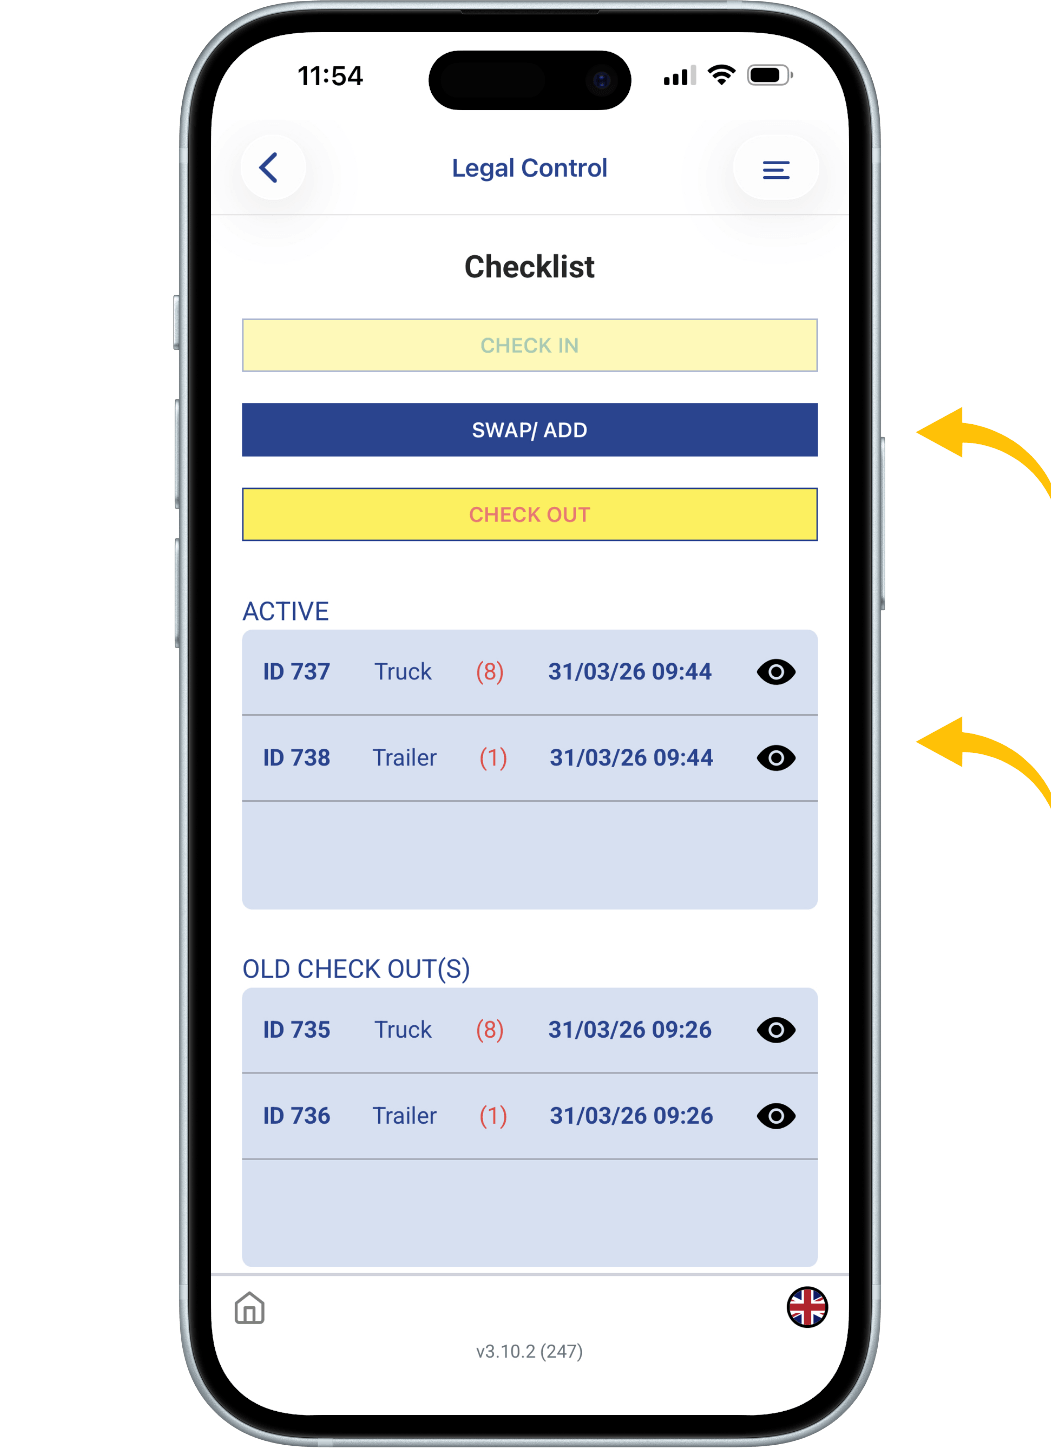
Step 11
After tapping „Next” in Step 11,
you will see the overview screen.
At the top, you will see the „Swap / Add” button,
which allows you to modify your setup.
You will also see the „Check Out” button,
used to check out a component(S).
Under „Active”, you can see what is currently checked in.
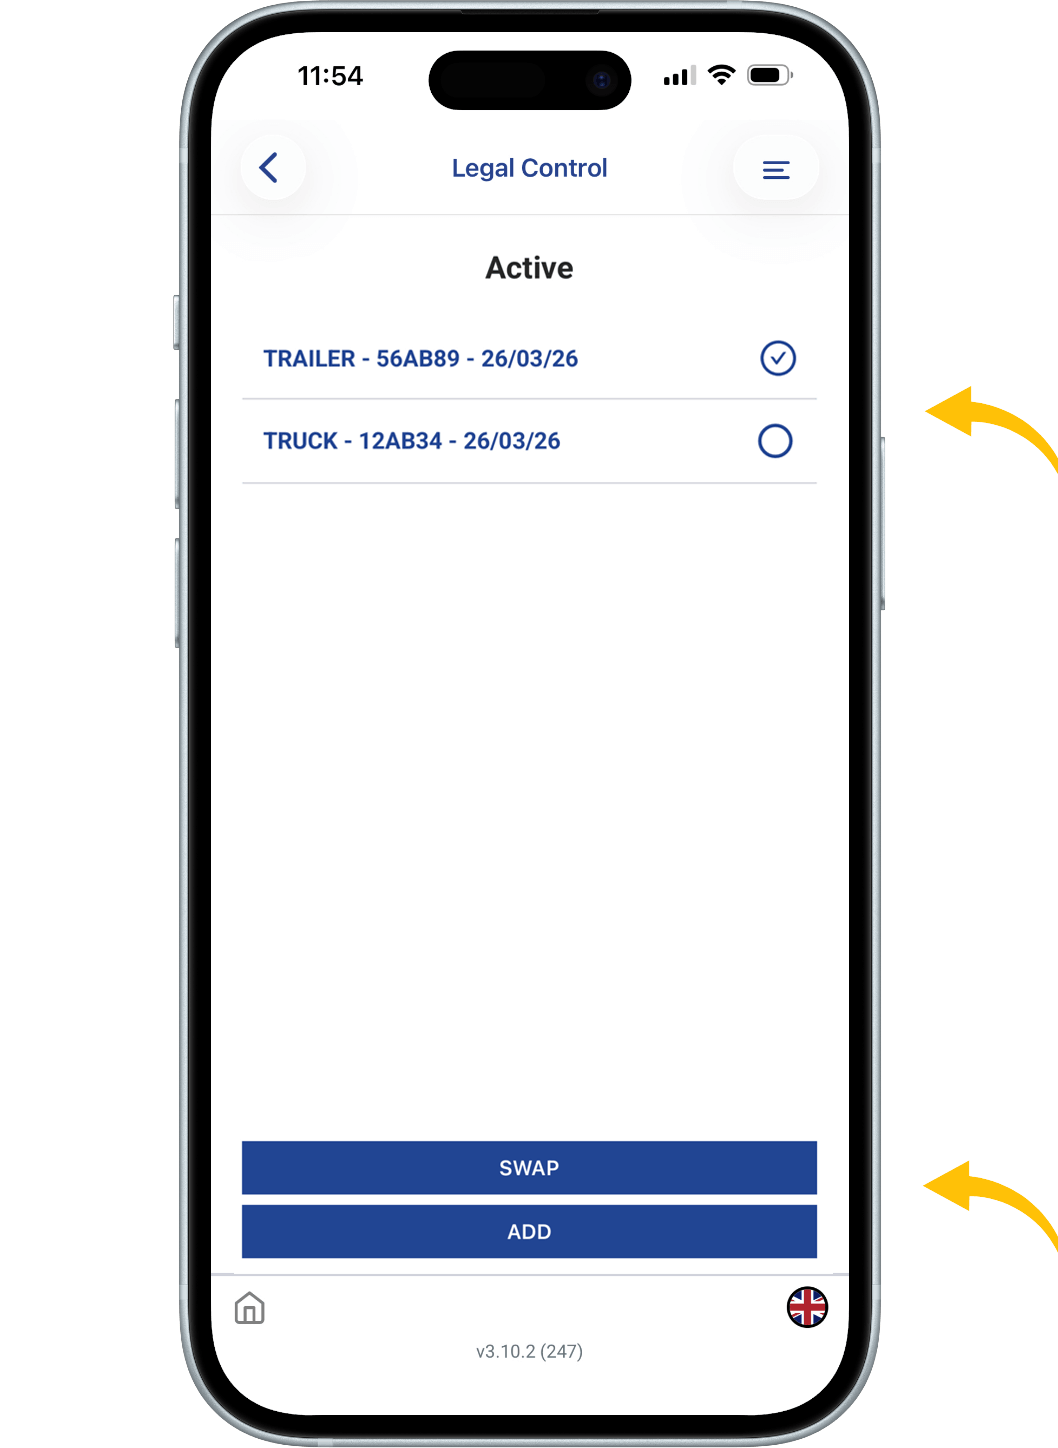
Step 12
The „Swap / Add” option allows you to modify your setup.
Swap:
First, check out the component you want to replace.
Then select the new component.
Follow the same steps as before (enter details and take photos).
Add:
Tap „Add”, select the component you want to add,
and follow the same steps.
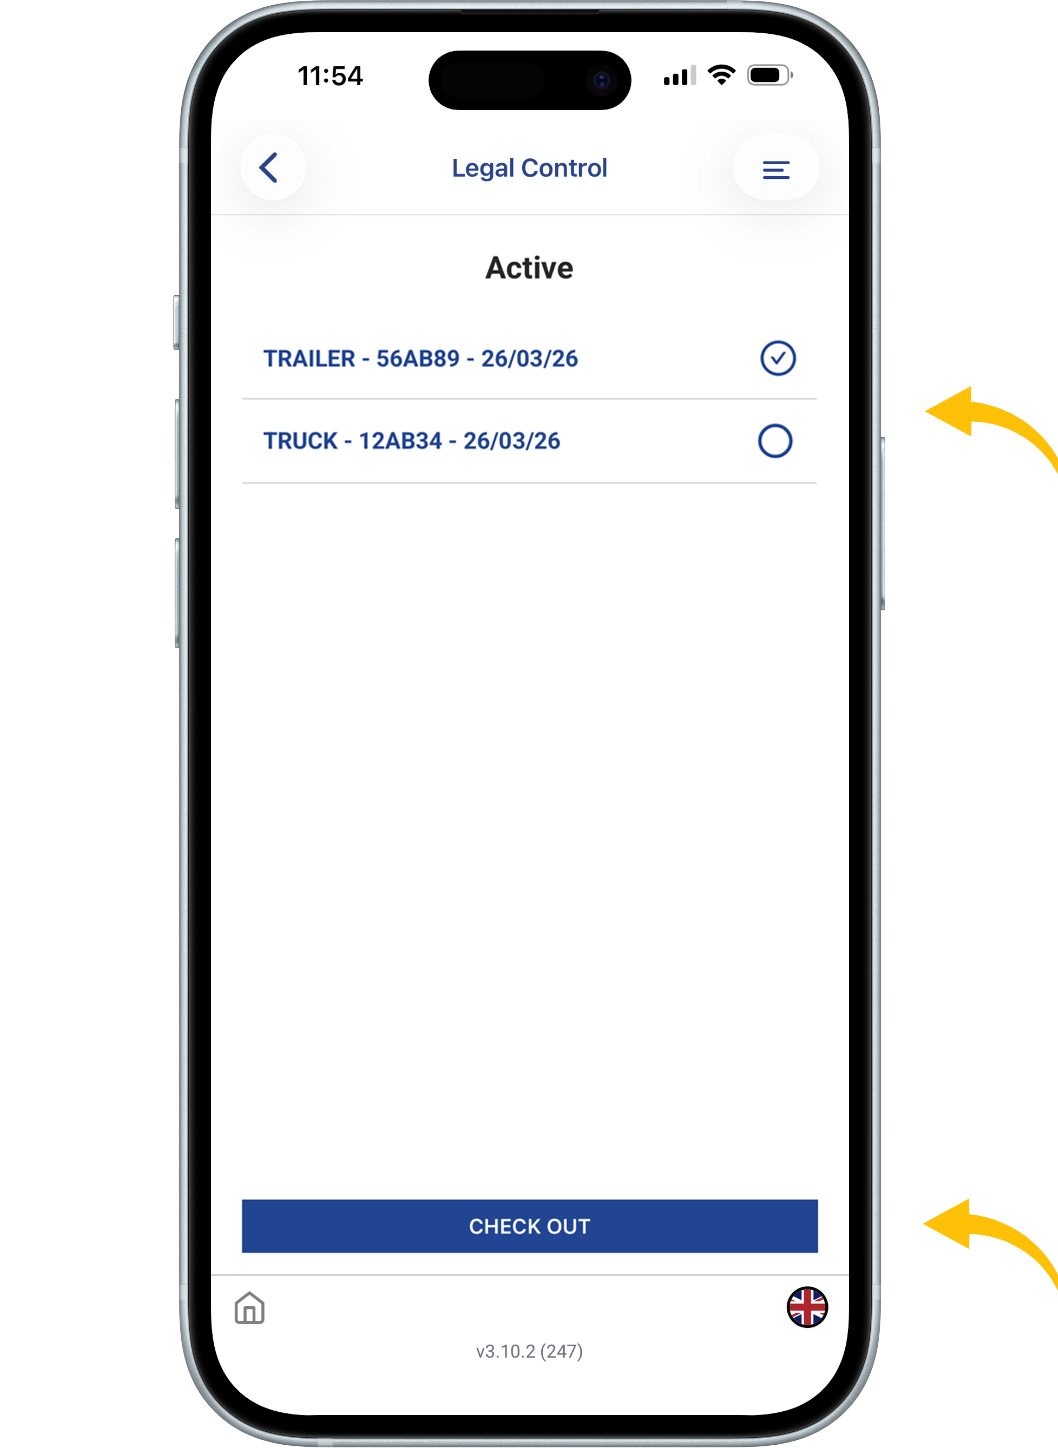
Step 13
The „Check Out” option is used to close a component.
Select the component you want to check out (one at a time).
Then tap „Check Out” at the bottom of the screen.
Follow the same steps as before (enter details and take photos).
![]()
This document is the property of Transport in Nood.
All rights reserved.
 Legal Pay
UNDER CONSTRUCTION
 UK VISA
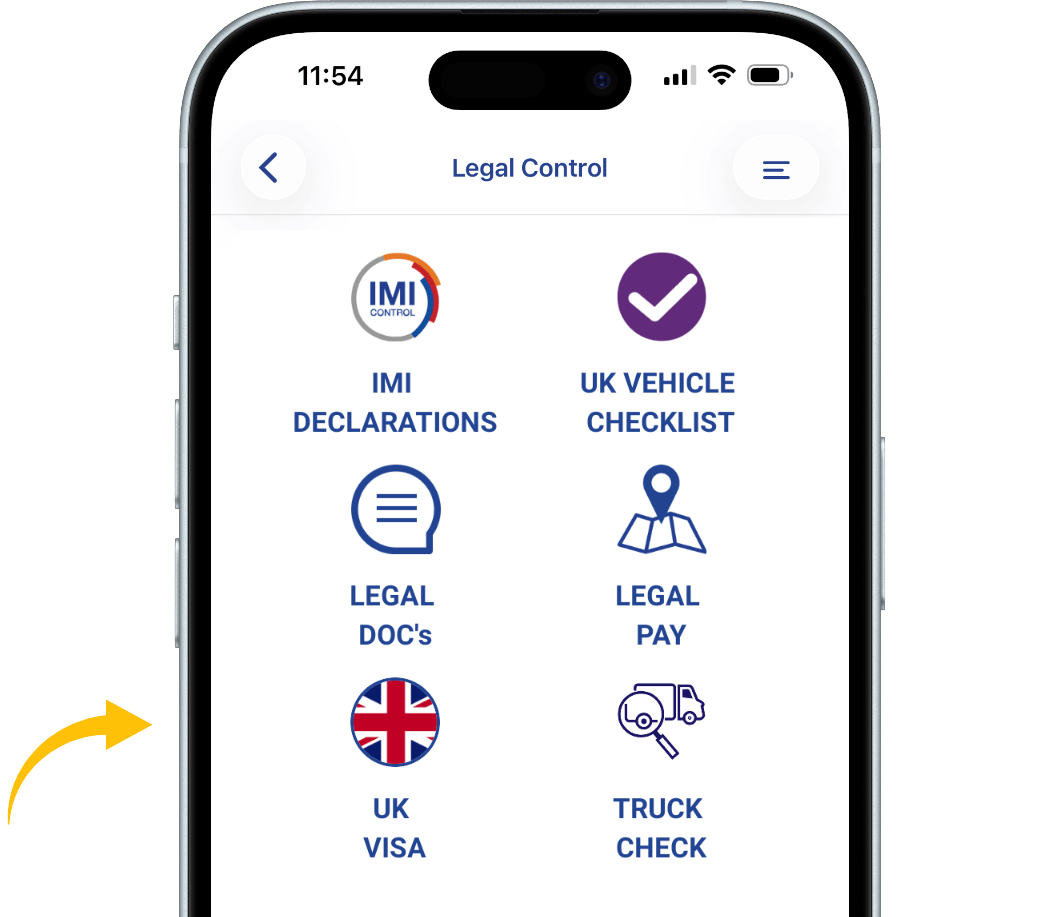
In Legal Control, choose UK VISA
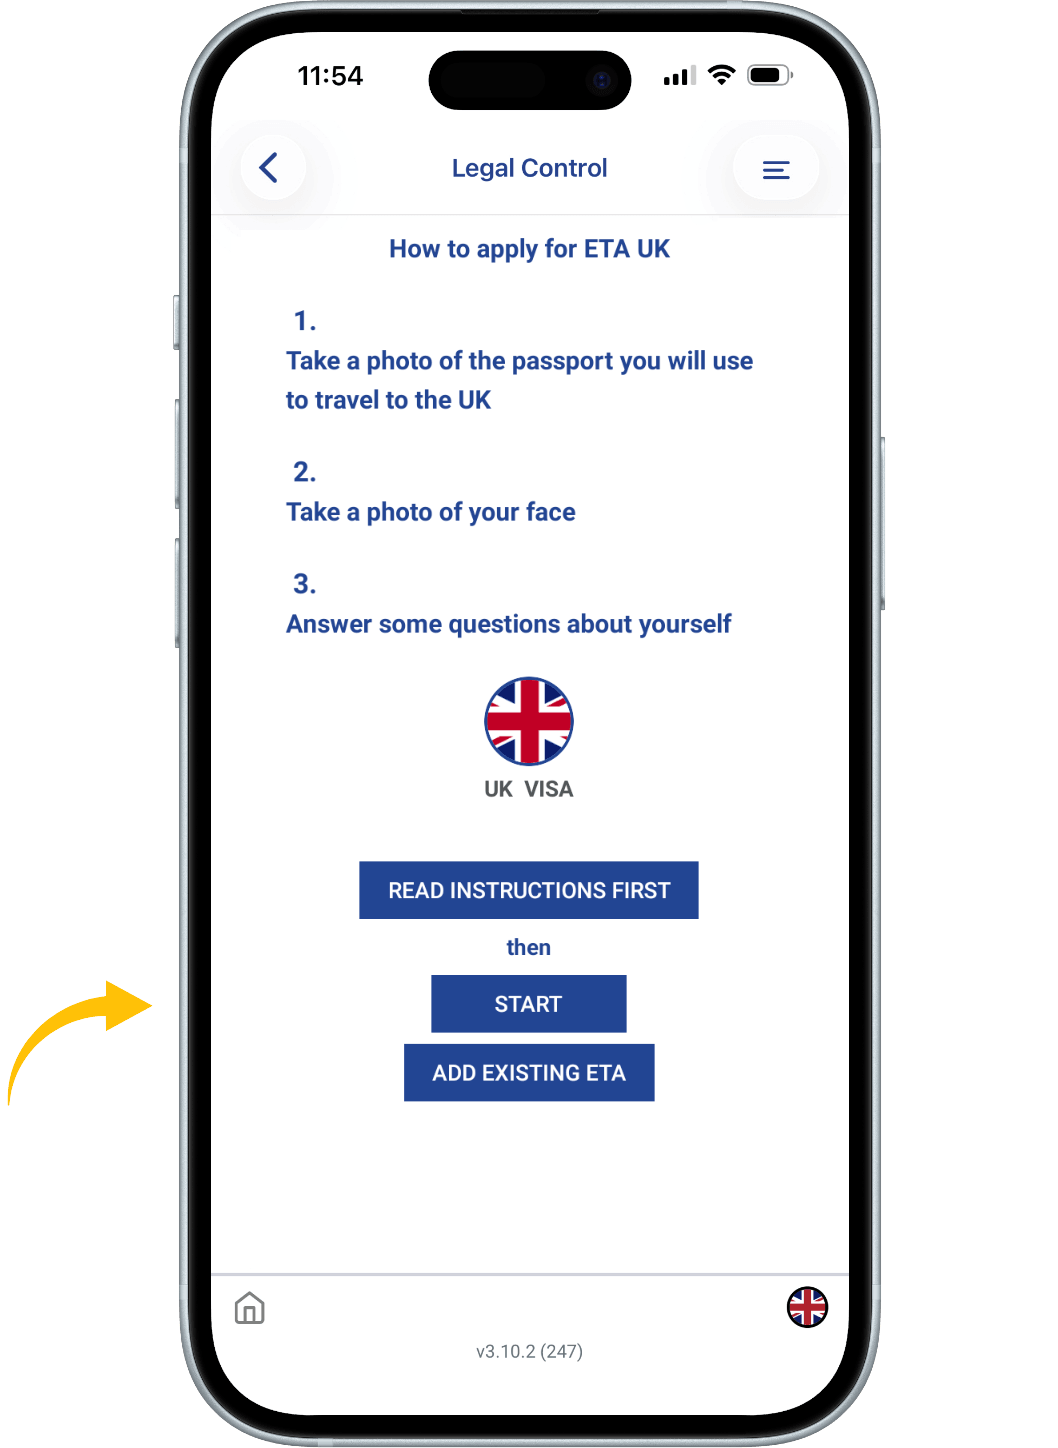
How to Apply for a UK ETA
(Electronic Travel Authorisation)
To apply for a UK ETA, follow
these steps:
- Upload or take a photo of the
passport you will use for travel to the UK. - Scan your face using your
device’s camera. - Upload or take a photo of
yourself. - Answer a few personal questions.
When ready, press START to begin.
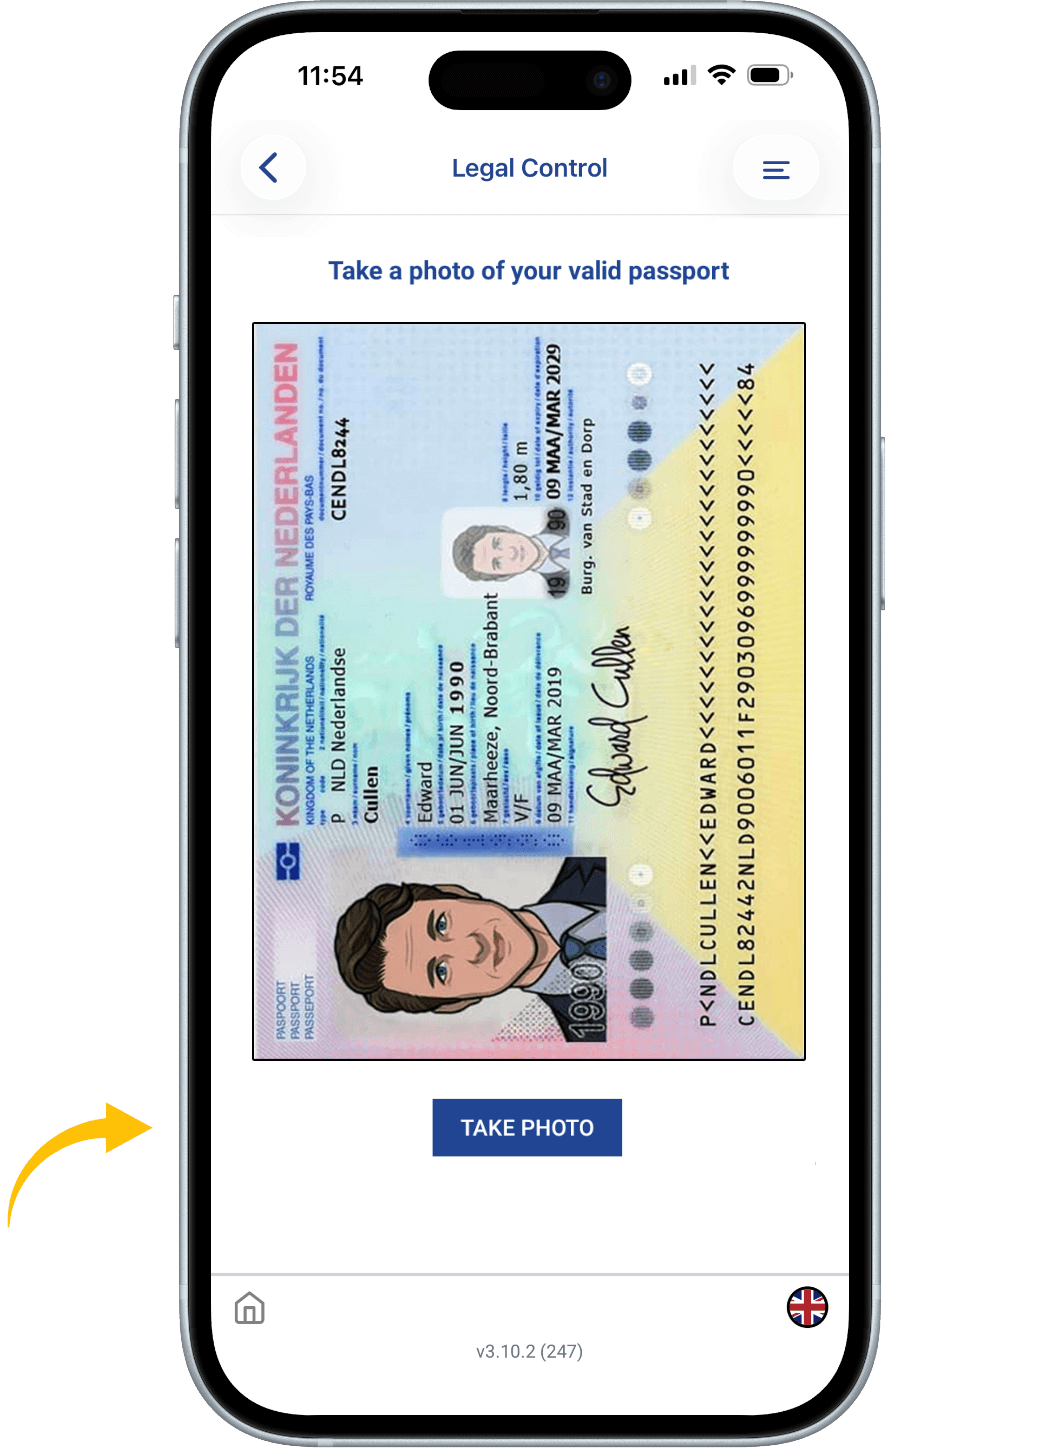
Passport Photo Upload
You must upload a photo of your
physical passport. This passport will
be linked to your ETA
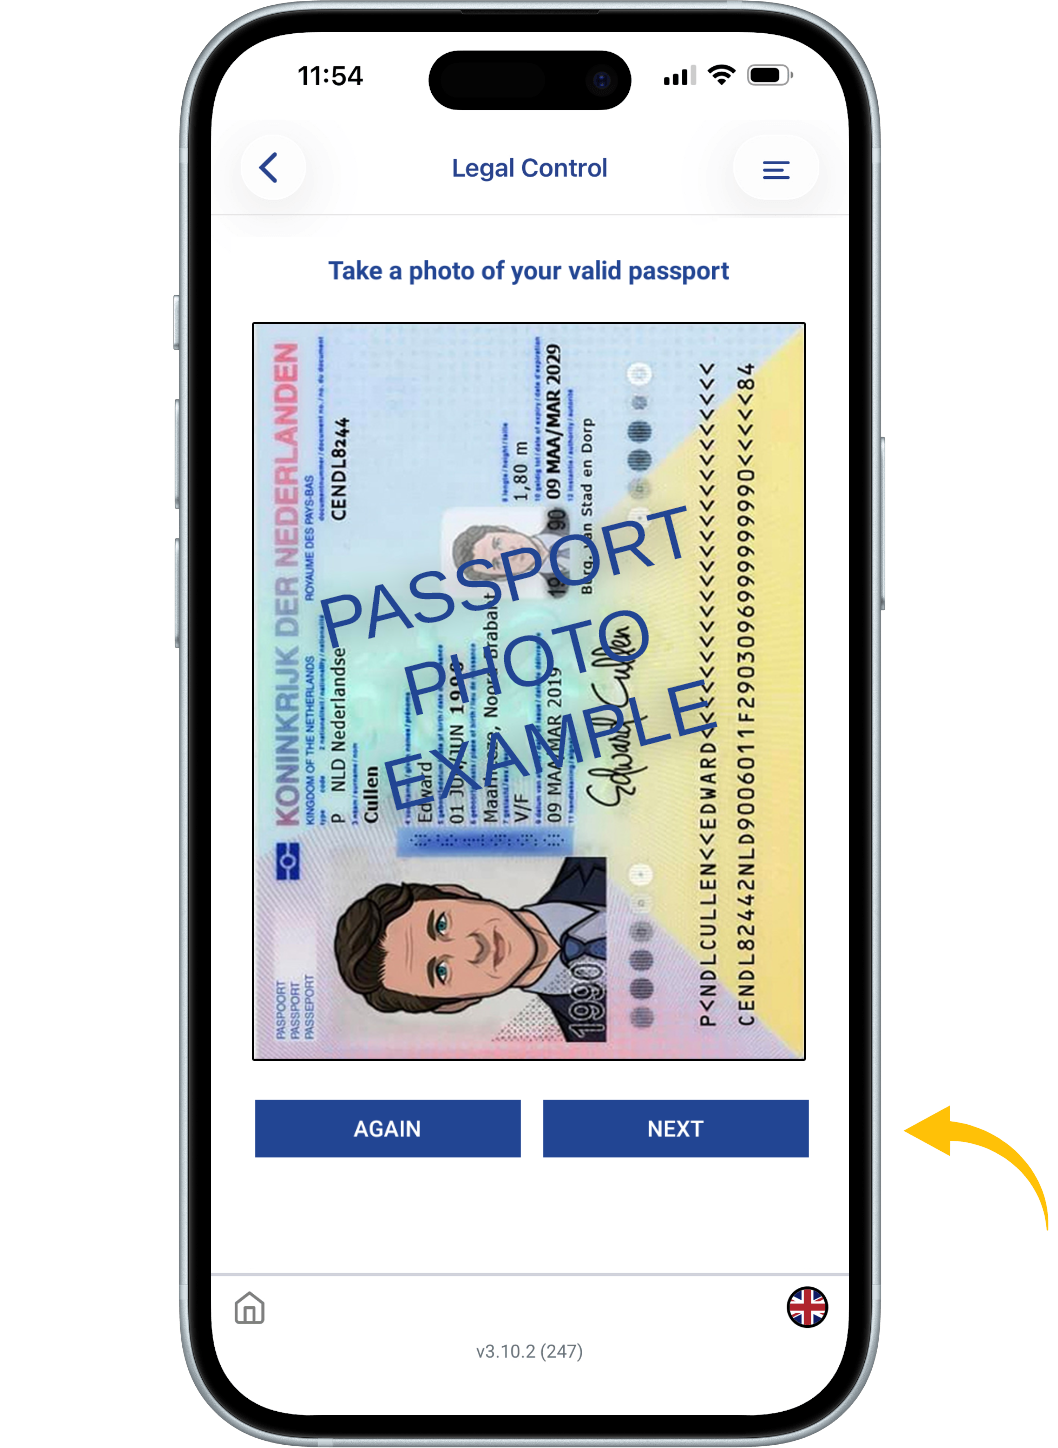
Photo Requirements:
Must be a photo of the actual passport (not a digital copy).
Must clearly show:
- All four corners of the personal
details page - Your personal information
- Your passport photo
- The machine-readable zone
(MRZ) — found at the bottom of the personal details page
The photo must be:
- Clear and in focus
- Free from glare or reflections
Press TAKE PHOTO, then NEXT when finished.
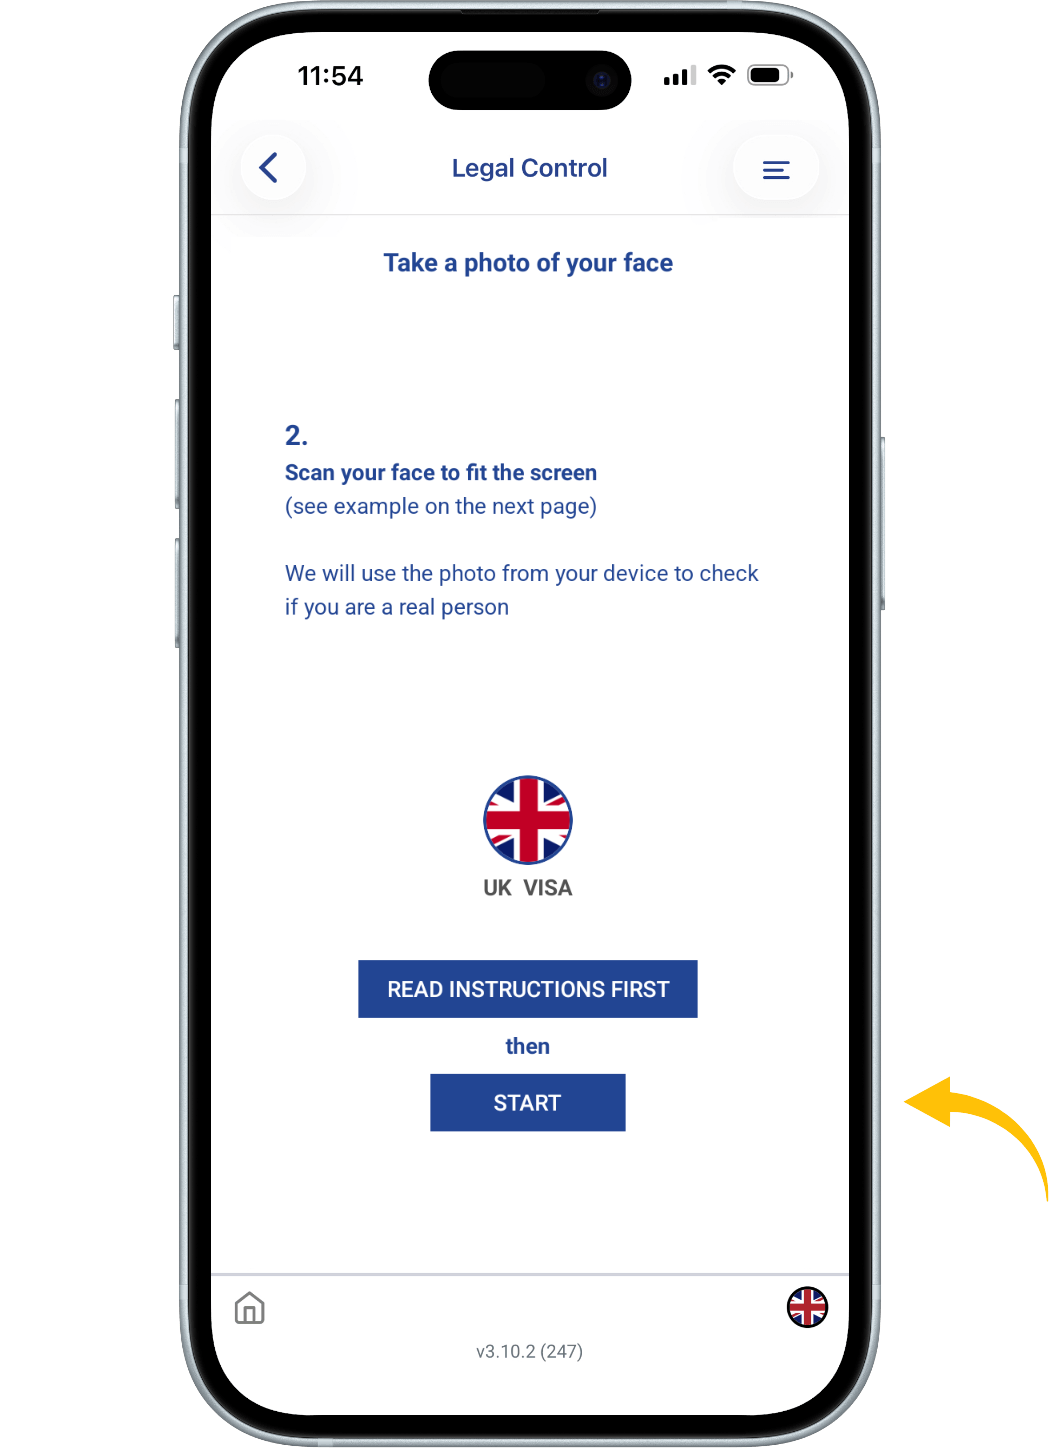
Face Scan
We need a photo of your face for
identity verification.
Make sure:
- The background is plain and light
- No objects or people are behind
you - Your head, shoulders, and upper body are visible
- Lighting is even (no shadows or
glare)
Press START to scan your face,
then TAKE A PHOTO.
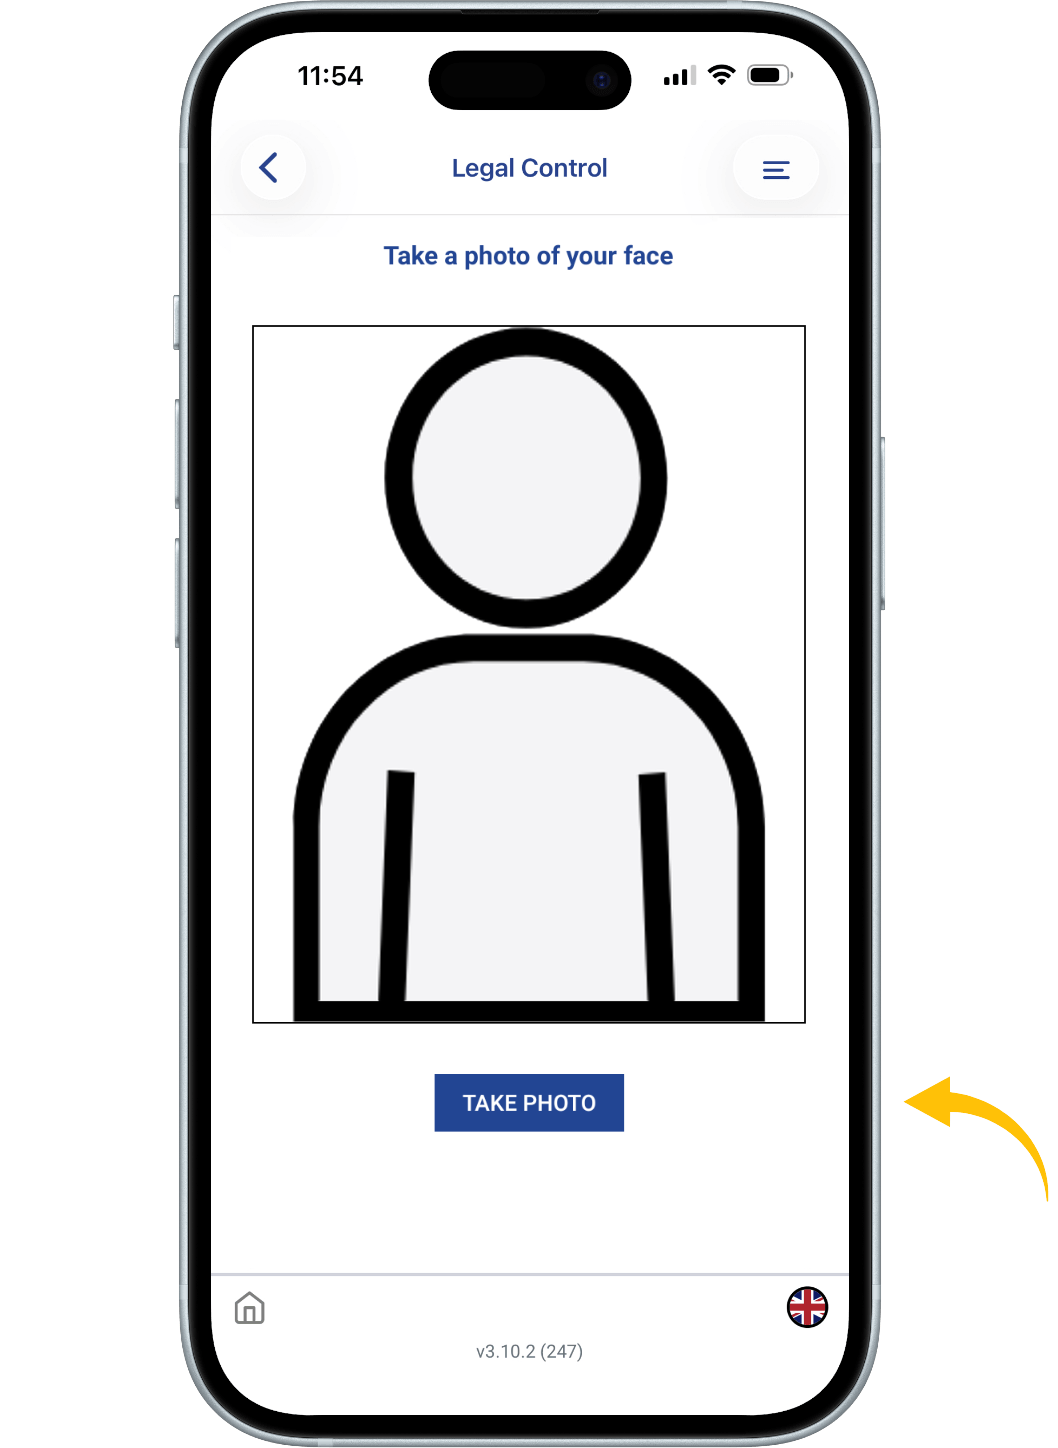
We need a photo of your face to
confirm your identity.
Make sure you have:
- a plain light background
- no objects or people behind you
- your head, shoulders and upper
body must be visible
You also need:
- even lighting
- no shadows or glare on your face or behind you
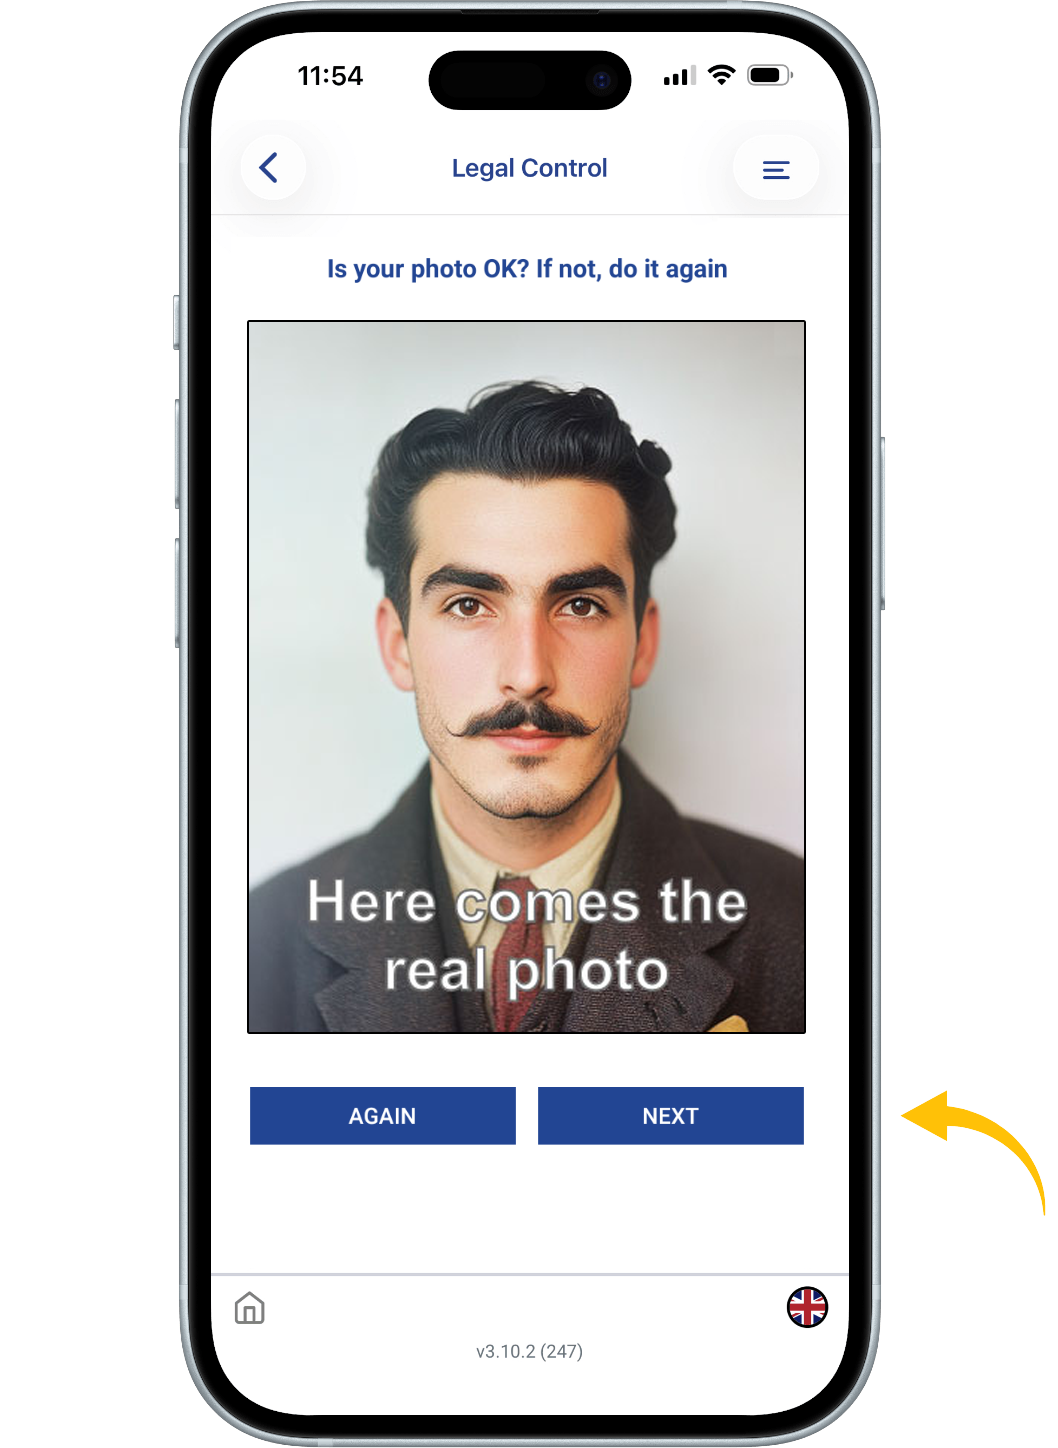
After uploading your photo press
NEXT and answer following questions.
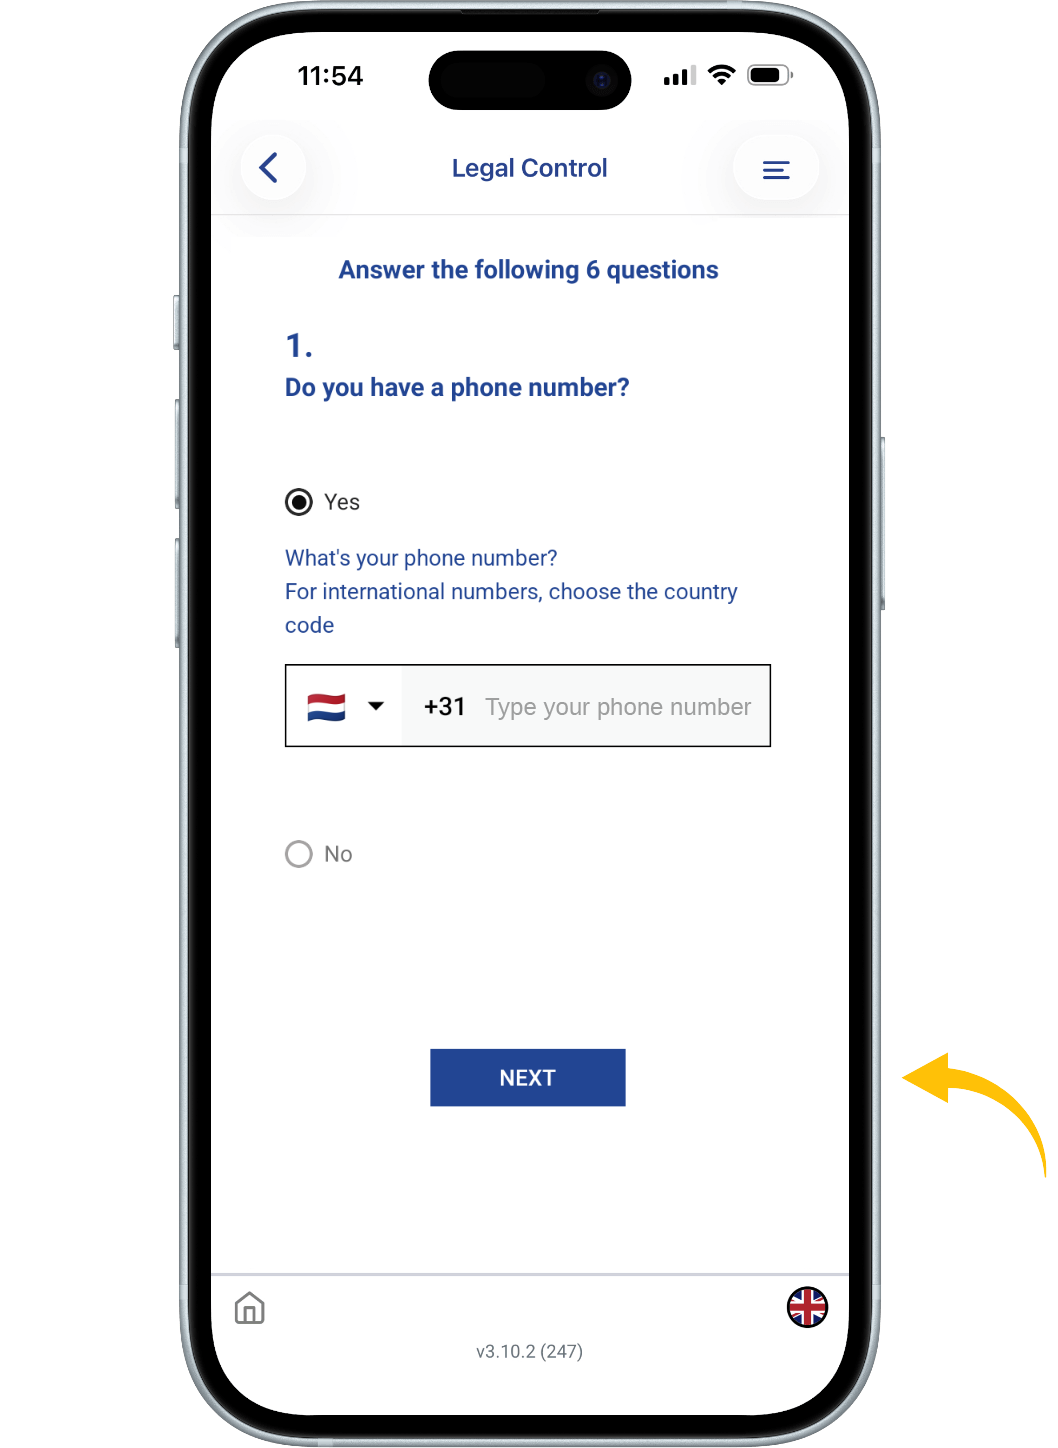
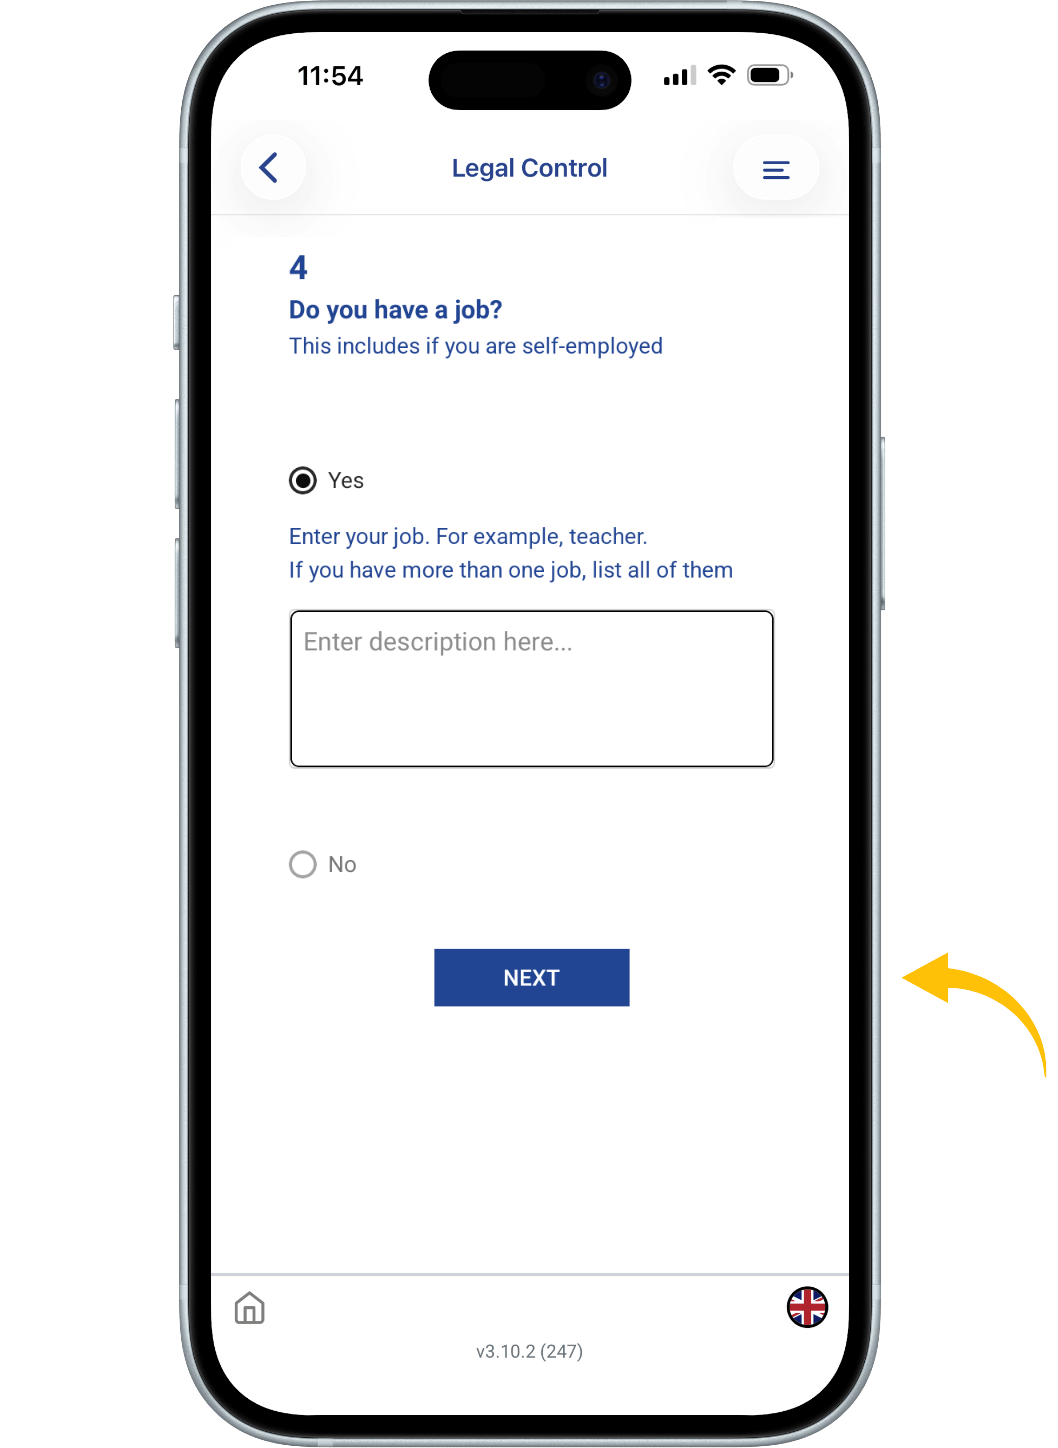
Answer following questions.
If your answer is YES
Add your phone number as
international one with country
code:
+39133457090
If your answer is NO. Then press NEXT.
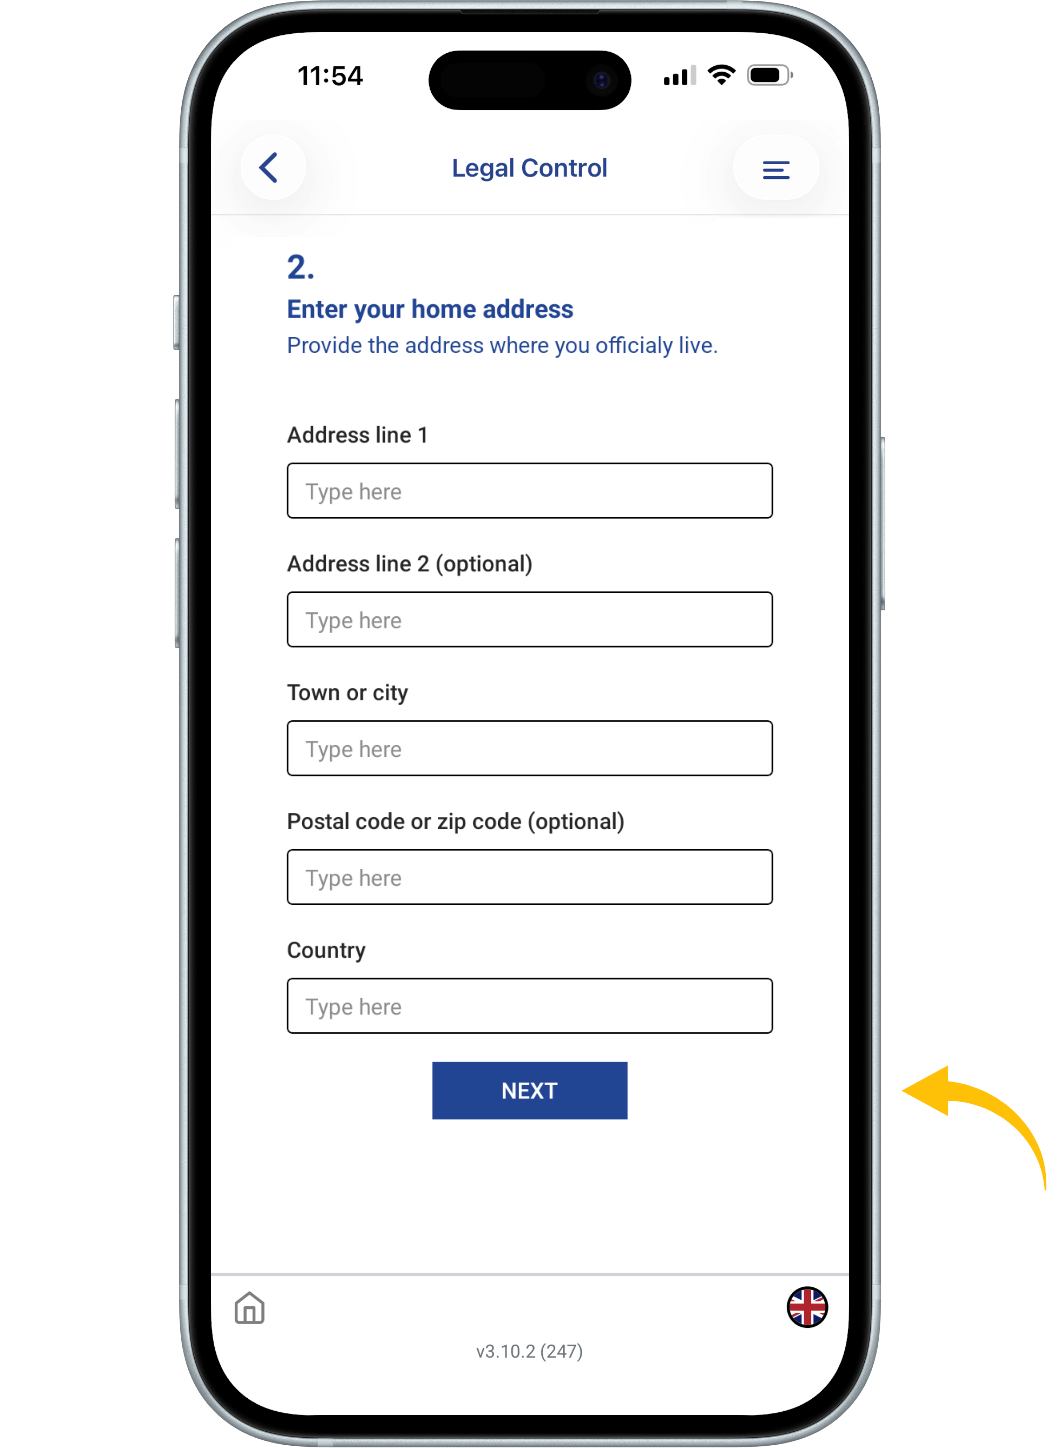
Provide Your Home Address
Fill in your current residential
address:
- Address Line 1
- Address Line 2 (optional)
- Address Line 3 (optional)
- Town or City
- Postal/ZIP Code (optional) Country
Then press NEXT.
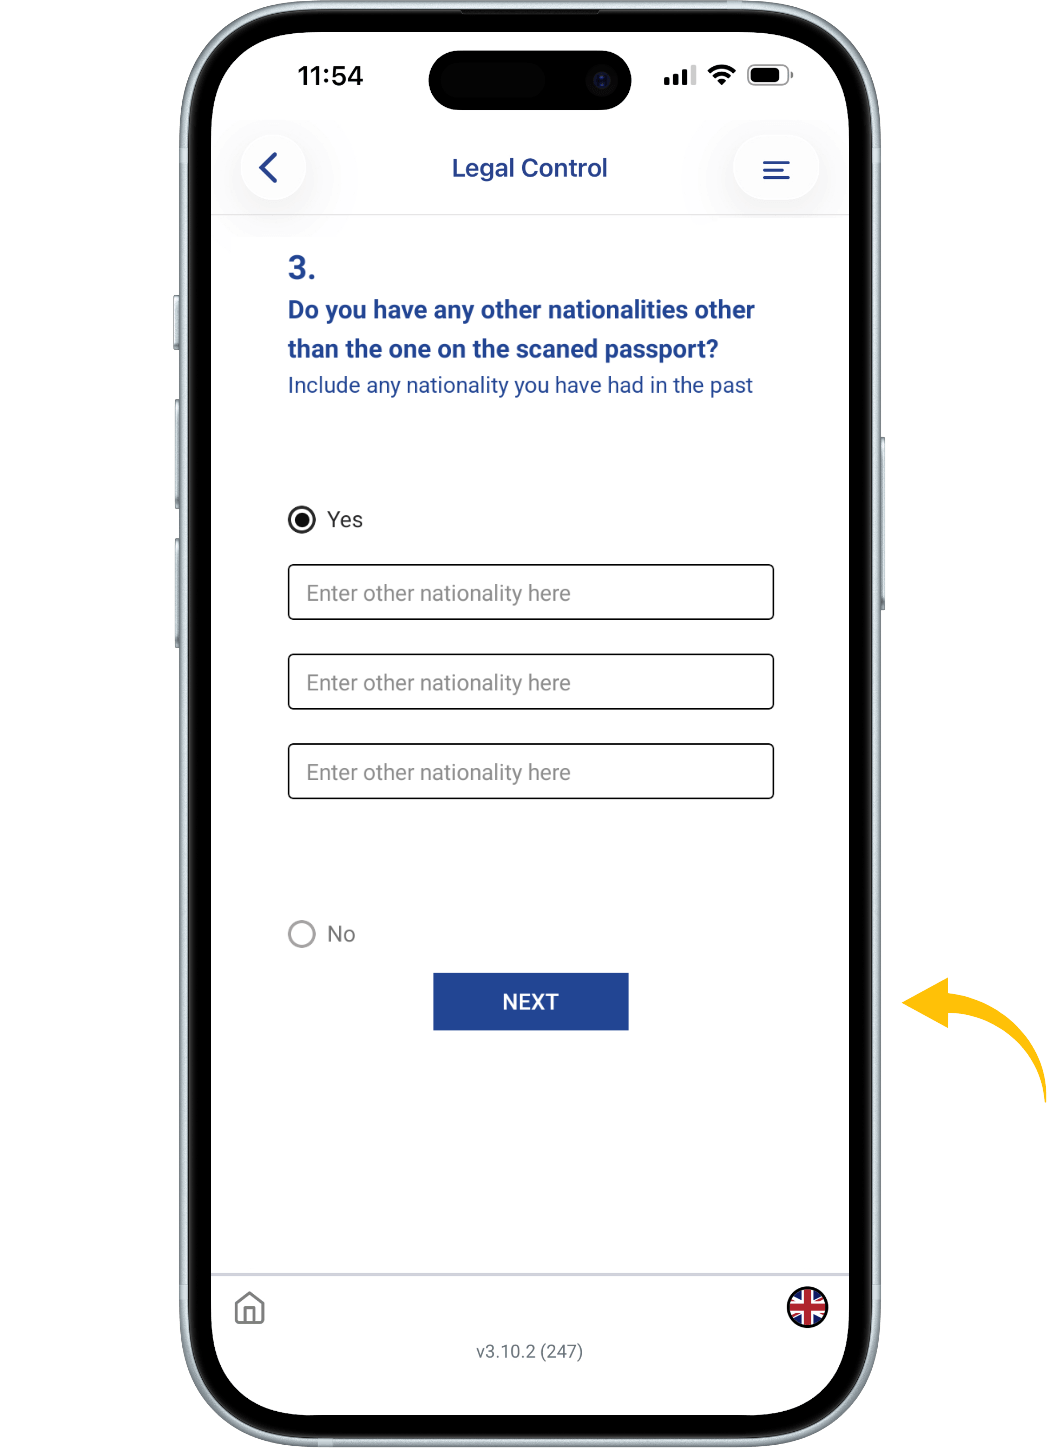
Additional Questions.
1. Do you have any other
nationalities (current or past)?
Yes / No
Then press NEXT.
Answer following questions.
Yes / No
Then press NEXT.
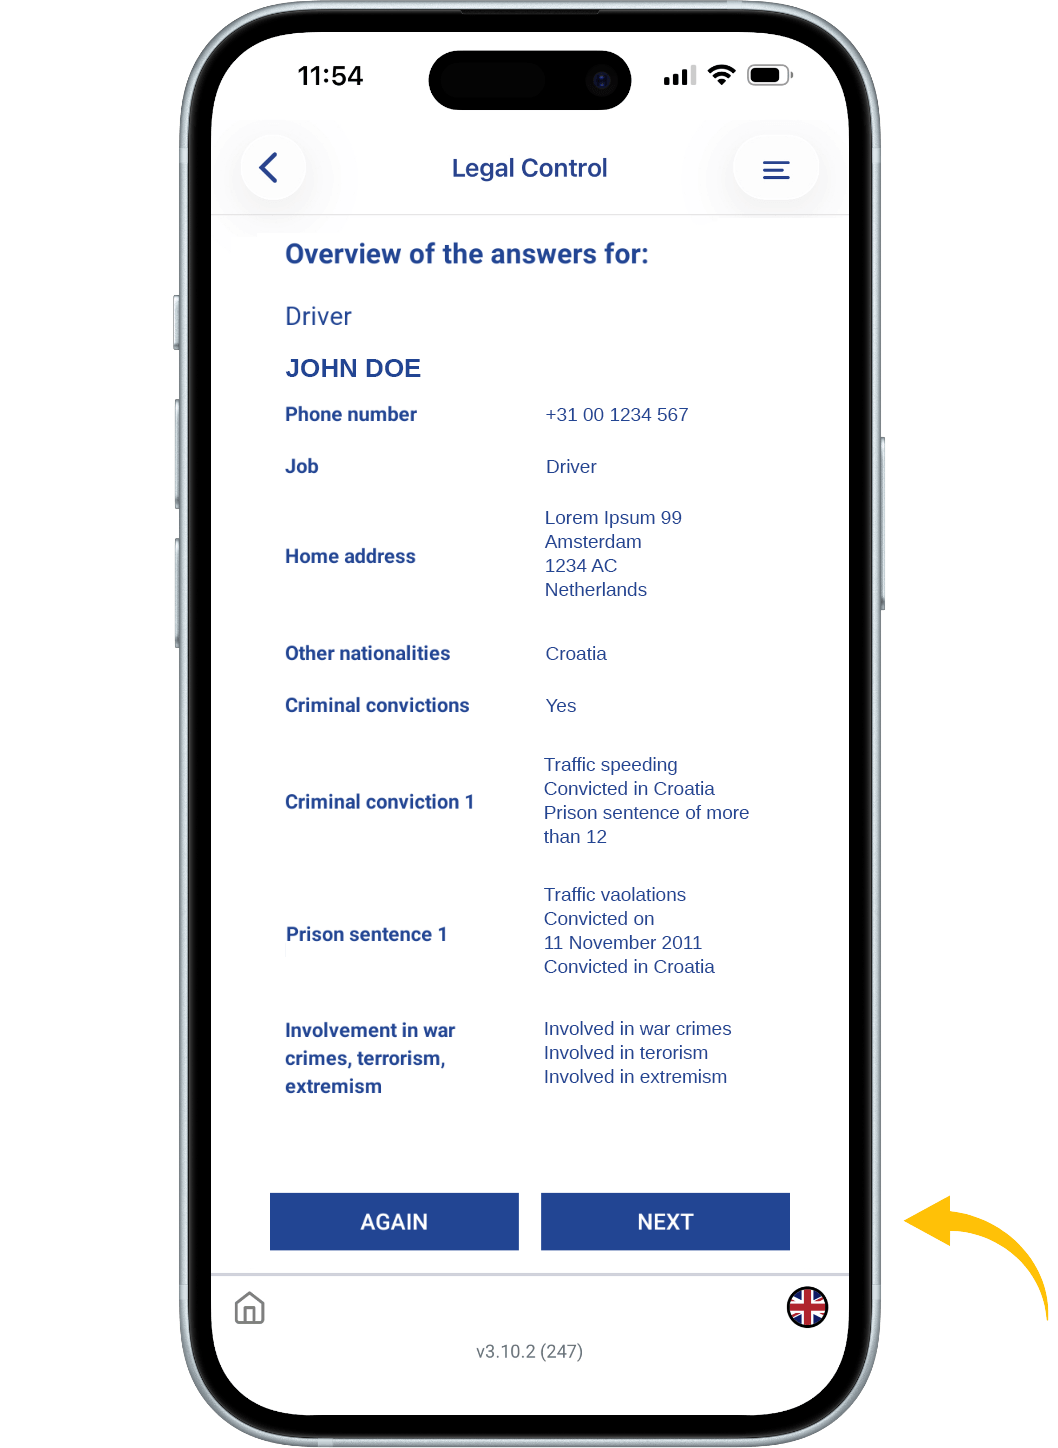
Check your answers and start again if
they are not correct.
Then press NEXT
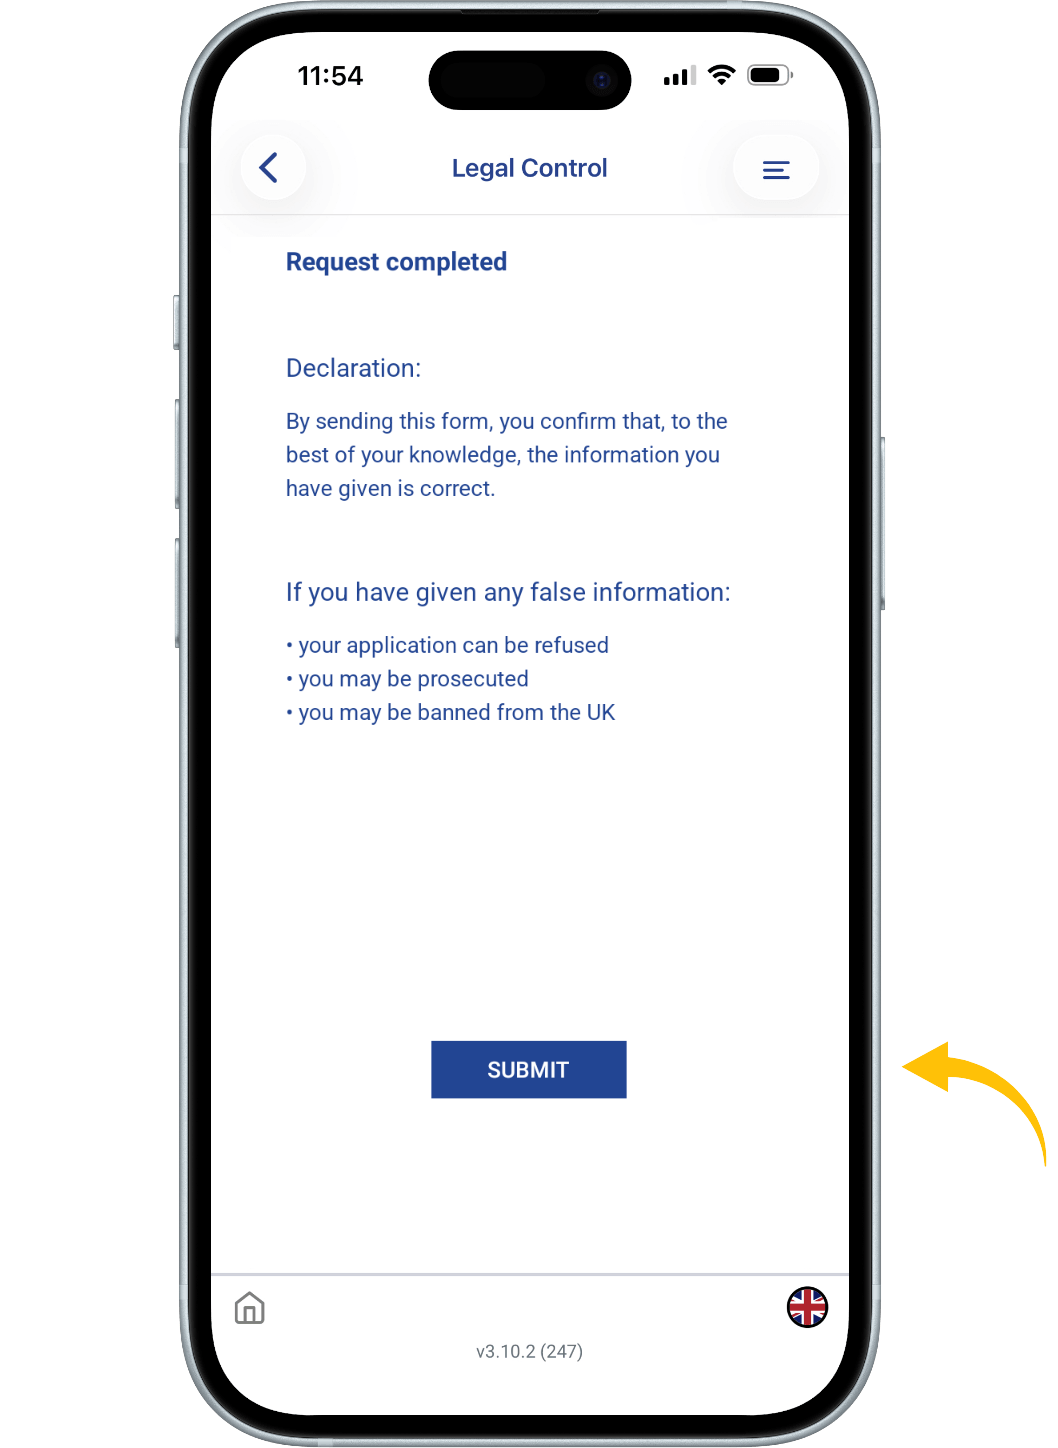
Declaration
By sending this application, you
confirm that, to the best of your
knowledge, the information you
have given is correct.
If you have given any false
information:
- your application can be refused
- you may be prosecuted
- you may be banned from the UK
If you are applying on behalf of
someone else you must have
confirmed with them that the application
is complete and correct.
Press SEND.
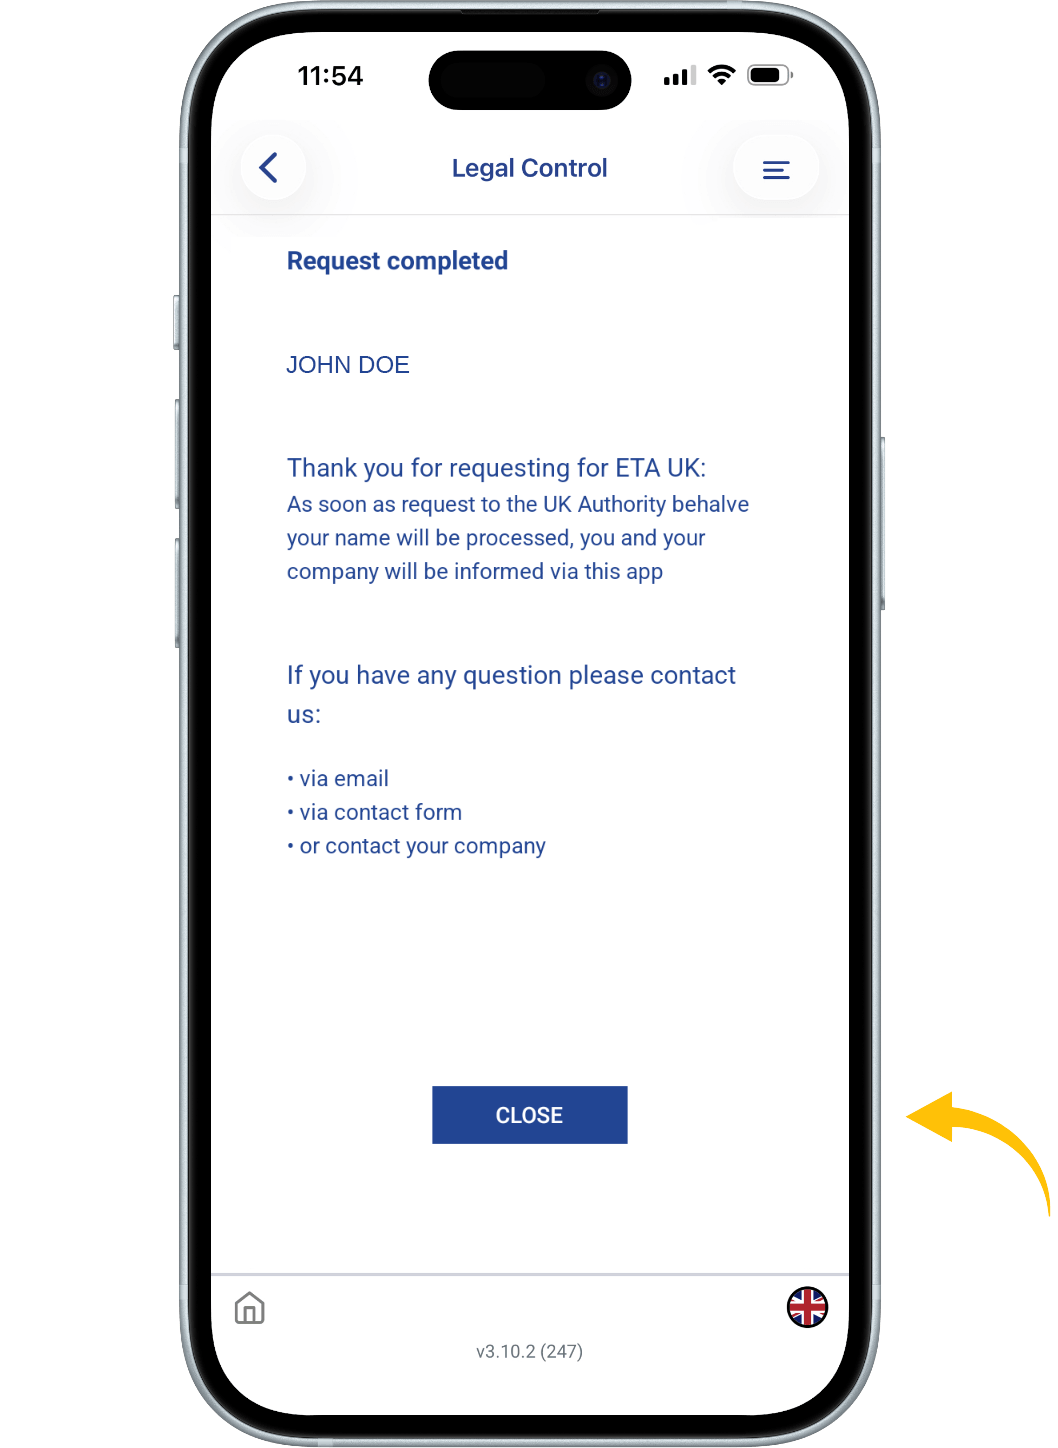
What happens next
We will send you notification (on
the media you choose (email,
contact form, via company).
When we have made a
decision on your ETA.
Allow up to 3 working days
(Monday to Friday) to get a
decision, but it may
arrive much sooner.
CLOSE and leave service
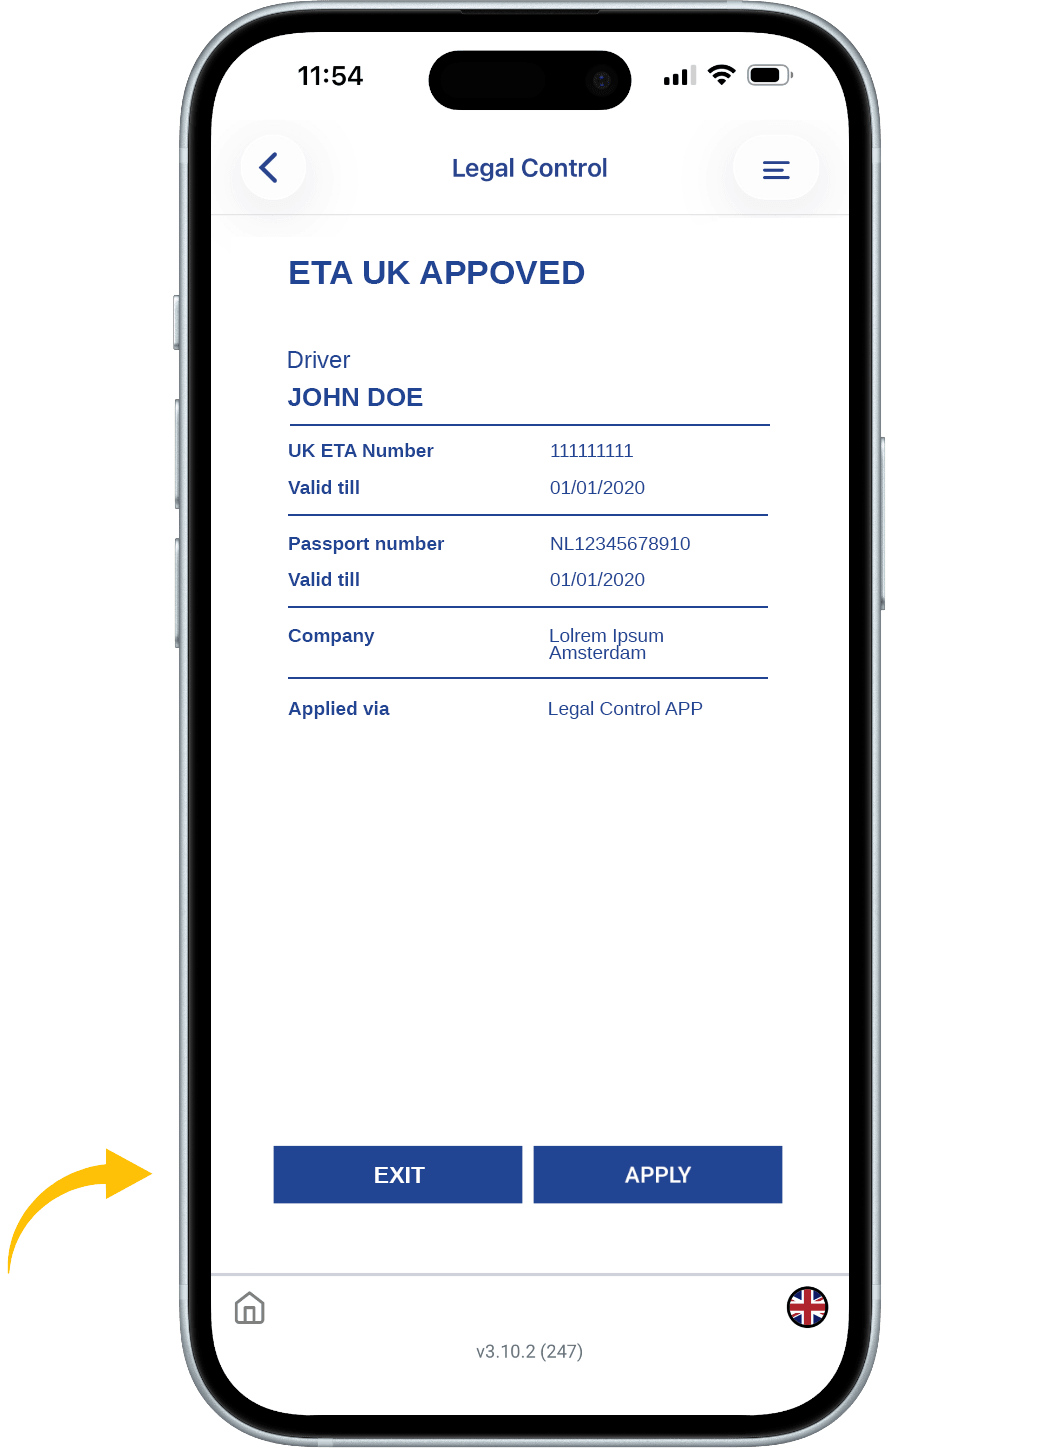
When you will get UK ETA, you
will get that kind of notification.
EXIT or APPLY again
![]()
This document is the property of Transport in Nood.
All rights reserved.