How to make a CRM account?
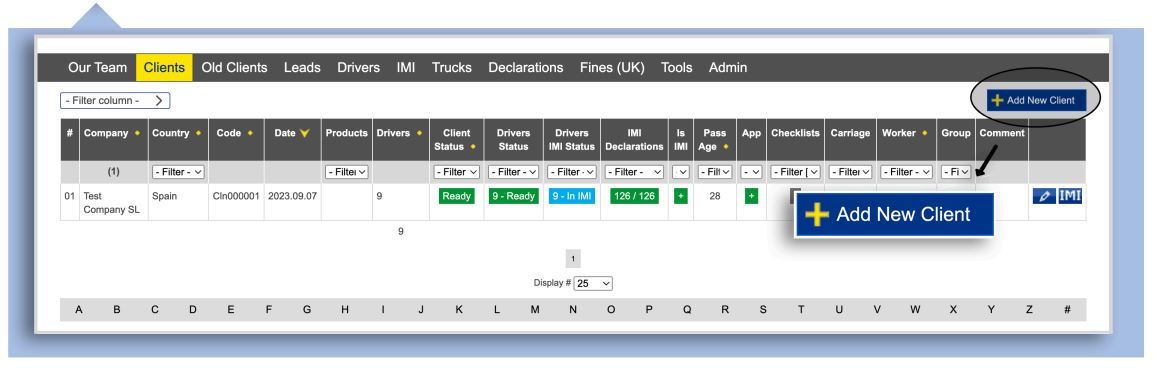
- After you are logged in you will see the admin side of the CRM. Go to clients. Now you will see the overview of all your clients.
- To start making an account for your clients, press on the + Add new client in the top right corner.
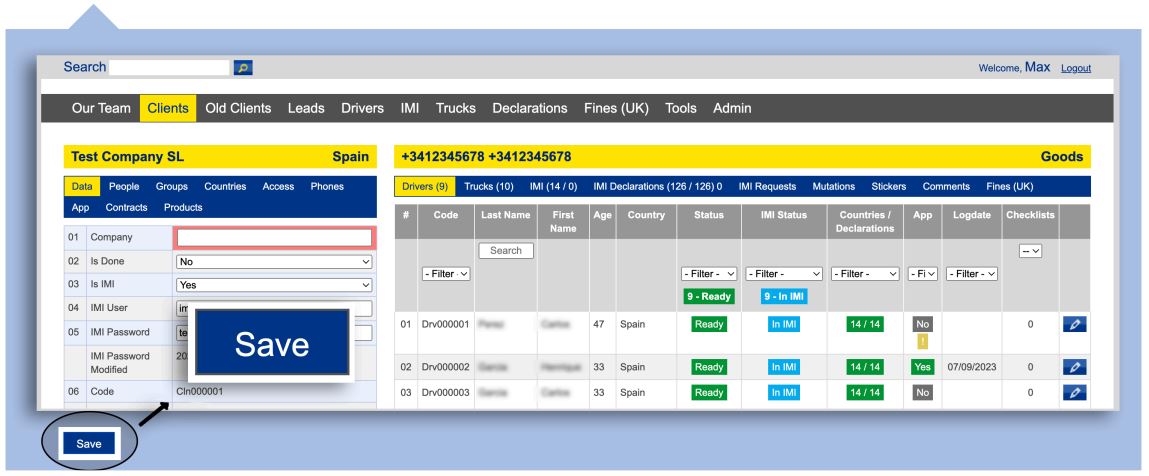
- Once you pressed the + Add new clients button, you can start filling in the company details of your client. Please make sure that all the red fields are filled in.
- Once done with filling everything in, press save. The client is now created.
What to remember when making a new CRM-account?
- Phone numbers should always be filled in with the + and a landcode. Without this we are unable to make specific features of the portal work. If you see a client that has filled in the phone number incorrectly, please change this.
- If a client has sub-companies, it is not possible to use the same email address for every account to log in. In this case the client should provide multiple email addresses.
- Make sure the selection on line 3 (is IMI) is always set to yes, otherwise we won’t be able to make the IMI declarations.
- On line 28, you have three different choices: Goods, Passengers and Goods + Passengers.
You should only select Goods if the company in question only transports goods.
If the company in question does not carry out transport but specializes in passenger transport, choose Passengers.
If the company in question is engaged in both transport and passenger transport, choose Goods + Passengers. - Don’t forget to save.
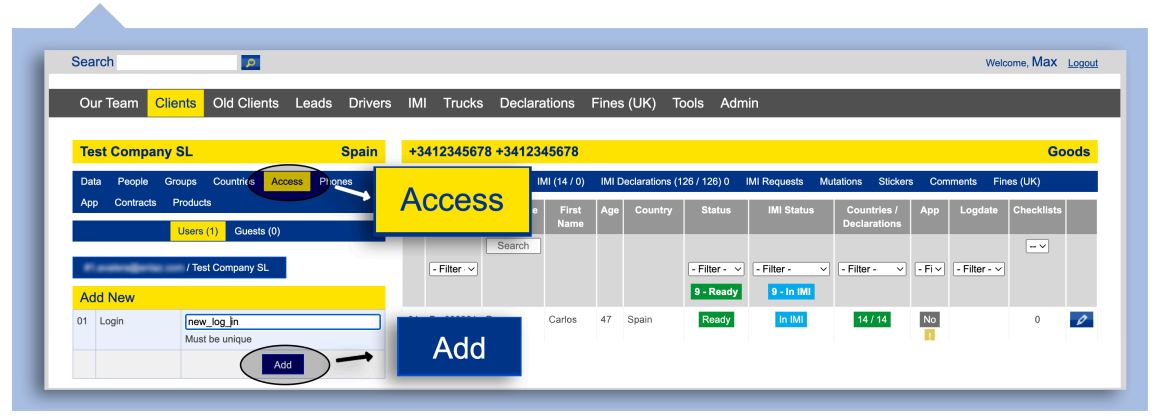
Where to find the login details of the client?
- Open the clients account in your own portal.
- When opened, you will see a few options on the top left.
Choose the access button. - When opened, you will see the email filled in by the client and/or you. Please click on add to create the login.
- The login can be seen by clicking on the email address shown.
- Please do not provide the login details through email, always call the client. This is due to the GDPR rules.
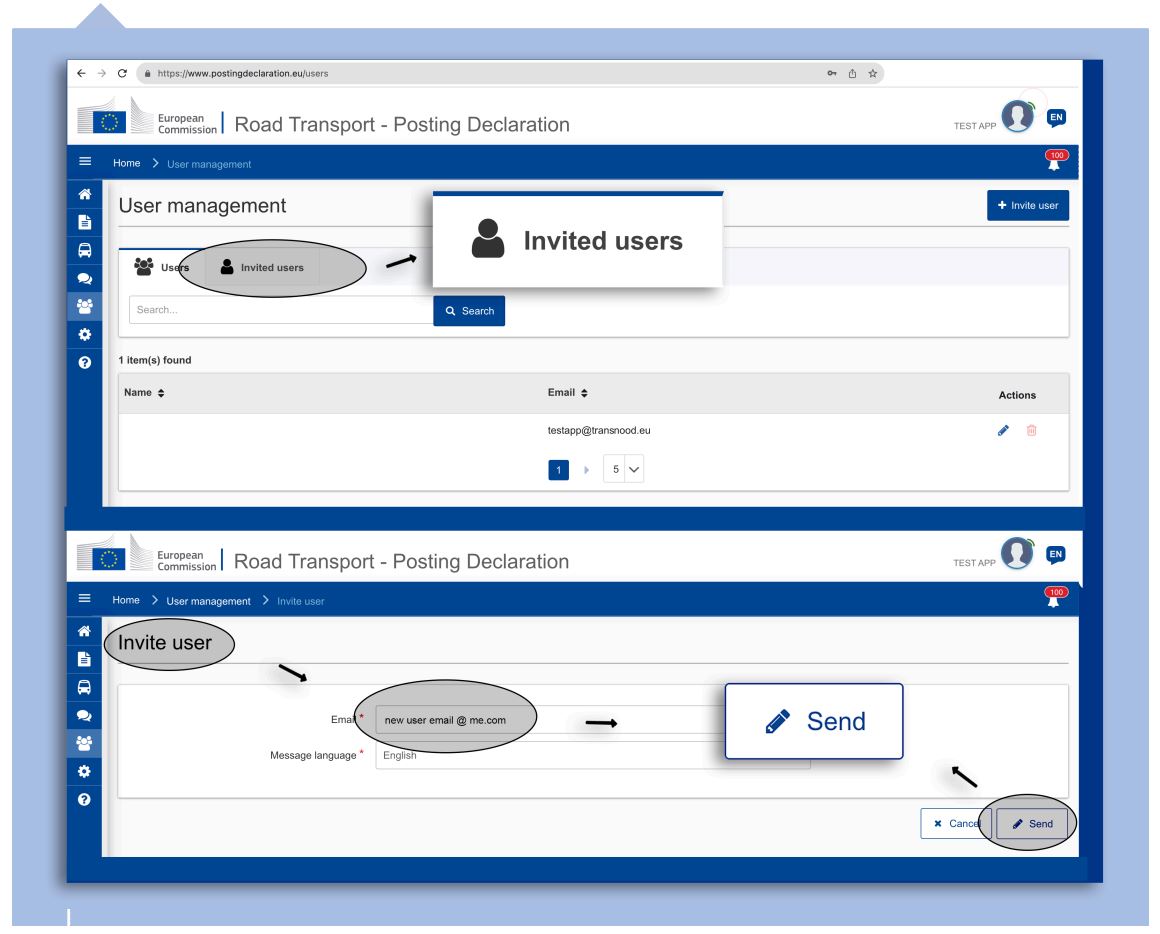
How your client manages account?
Now that the client has received their login details, they can fill out the remaining part of their account:
- Company and Persons details
Choosing countries
Please ask the client to select the countries they would like to receive the declarations for. The client can do this by ticking the boxes and press save.

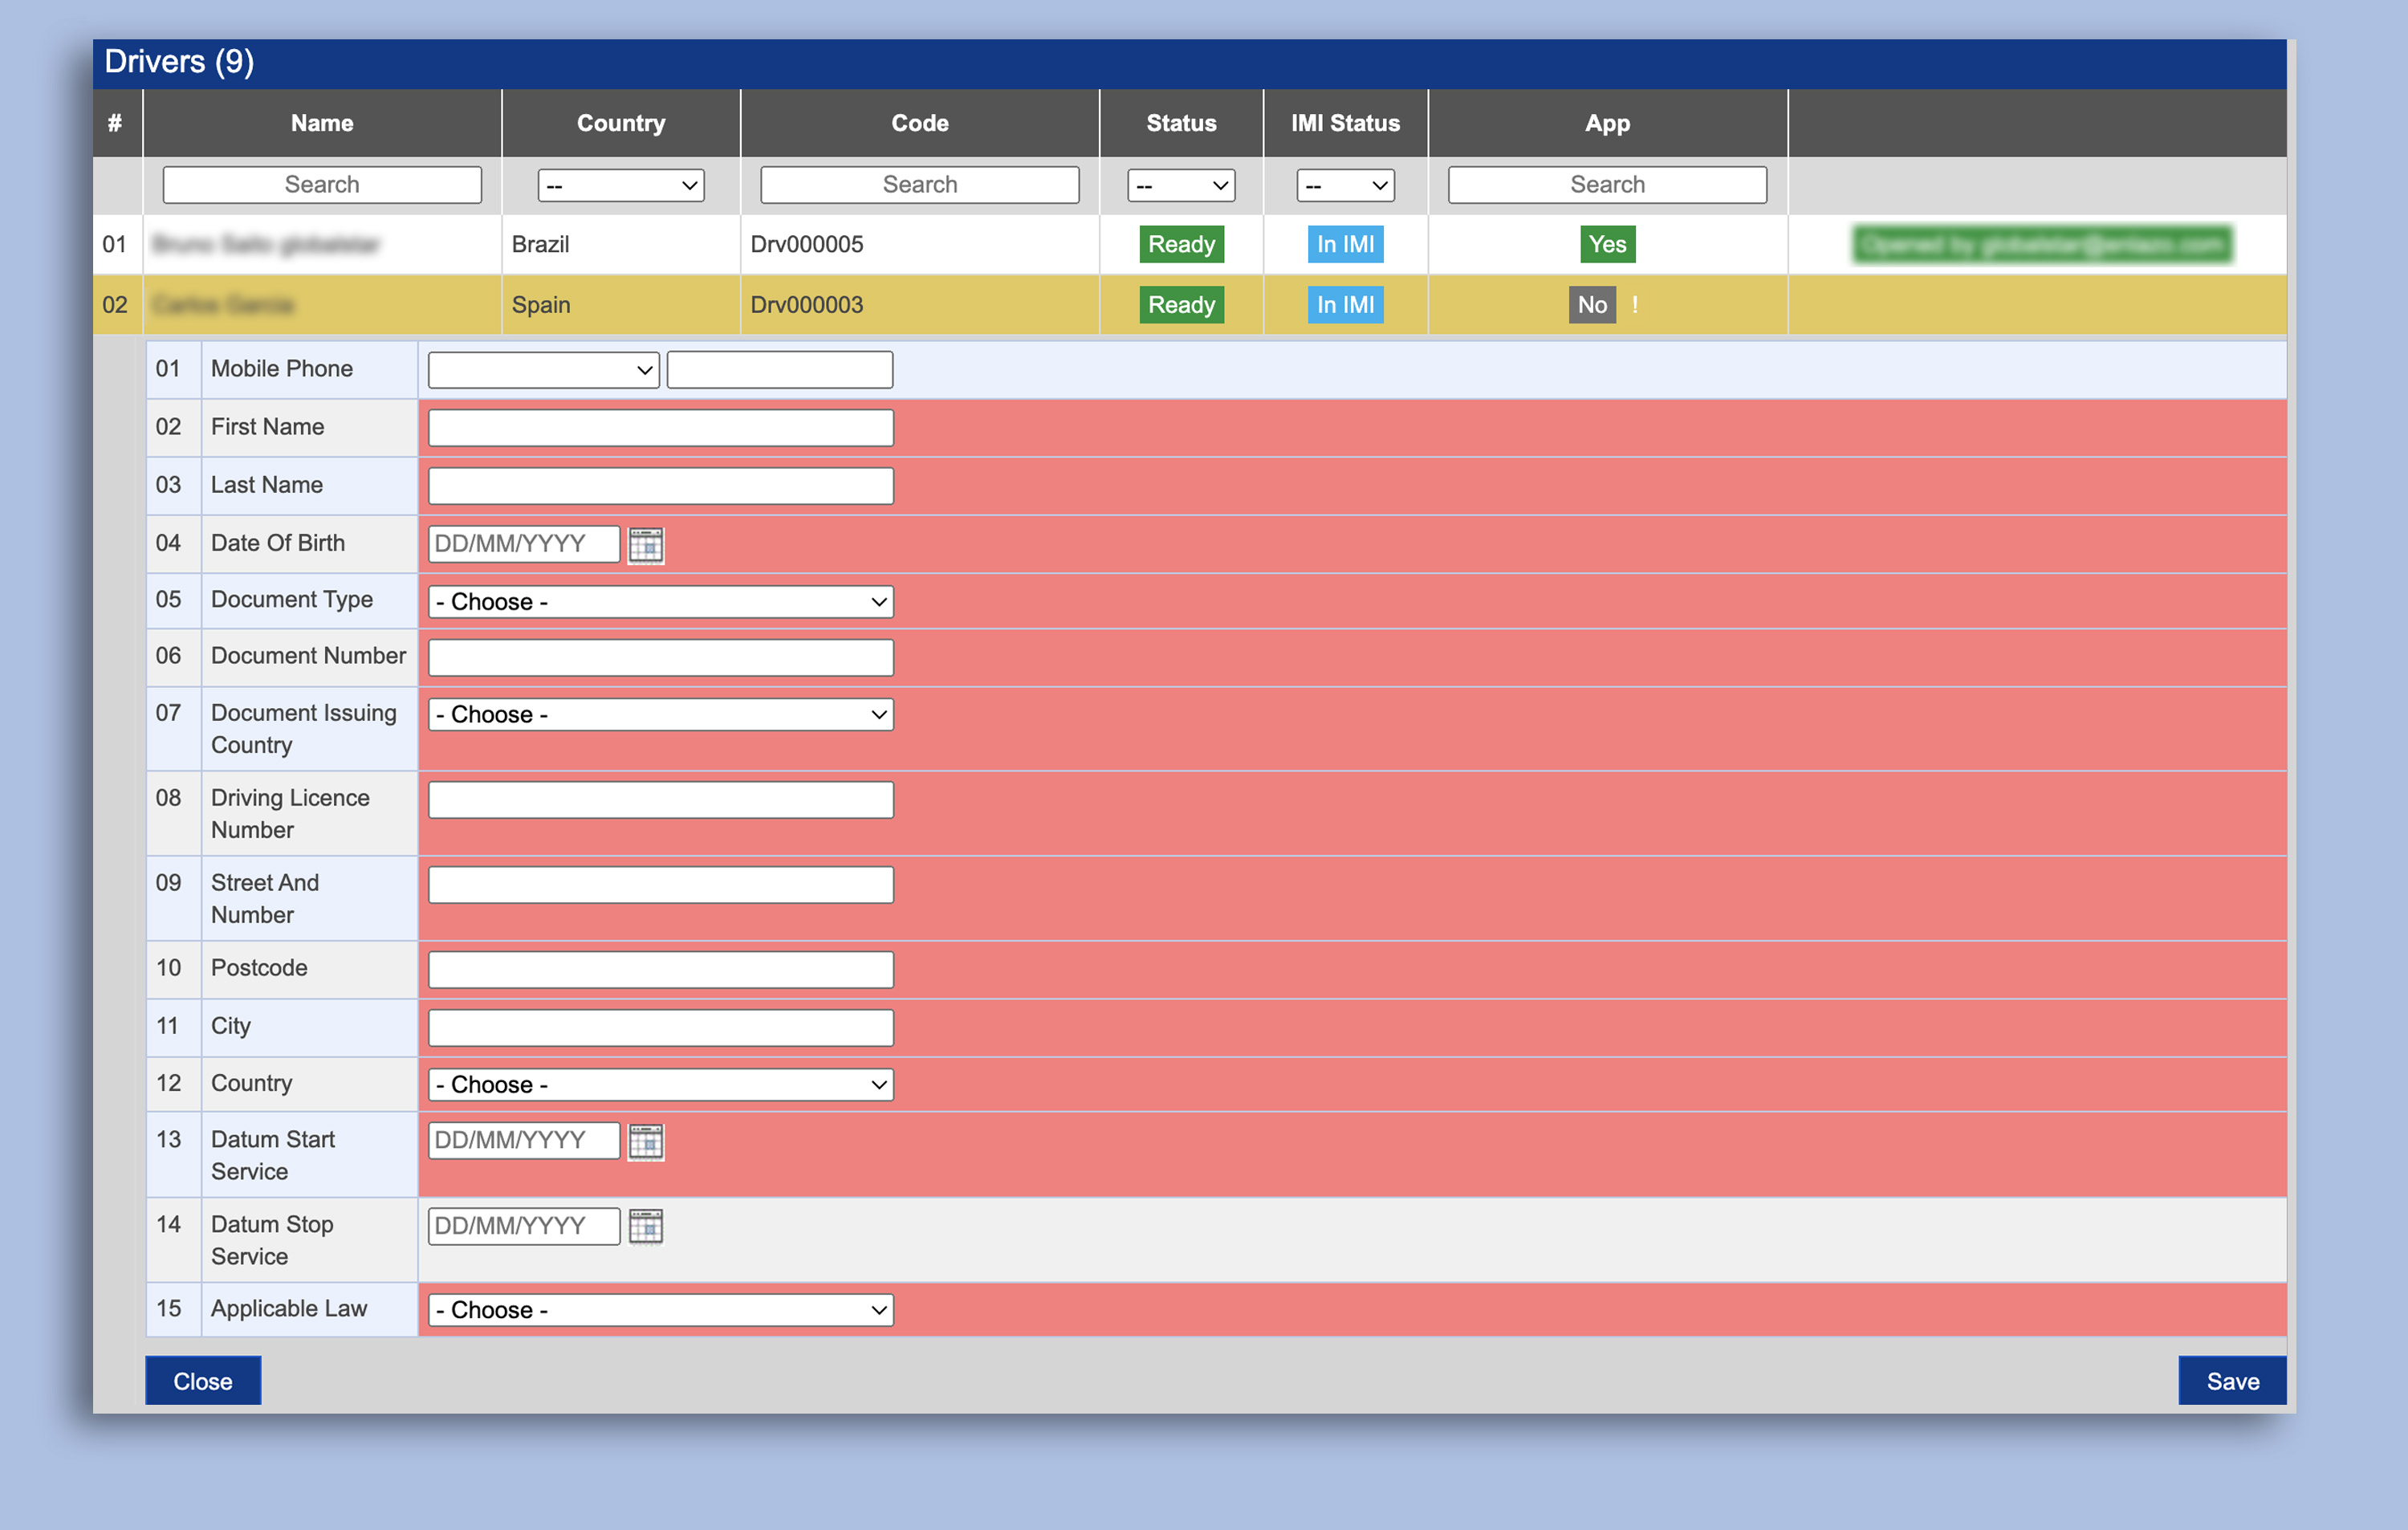
How to correctly register drivers?
The client can register drivers by adding them into the system. They can do this by following the steps down below:
- The client chooses IMI on the top of the screen. After this they have to scroll down until they meet the heading Drivers.
- A new driver can be added by clicking the blue button Click here to add a new driver.
- The client now sees a number of red fields in front of him, these need to be filled in accurately.
- When it is all filled in and the client does not see any red fields anymore, the client presses save.
Note that if the client would like to make use of the app, the mobile phone number of the driver is filled in. This includes choosing the right landcode.
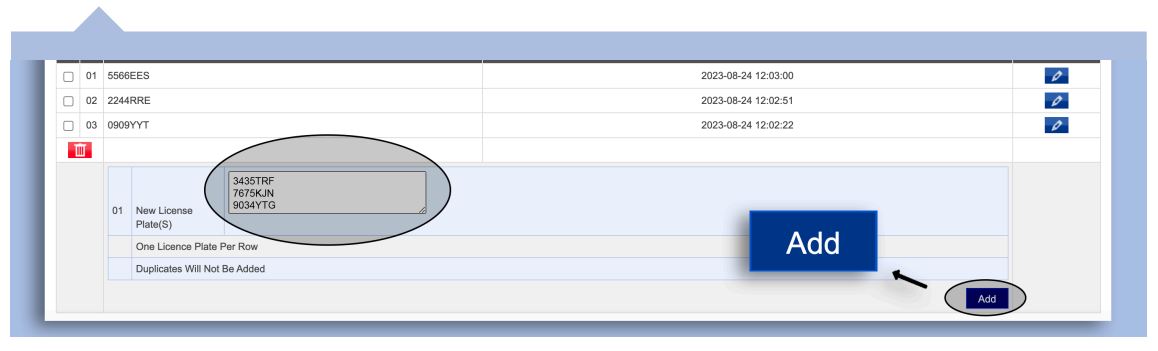
How to correctly register trucks?
There are two options to register trucks into the CRM:
- Register a license plate one by one. The client can do this by scrolling all the way down until they see the header License Plates. The client can type a license plate here, then proceed to press add on the bottom right. This should be repeated until all the license plates are in the system.
- Register license plates by excel. The client can do this by opening a new excel file. Here they can place all the license plates underneath each other in one column. Once the list is completed, the column can be selected and copied. Now they can proceed to go back to the CRM-account to the white box under the header License Plates. Now the list can be pasted here and added by pressing add on the bottom right.
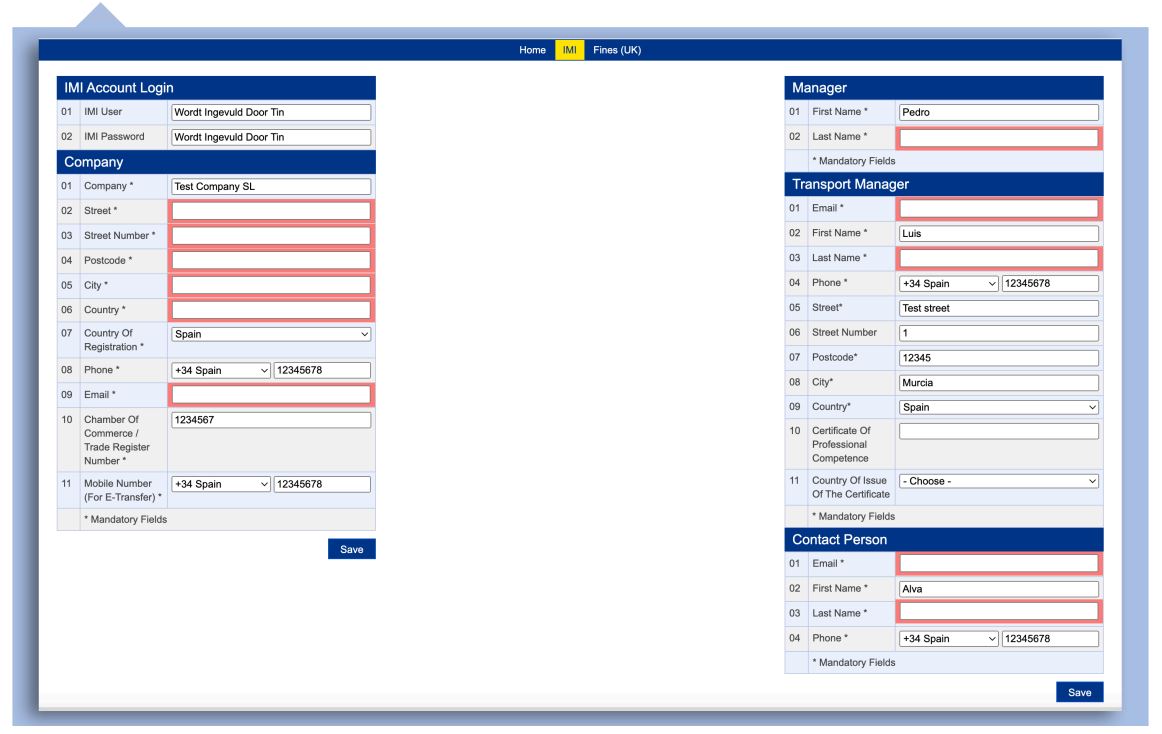
Filling in the IMI-account
After the client completely filled in their account, we are ready to create declarations. There is only one thing missing: The login of the IMI-account. There are several options here:
- The client already has an account in the IMI-system.
- The client will give you the login of the account to use.
- The client will invite you as a second user for the account.
- The client does not have an account.
- You will create an account for the client.
- Transport in Nood will create an account for the client.
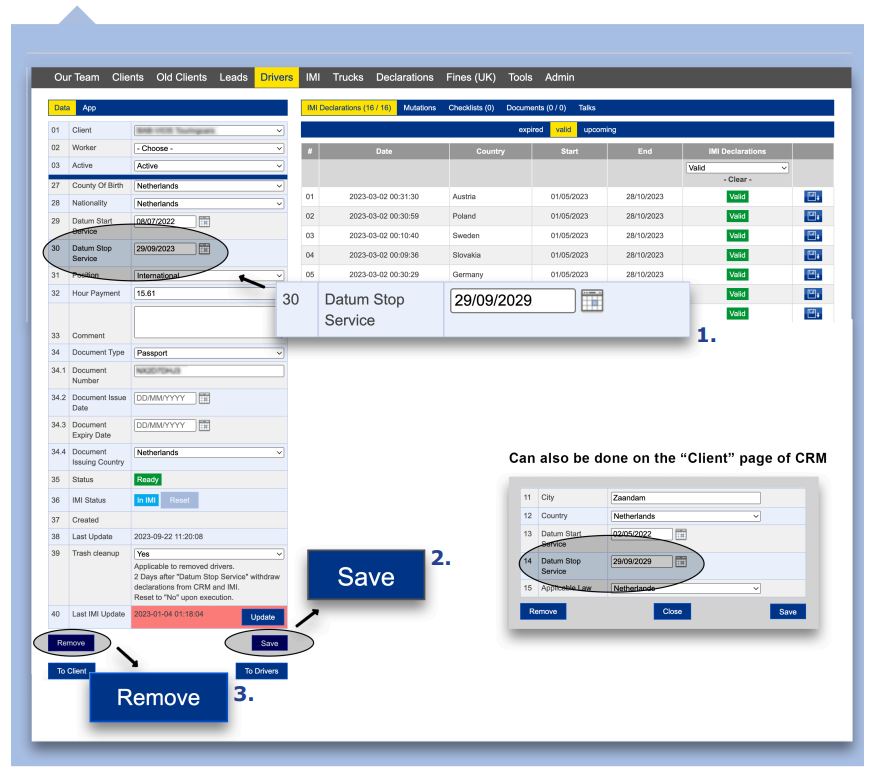
How to correctly dismiss drivers?
Often, clients just remove a driver by simply pressing the remove button. However, when a clients mentions this, we should automatically try to explain how to correctly dismiss a driver!
- Tell the client to click on the name of the driver. The driver details will open up.
- Fill in the end date of a drivers contract on #14
- Press save.
- Now the client can remove a driver from their list. If the client forgets this, the system will automatically remove the driver after midnight.
How to explain the client how to download?
- They should click on the home button in their account (top left).
- Then, on the right hand side of the page, they see four options - Drivers, trucks, IMI-declarations and Checklists. They should click on IMI-declarations.
- At the top, the client can select what they want to download: valid or upcoming (upcoming is in the case of a renewal).
- The client can scroll down to go to our download menu. Here, there must be made a few choices:
- Selection set to valid (or another chosen category)
- Group in folders on by driver. This will ensure that the client will receive the declarations grouped by driver
- Merge folder into one PDF on no. If the client wishes to print all the declarations at once, this can be put on yes as it makes one pdf of all the declarations per driver.
- When the client has set their preferences the client can press the `prepare zip` button and then proceed to press download.

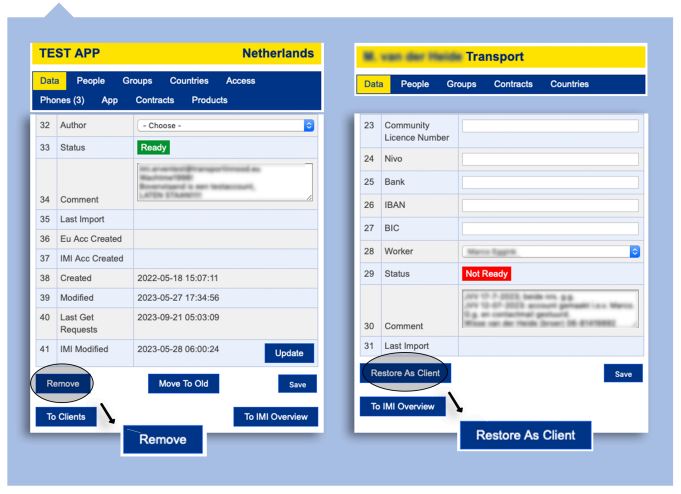
How to process the termination of a client correctly?
- Open your CRM and look up the client that wants to terminate the contract.
- Open the client and scroll down. You will see the button Move to old. Proceed to press this button. This will place the client under the tab Old Clients where it can always be looked up.
- If you really want to remove the client from the system as a whole, you can opt for the Remove button. Please know the client is not be able to found in the system anymore after using this option.
By moving the client to Old Clients, the client will not be able to login anymore. If they choose to want to become a client again, the account can be restored. To do this, follow the following steps:
- Go to the Old Clients tab on the CRM and look up the client.
- Once you have found the client, proceed to open the client and scroll down.
- Click on Restore as Client. The system will ask you to you are sure you want to restore the account. Click on Ok.
How to update declarations after the client has made mutations?
Clients will make changes in the system. After most of these changes, the declarations need to be updated.
- Change of transport manager.
- Change of company name and or details.
- Change of details of the driver → home address, new identification document etc.
- New trucks
These mutations can be seen when opening a client. On the right of the page a few options will be shown. Press Mutations to see what and when the client has changed information.
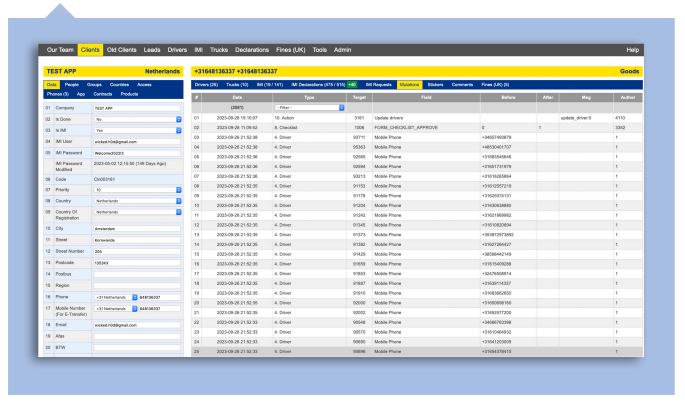
If any of the above options apply, the declarations need to be updated. This goes automatically every night, but sometimes a client needs the declarations immediately.
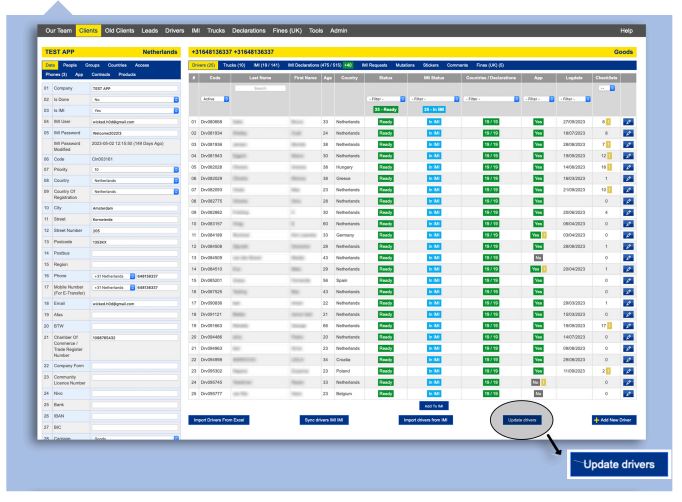
To renew the declarations you need to select the client. Now there needs to be made a selection.
Drivers:
- Select Drivers on the right side of the page.
- Scroll down and press Update drivers.
License plates:
- Select Trucks on the right side of the page.
- Scroll down and press Update trucks
In both of the above situations we need to allow the system to process this move. If the client has a lot of declarations it will take longer than a client with just a few declarations.
How to use the search function in the CRM?
If you want to look up a client and/or driver in the CRM, you can make use of the search function. You do this by pressing Search. In the middle of the page you can select the subject you want to look up. After you have made your choice, type in what you want to look up and press Search on the bottom of the screen. Make sure the border around the search field is colored yellow, otherwise the system will not take the query. The border can be colored yellow by pressing the border of the field.

How do I create declarations?
When a client has added new drivers the declarations need to be created. We do this by following the following steps:
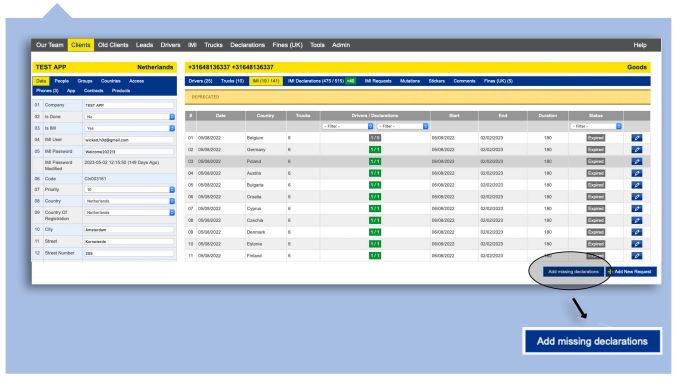
- Open the client you want to create the declarations for
- Choose IMI on the right side of the page
- Scroll down and press the Add missing declarations ONCE! It is very important to never press this button multiple times. This can create double the declarations needed.
If you are not sure the declarations are made, please wait for about 10 minutes. Is nothing happening? Click the button once more.
Extra information regarding the CRM portal
If you are logged in into the CRM portal, you can see a few options under the search bar.
DriversIf you click on old clients, you can see all the companies that have been removed from the active ones. If you want to reactivate an old client you can open the client and click on → Restore as client
Once you have clicked on restore as client, the client will be active again. Please remember that you can’t restore an old client more than once!
Declarations Under the drivers tab, you can see all the drivers that are registered in your portal together with some additional info about the driver.
You can also see the CRM and IMI status of the driver. This means that you can see if the information is correctly filled in, or if the IMI declarations are ready for the driver.
Trucks At the Truck tab, you can see all the registered trucks. You can also see the client number from whom the truck is registered to.
Old Clients At the declarations tab, you can see all the declarations that have been made. It also shows you for which company, driver and country the declaration has been made.
Extra information regarding the home page (Page Clients)
When you are on the home page (Clients) → Clients You can see an overview of all the clients in your account.
When you are on the home page, you might notice some colored boxes. Every company has its own line on the home page, see below

Under here you will find an quick explanation of the colored boxes, and where they belong.
- Client status
- Driver status
- Drivers IMI status
ready = means that the client account is filled in correctly.
not_ready = means that there is still some information missing in the client account.
1 - ready = shows you how many drivers are ready.
1 - not_ready = shows you how many drivers are not completely filled in.
7 - not in IMI = tells you how many drivers still need to be imported into the IMI system.
1 - in IMI = tells you how many drivers are imported into the IMI system.
1 - failed import to IMI = means that there is something wrong with the drivers information. Open the drivers’ information and check if there is an error. If you can not see anything wrong, please proceed to solve the error. Please have a look at the header → How to solve errors.
- IMI declarations
7/7 = tells you how many drivers still need to be imported into the IMI system.
160 - upcoming = shows you how many documents need to be made in the near future for the renewal
0/0 = means that there are no declarations for this client
Furthermore you will see the column Pass Age. This shows how old the password of the IMI-account per client is. A password will expire every 170 to 175 days.
By setting the filter on gt_175, you will see which passwords are expired. It is needed to renew these in case you are managing the account or asking the client to renew their password and let you know if you make use of their account.
If you want to make sure the passwords will not expire, you can filter on gt_165. This will show the passwords that will expire very soon and this allows you to get ahead of the expiration.
 Introdução
Este manual destina-se a ajudá-lo com instruções fáceis e sugestões úteis para a nossa App Legal Control. Se tiver alguma dúvida sobre as funcionalidades ou não conseguir resolver determinadas situações, contacte-nos.
 Declarações IMI
Na aplicação, prima o botão
DECLARAÇÕES IMI.
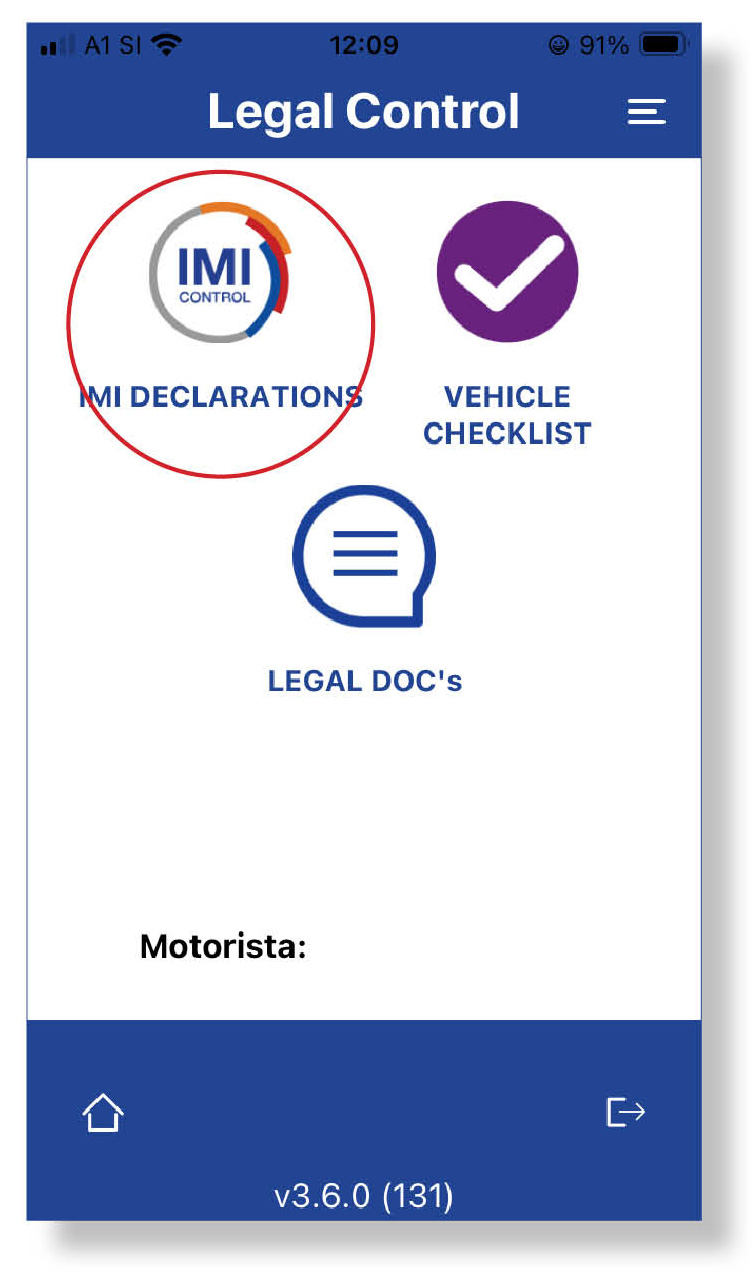
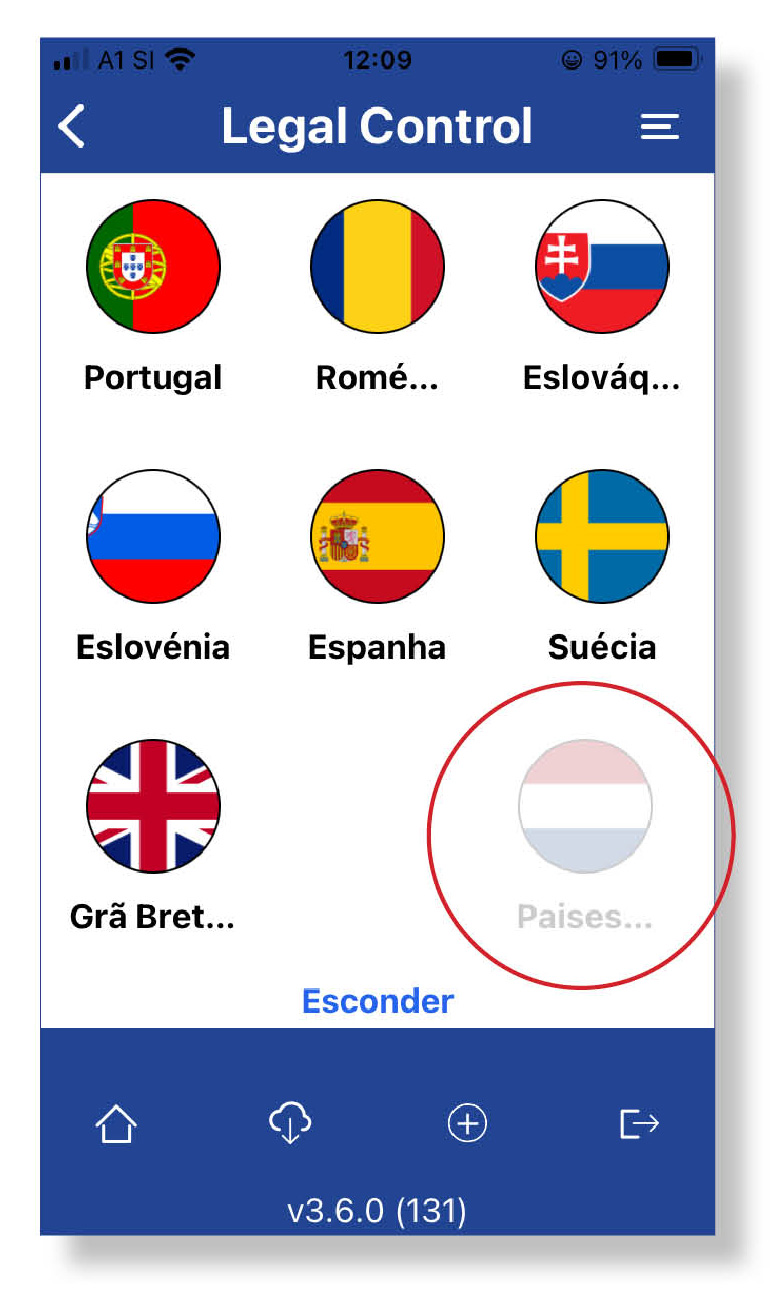
São apresentadas bandeiras de vários países. As bandeiras que a cores são as bandeiras que representam os países para os quais validou as declarações de IMI.
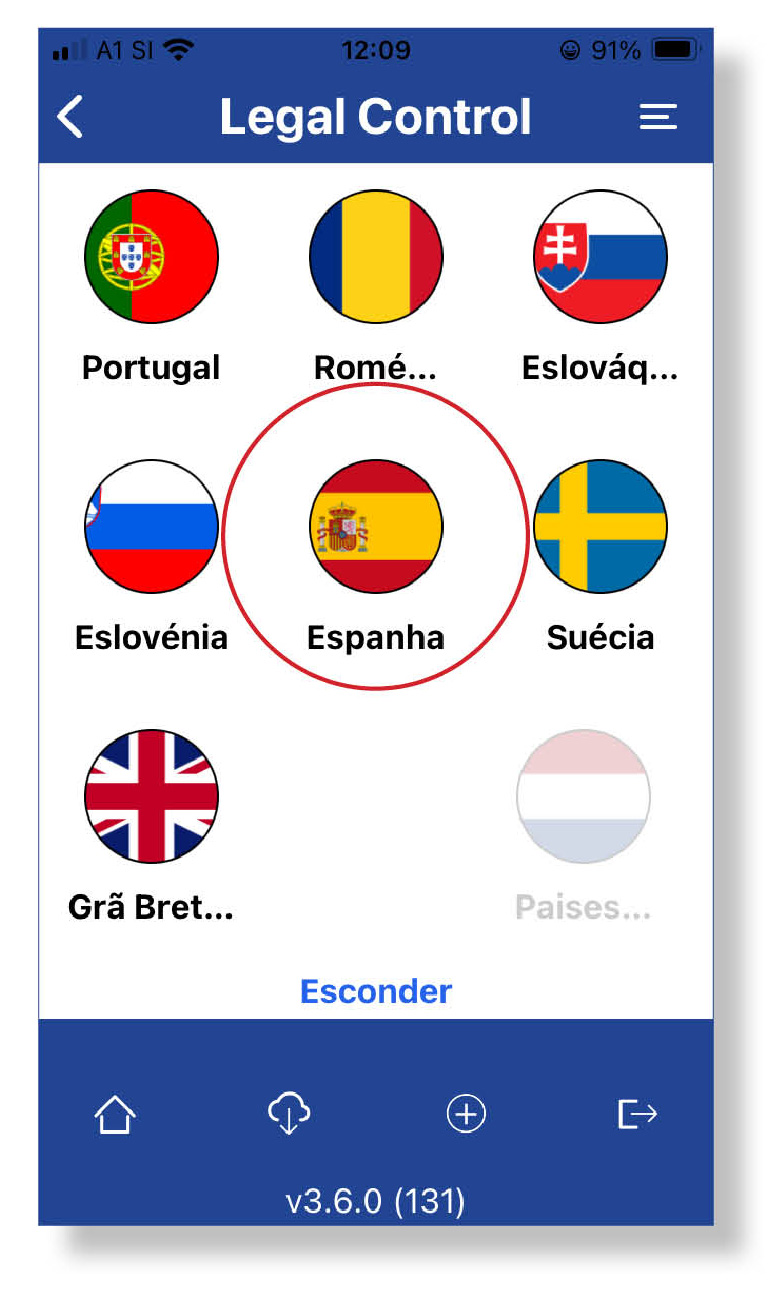
Todas as bandeiras que têm uma cor esbatida não estão activas. Quando clicar num país, verá primeiro um código QR. Trata-se da sua declaração IMI para esse país específico.
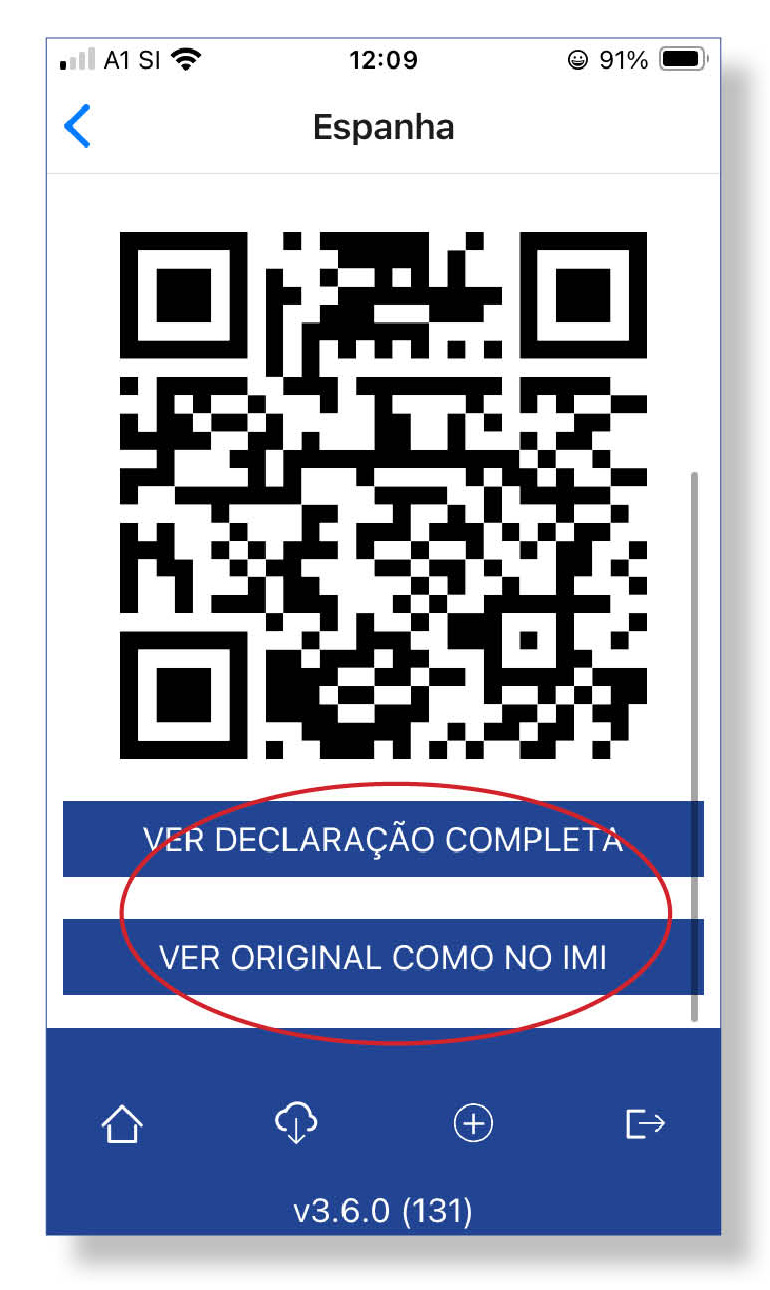
Em baixo, existem dois botões azuis.
1. VER DECLARAÇÃO COMPLETA: Este botão mostra todos os detalhes da sua declaração de IMI.
2. VER ORIGINAL COMO NOIMI: Este botão mostra a sua declaração IMI tal como está no portal IMI. Todos os códigos QR podem ser lidos pelas autoridades.
 Lista de verificação do veículo
Na aplicação,
prima o botão
LISTA DE VERIFICAÇÃO DO VEÍCULO.

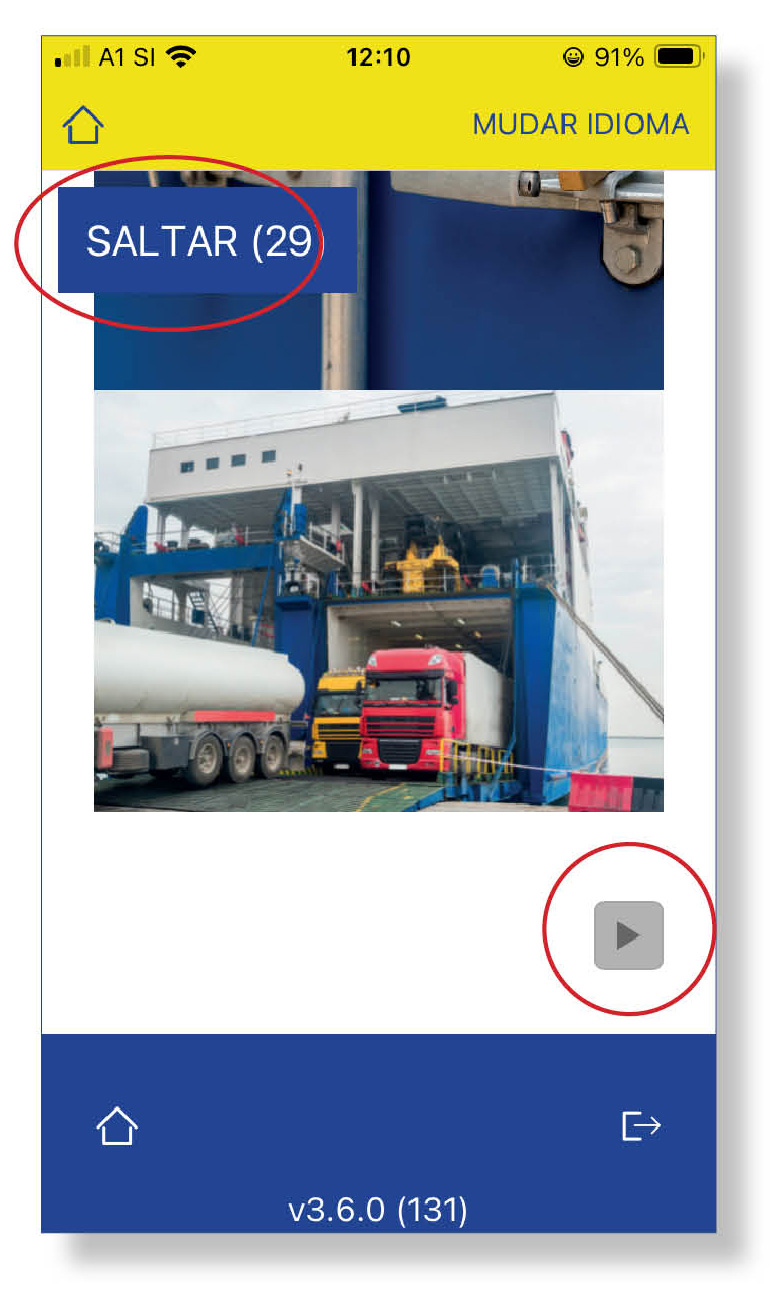
Para iniciar a formação, prima na seta que se encontra no canto inferior direito.
Continue a formação respondendo às perguntas.
Pode saltar a formação premindo o botão SALTAR. Pode adiar a formação durante 30 dias. É obrigado efetuar a formação de 6 em 6 meses
Quando tiver completado as perguntas da formação, verá este ecrã.
Prima o botão: NOVA JORNADA para iniciar a lista de verificação.

Preencha os campos vazios.
Quando tudo estiver preenchido, prima o botão: INICIAR VIAGEM.
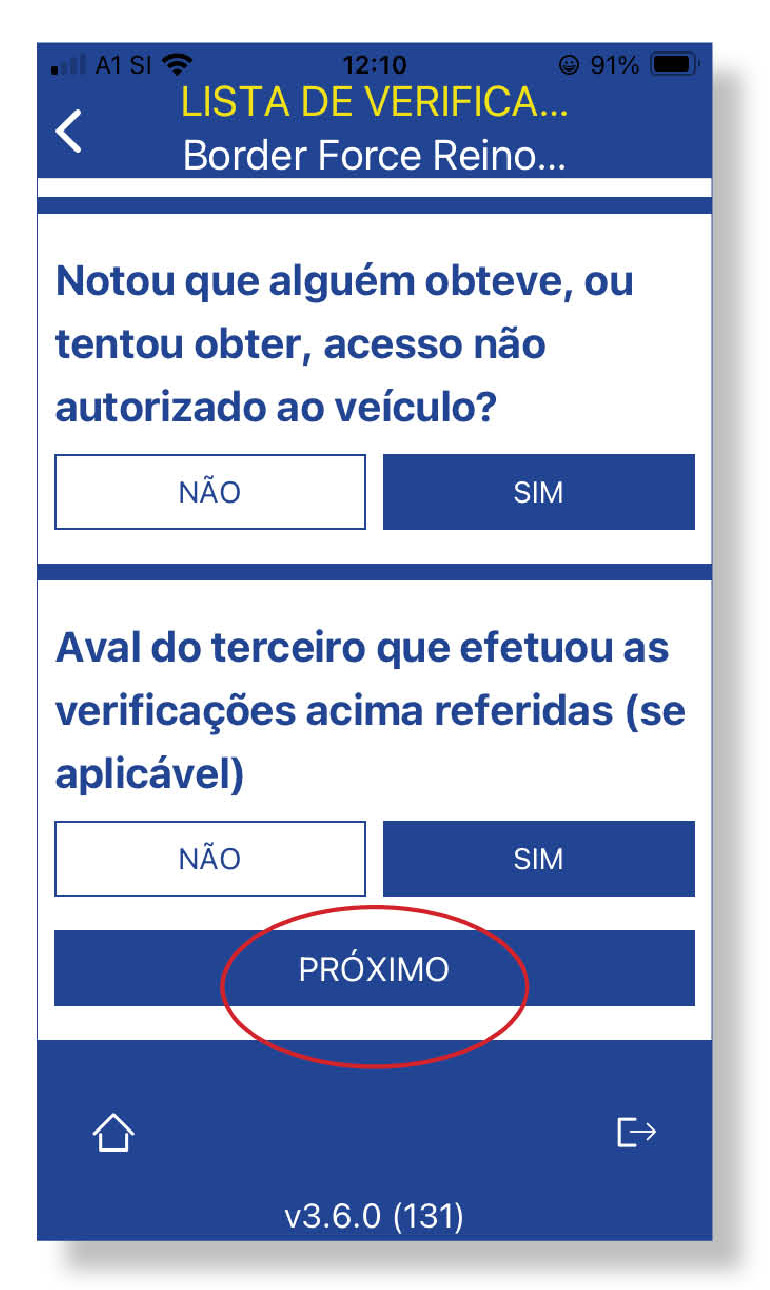
Agora preencha a lista de verificação que consiste em 14 perguntas curtas.
No final da lista de verificação, prima: PRÓXIMO
TIRAR UMA FOTOGRAFIA DO NÚMERO DO SELO OU DO CADEADO
Para adicionar uma assinatura, prima o botão ASSINAR
Se vai ter mais paragens ao longo do percurso. Prima: PARAGEM FINAL.
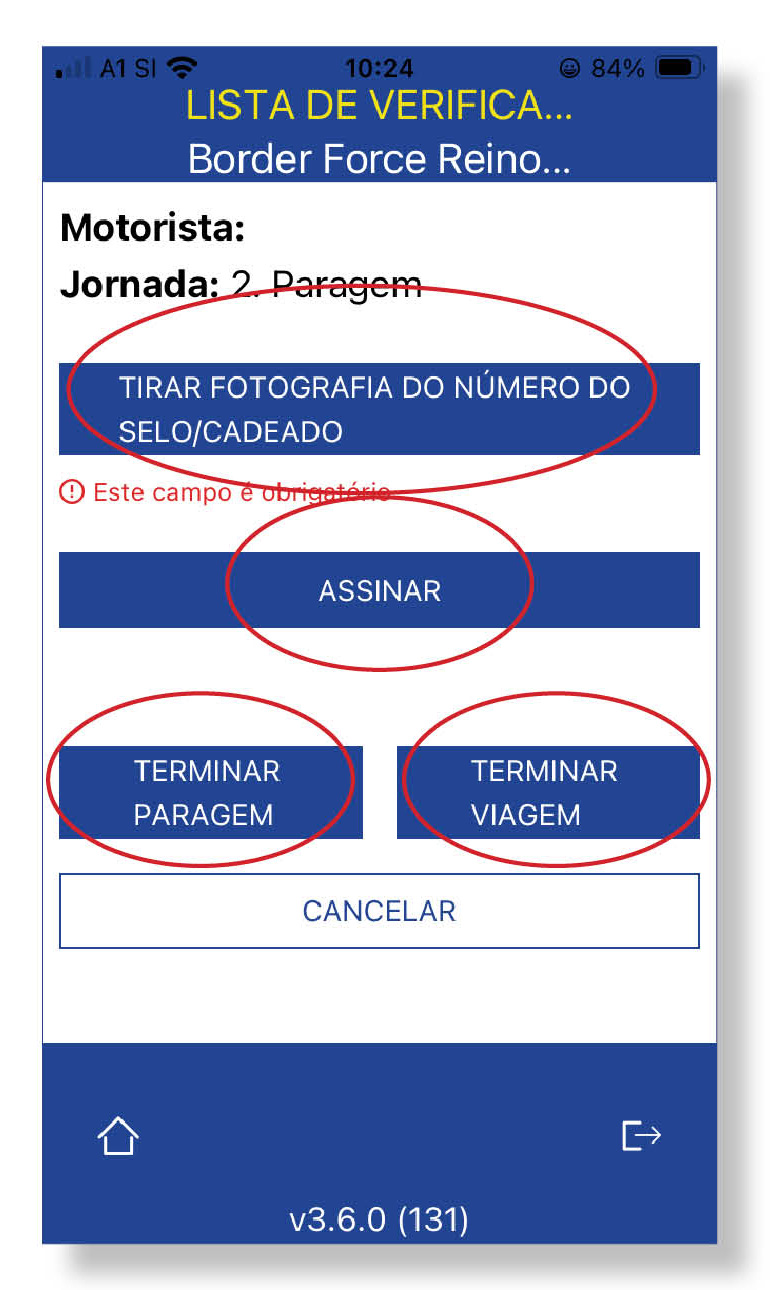
Se esta for a sua última paragem, prima: TERMINAR VIAGEM.
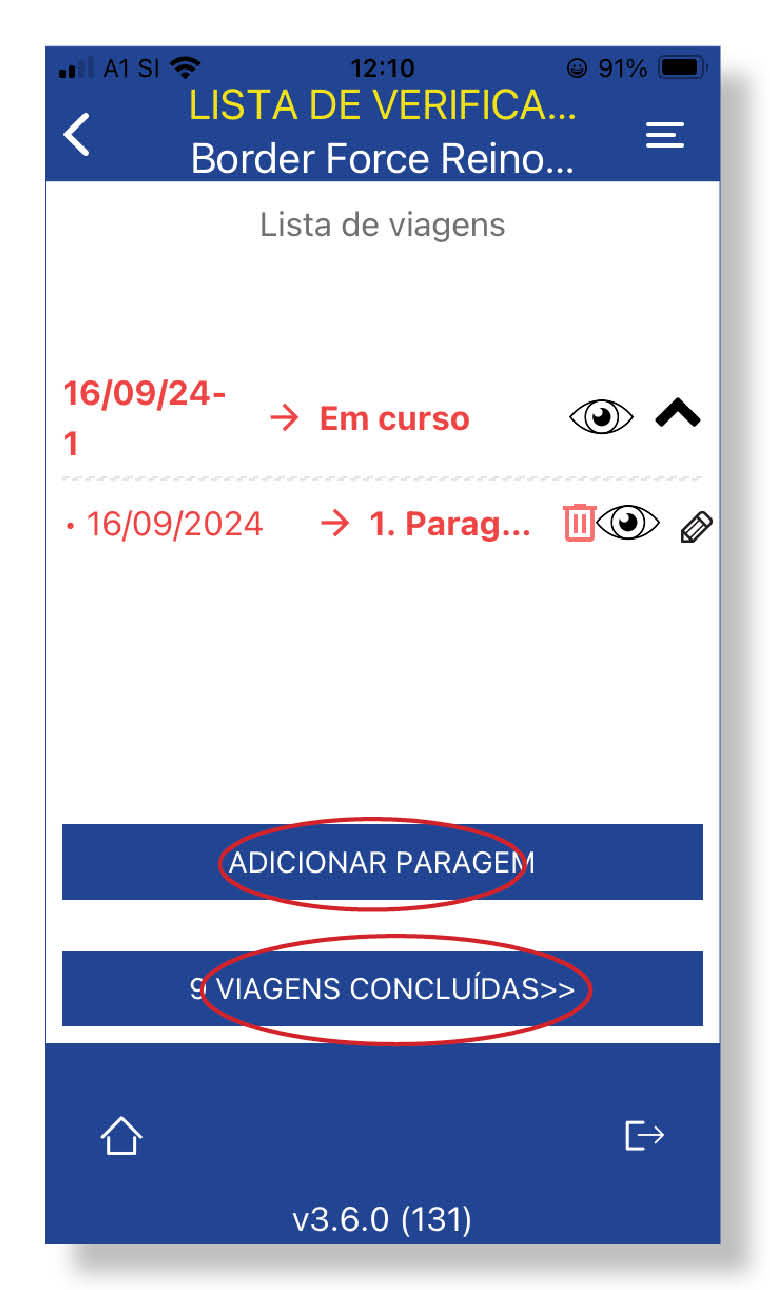
Na parte superior do ecrã, verá que o texto está a vermelho. Isto significa que a sua lista de verificação está em curso e que, portanto, ainda não está terminada.
Na parte inferior, encontrará um botão azul VIAGENS CONCLUÍDAS.
Se clicar nesse botão, verá todas as suas viagens concluídas.
Se quiser adicionar uma paragem, prima o botão: ADICIONAR PARAGEM.
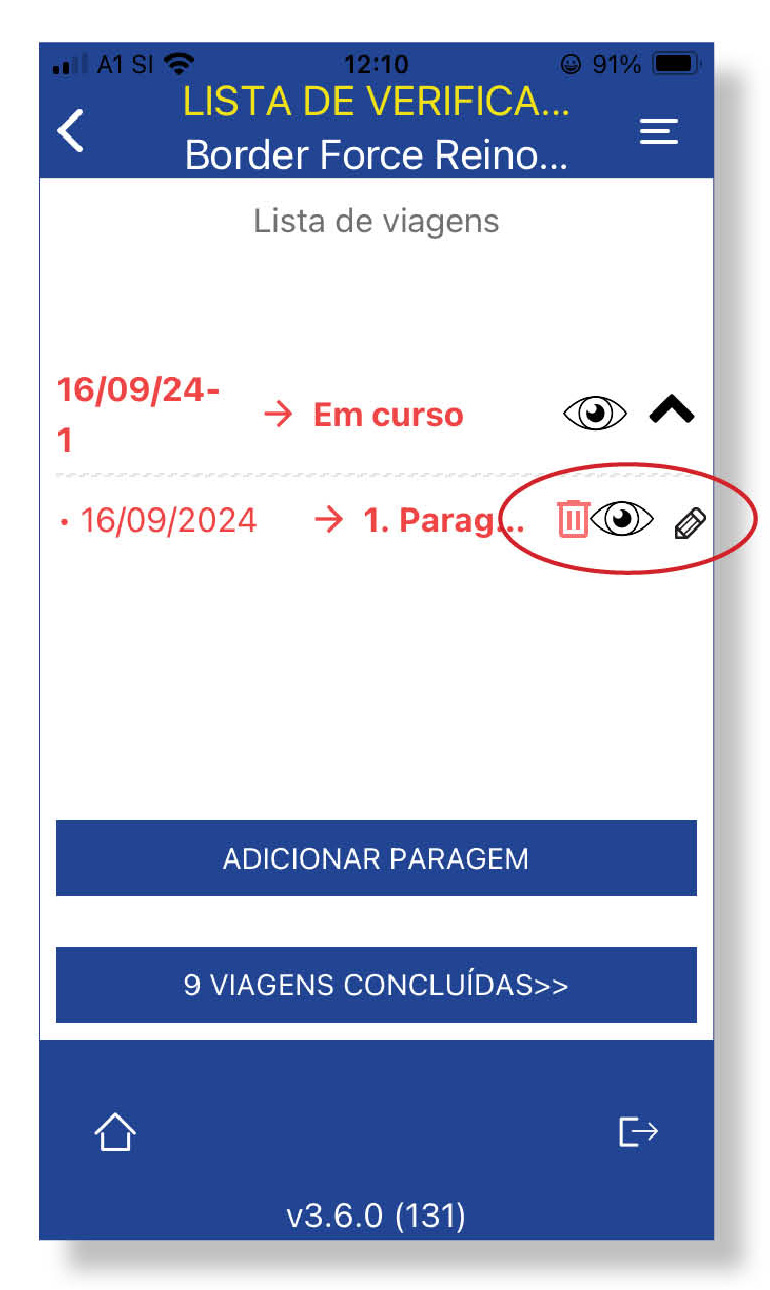
Pode ver um botão com um olho no lado direito. Se clicar nesse botão, pode enviar a lista de verificação e a formação às autoridades por correio eletrónico, se necessário.
No lado direito do ecrã, aparece um lápis. Se clicar no lápis, pode editar/alterar a sua última paragem, se necessário.
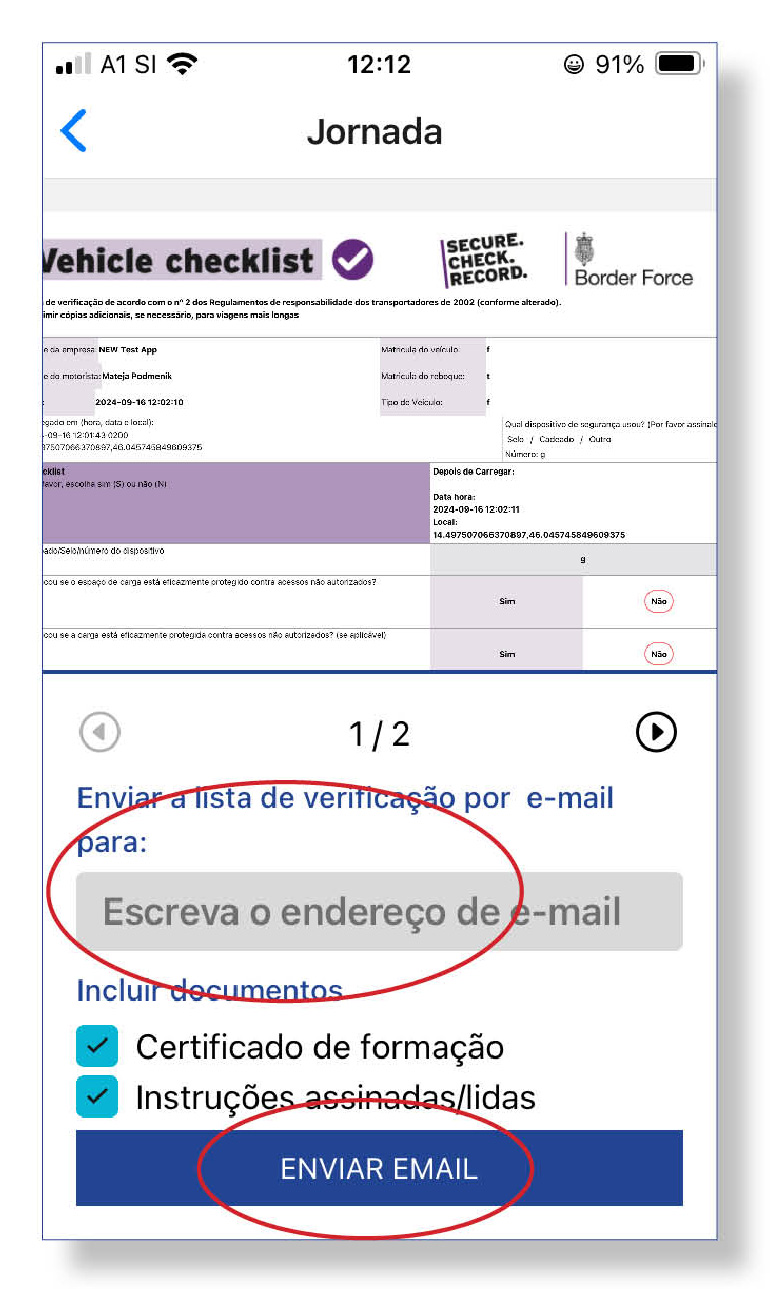
Se tiver carregado no botão do olho, verá este ecrã.
Introduza aqui um endereço de correio eletrónico.
Pode selecionar se pretende enviar a lista de verificação, a formação ou as instruções. Prima aqui para prosseguir com o envio da lista de verificação.
 Documentos Jurídicos
Quando estiver na aplicação, prima o
botão
DOC’S JURÍDICOS.
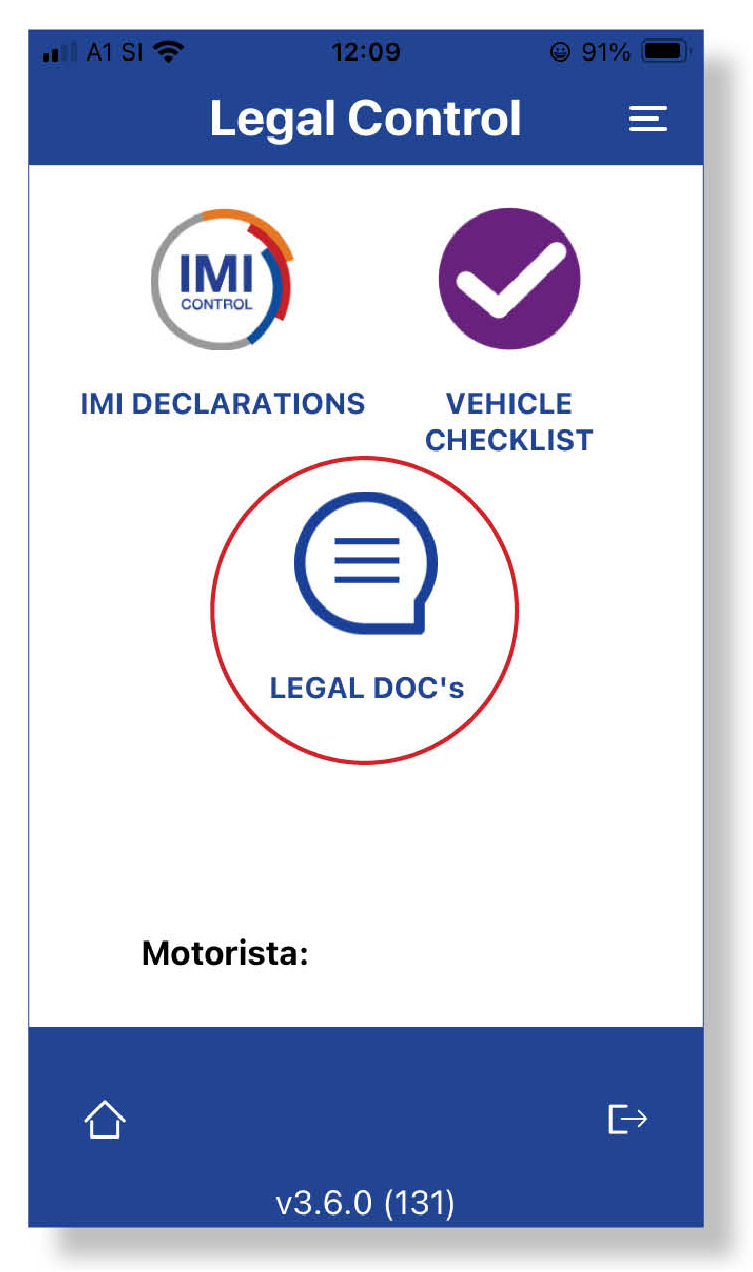
Aqui tem uma visão geral de todos os relatórios em aberto.
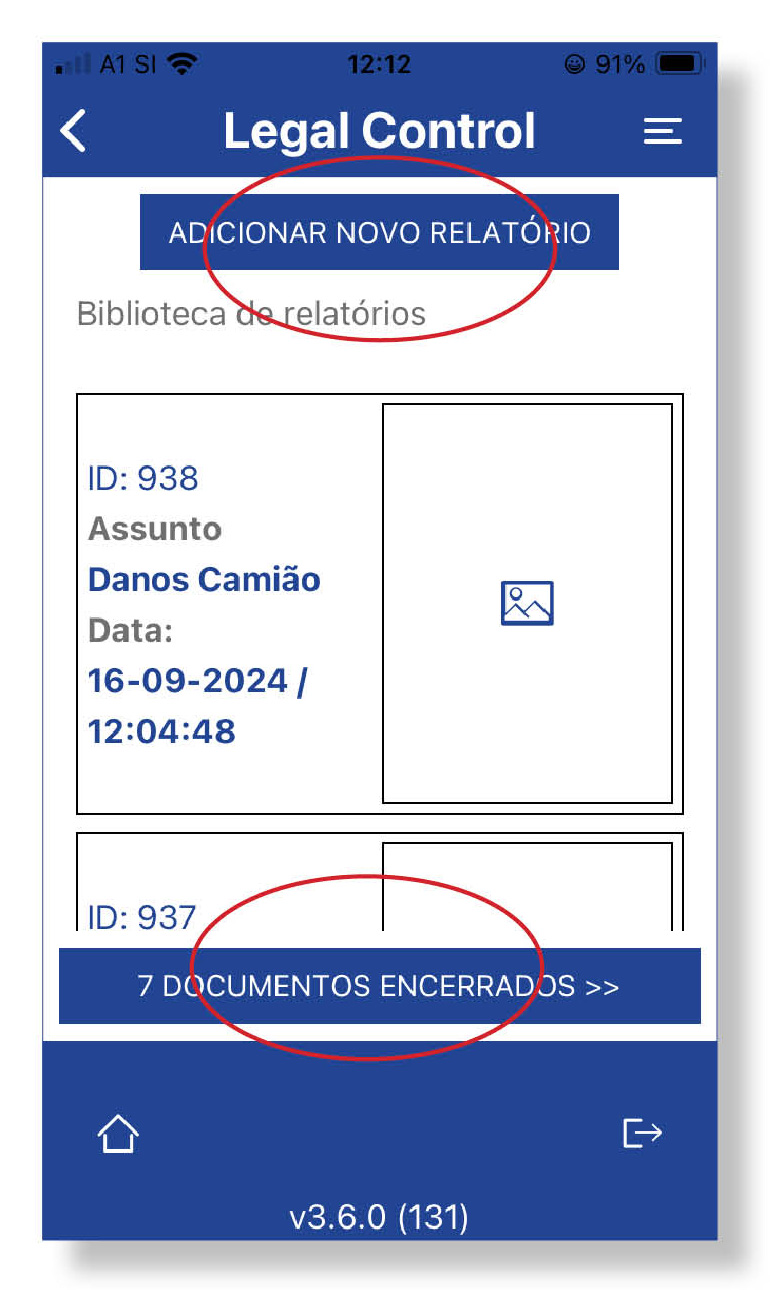
Se premir o botão inferior DOCS FECHADOS, pode ver todos os seus relatórios concluídos. Para criar um relatório, clique no botão azul ADICIONAR NOVO RELATÓRIO.
Em seguida, clique no
CAMPO BRANCO
e aparecerá um menu pendente.
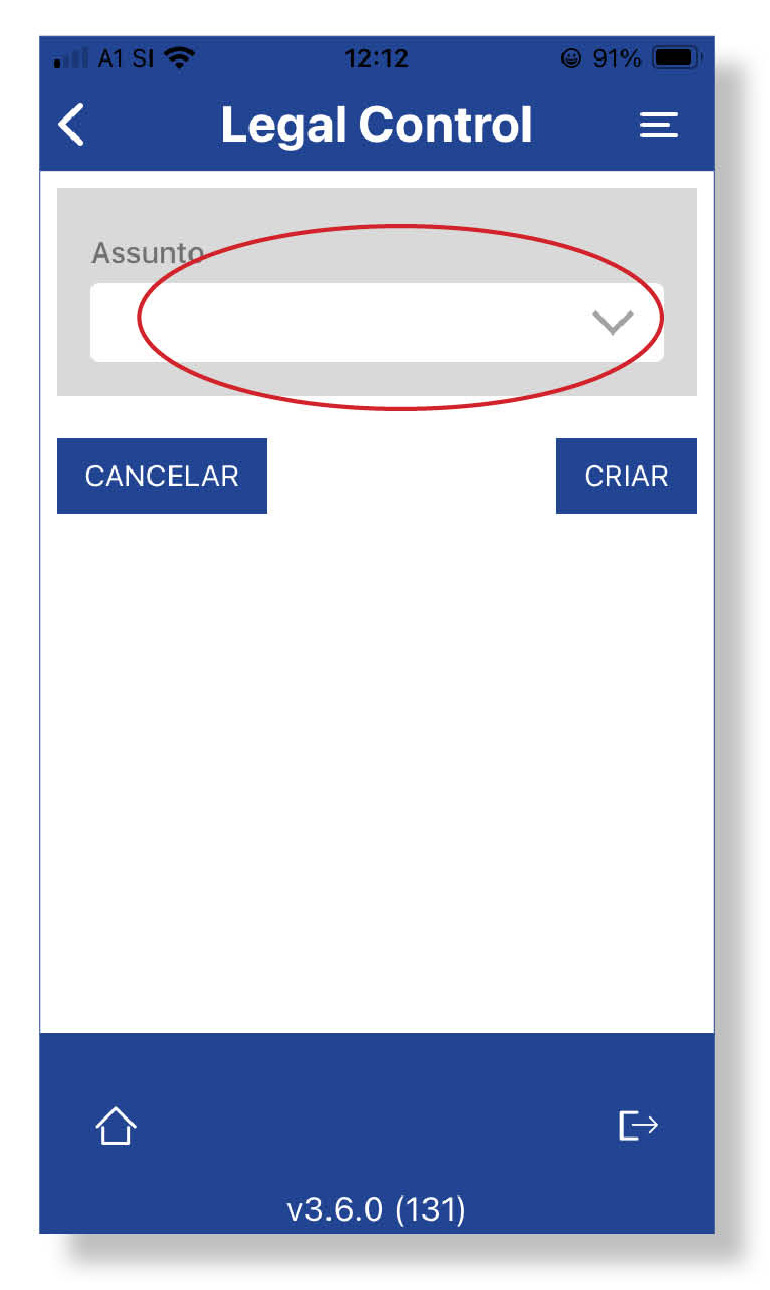
Escolha o tema sobre o qual o relatório é elaborado ou selecione Outro e introduza um tema.
Em baixo, encontrará uma secção onde pode escrever mensagens para o sistema CRM. Se já tiver escrito alguma coisa, prima o botão ENVIAR.
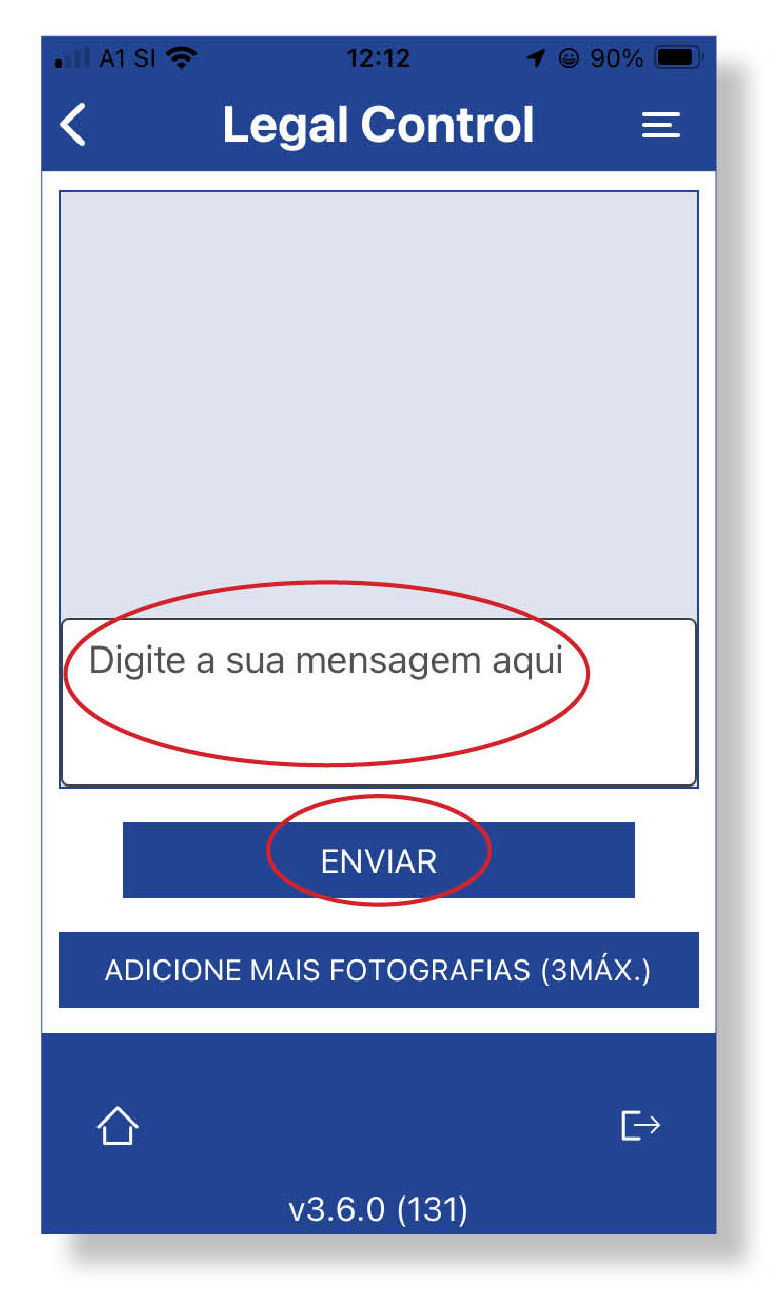
Para adicionar fotografias, prima o botão ADICIONAR MAIS FOTOGRAFIAS.
Por baixo das fotografias existe uma área onde pode escrever comentários.
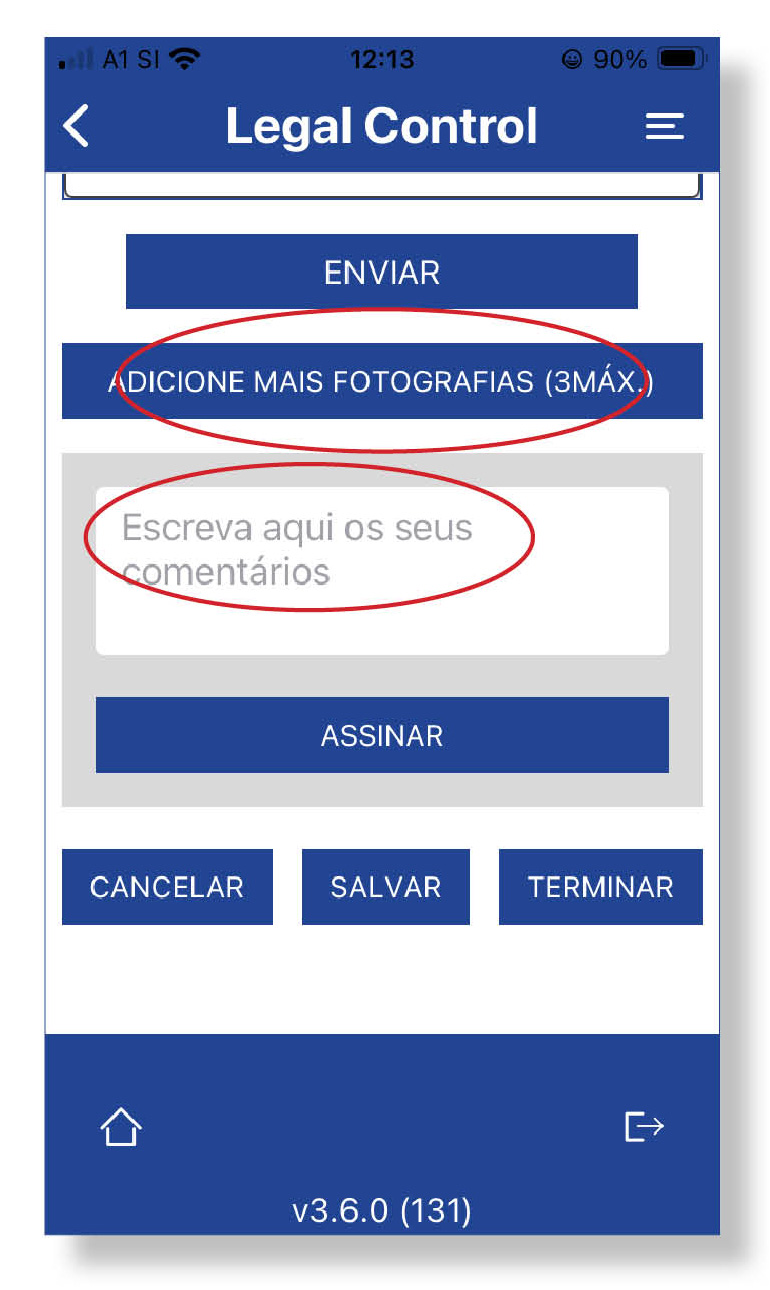
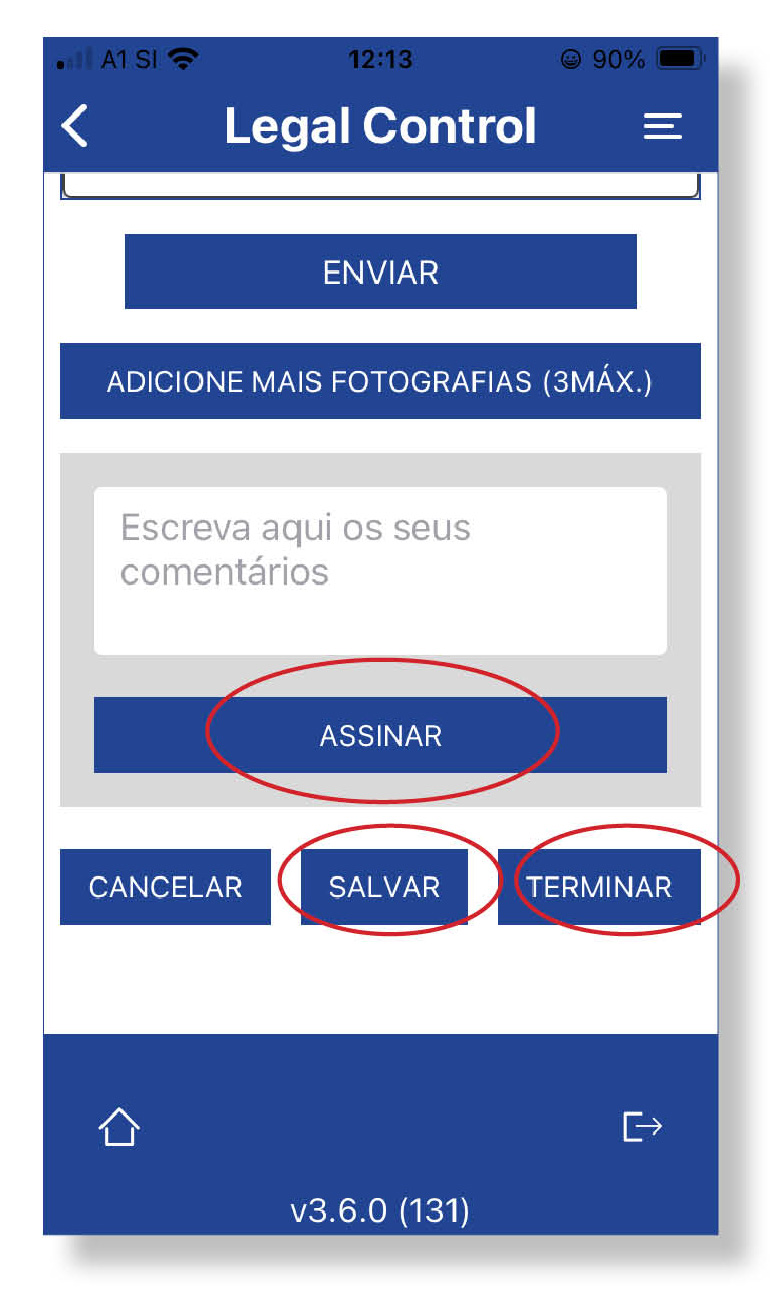
Para adicionar uma assinatura, prima o botão ASSINAR. Prima o botão SALVAR se ainda não quiser fechar o documento.
Prima o botão TERMINAR quando pretender terminar o documento e quando estiver tudo resolvido.
Lembre-se de que, ao premir TERMINAR, não pode fazer mais alterações.
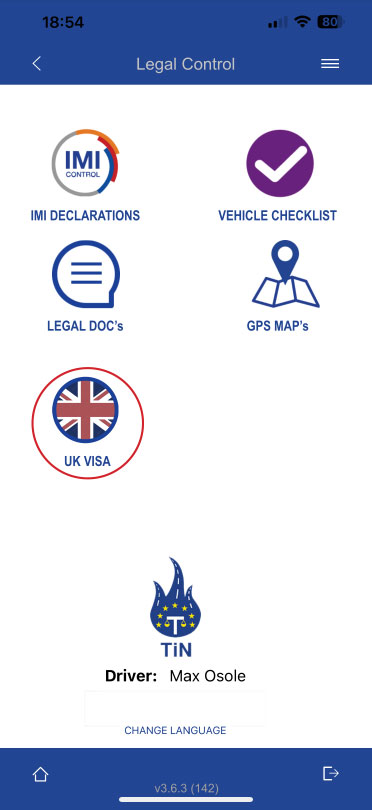
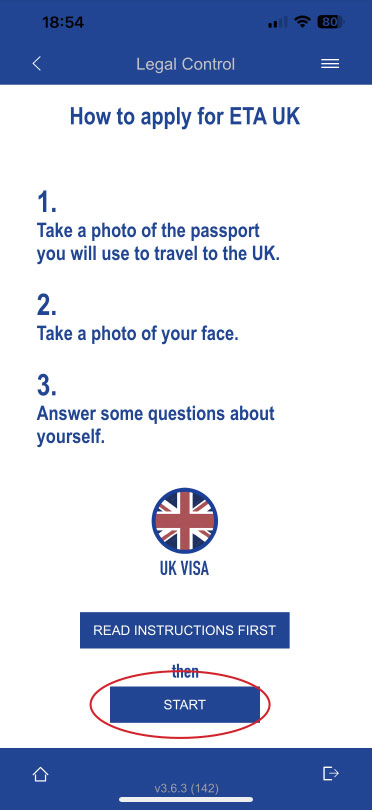
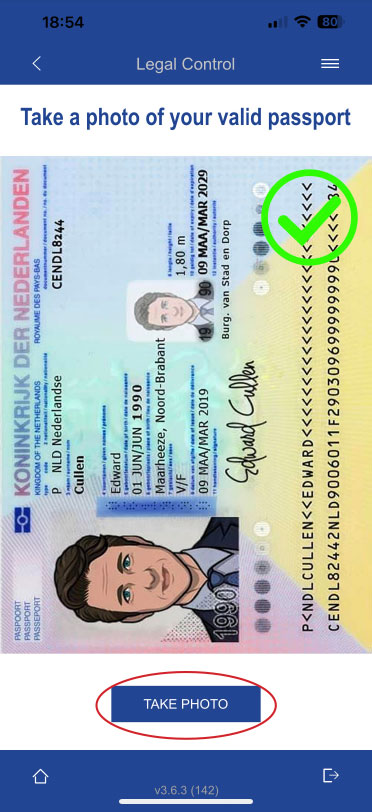
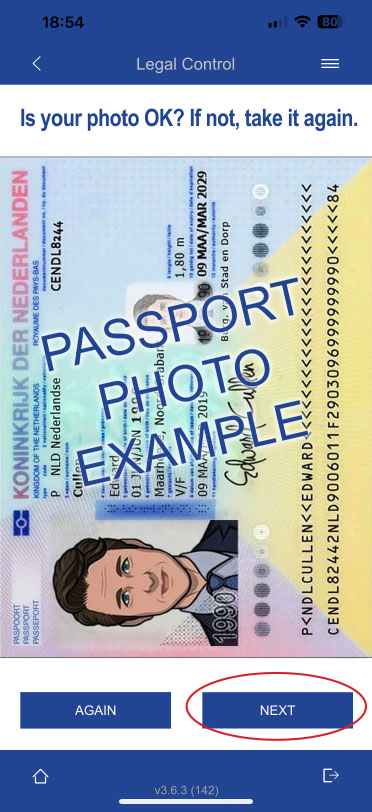
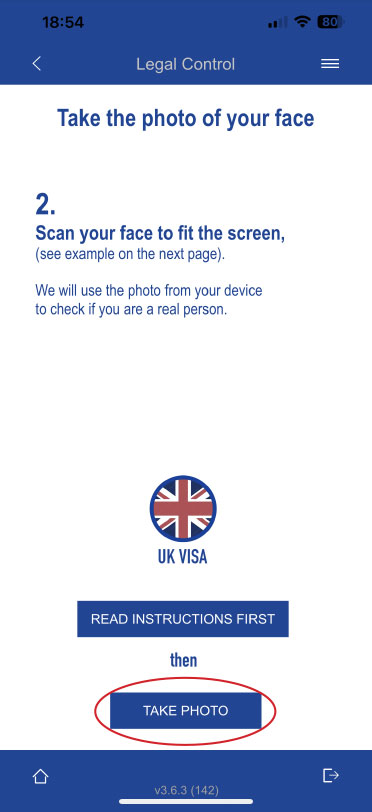
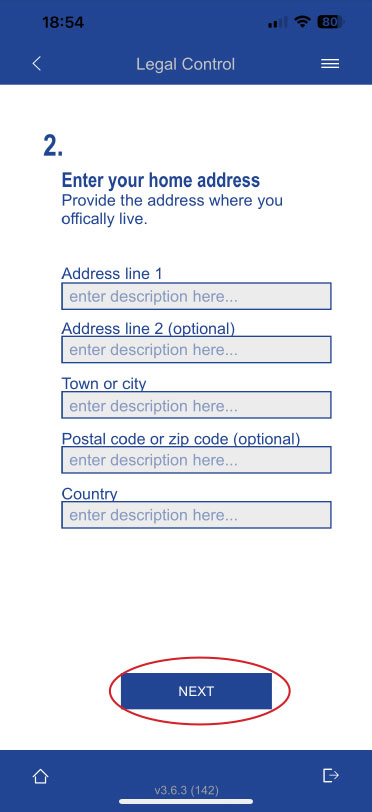
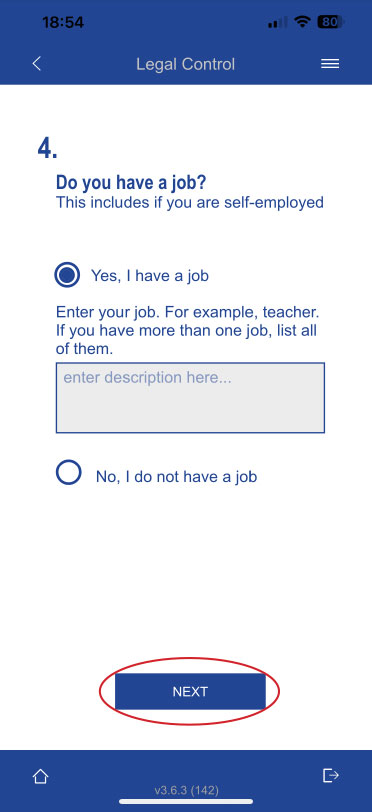
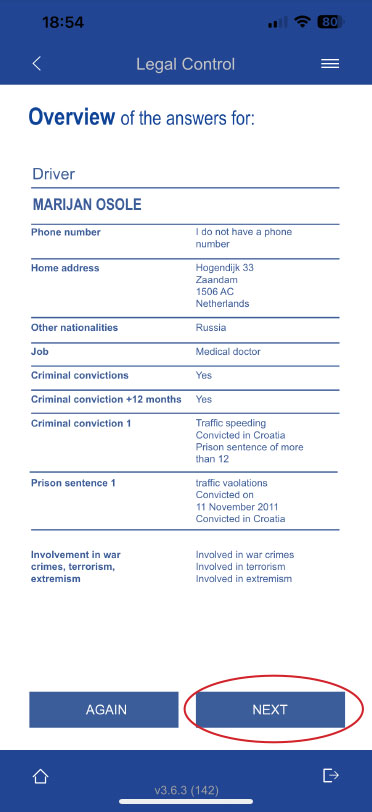
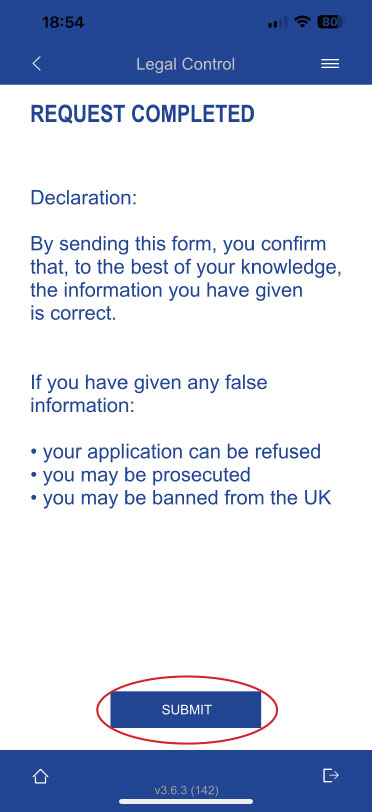
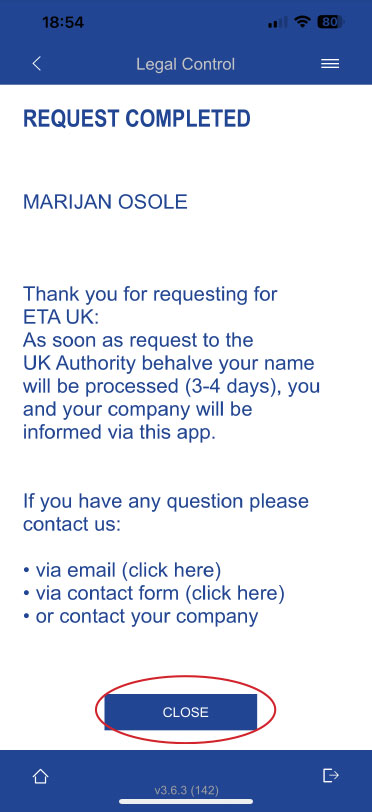
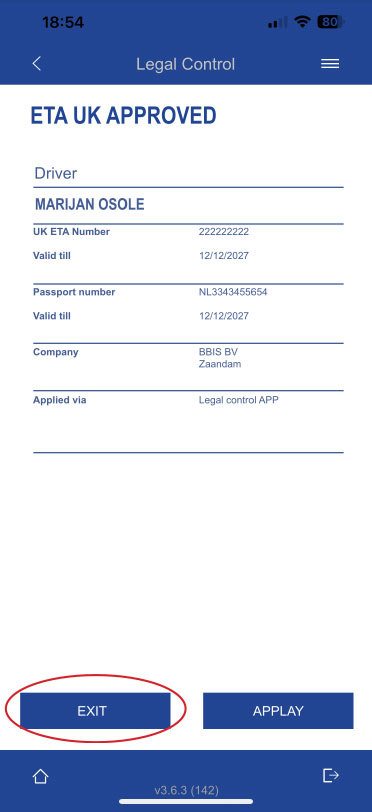
 UK VISA Instructions